
Oh, the holidays! Doesn’t the thought of that giant roast, all the bubbling pots, and the sheer juggling act of oven space give you a little anxiety? Trust me, I’ve been there, feeling that pressure to make everything perfect. After years spent in the design world rushing things, I learned that the best holiday meals are the ones where I actually get to enjoy my guests! That’s why I fell head-over-heels for turning stuffing into individual bites. This easy stuffing balls recipe is my personal gold standard for streamlining the feast. It’s simple, incredibly savory, and turns a potentially messy side into a perfect, portion-controlled delight. I’m Olivia Rosewood, and I promise this approach will make your holiday prep feel way less chaotic!
- Why This Easy Stuffing Balls Recipe Is Your Holiday Hero (E-E-A-T Focus)
- Essential Ingredients for Your Sausage Stuffing Balls Recipe
- How to Prepare This Simple Baked Stuffing Recipe Step-by-Step
- Tips for the Best Thanksgiving Stuffing Balls
- Make Ahead Stuffing Recipe: Holiday Prep Secrets
- Flavor Variations for Your Stuffing Balls Recipe
- Serving Suggestions and Storage for Leftover Stuffing Balls
- Frequently Asked Questions About Stuffing Balls Recipe
- Share Your Perfect Stuffing Balls Recipe Experience
Why This Easy Stuffing Balls Recipe Is Your Holiday Hero (E-E-A-T Focus)
When you’re trying to manage a turkey in the traditional roaster and a dozen other things, the last thing you need is a giant pan of stuffing eating up precious oven space. That’s where these little flavor bombs shine! I developed this approach because I needed reliability under pressure. Forget mushy middles or burnt edges; these are designed for success.
- They are genuinely quick to throw together—seriously, we’re talking under 40 minutes total effort!
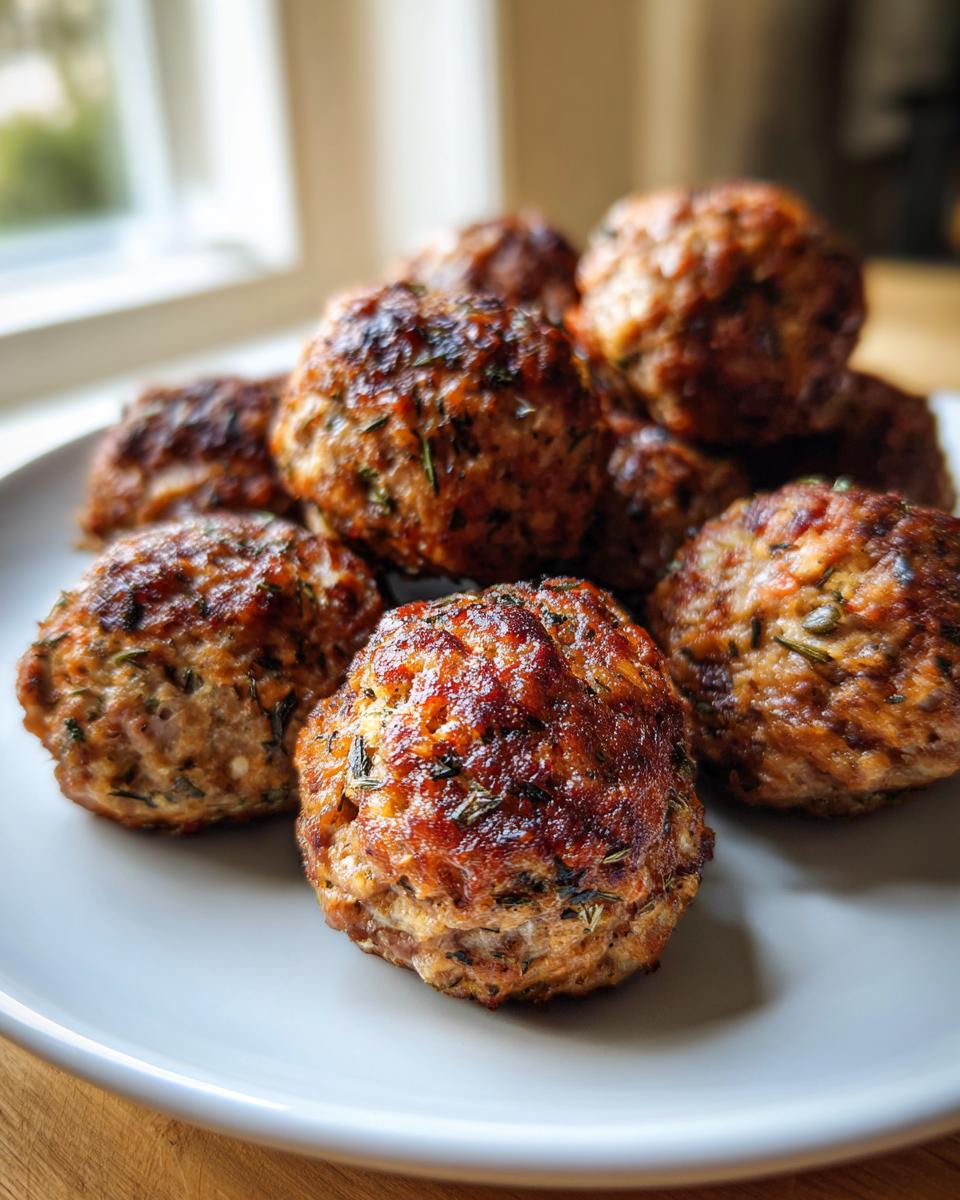
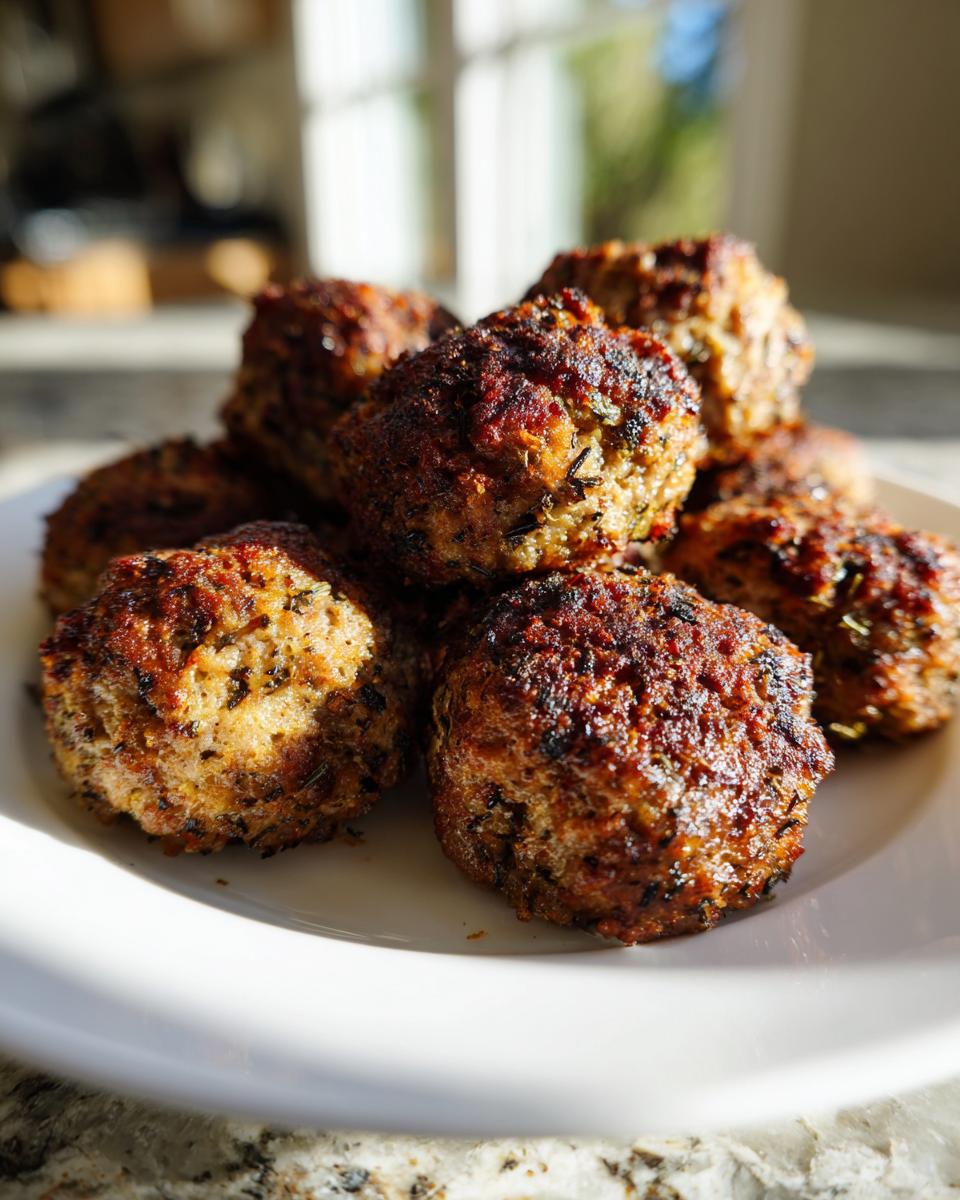
- The shape guarantees that perfect textural contrast savory food lovers dream about: a crunchy, golden coat protecting a deeply herby, moist interior.
- You get perfectly portion-controlled stuffing goodness for every single guest at the table.
Perfectly Portion Controlled Stuffing Bites
Rolling the mix into balls is the secret weapon for oven Tetris! Instead of a huge, shallow pan fighting for space with your bird, you can nestle these lovely bites right in there, or bake them easily on a separate sheet later. They cook evenly because they’re all the same size, which means less fussing. Plus, they double up instantly as an amazing appetizer stuffing bites while you’re waiting for everything else to finish.
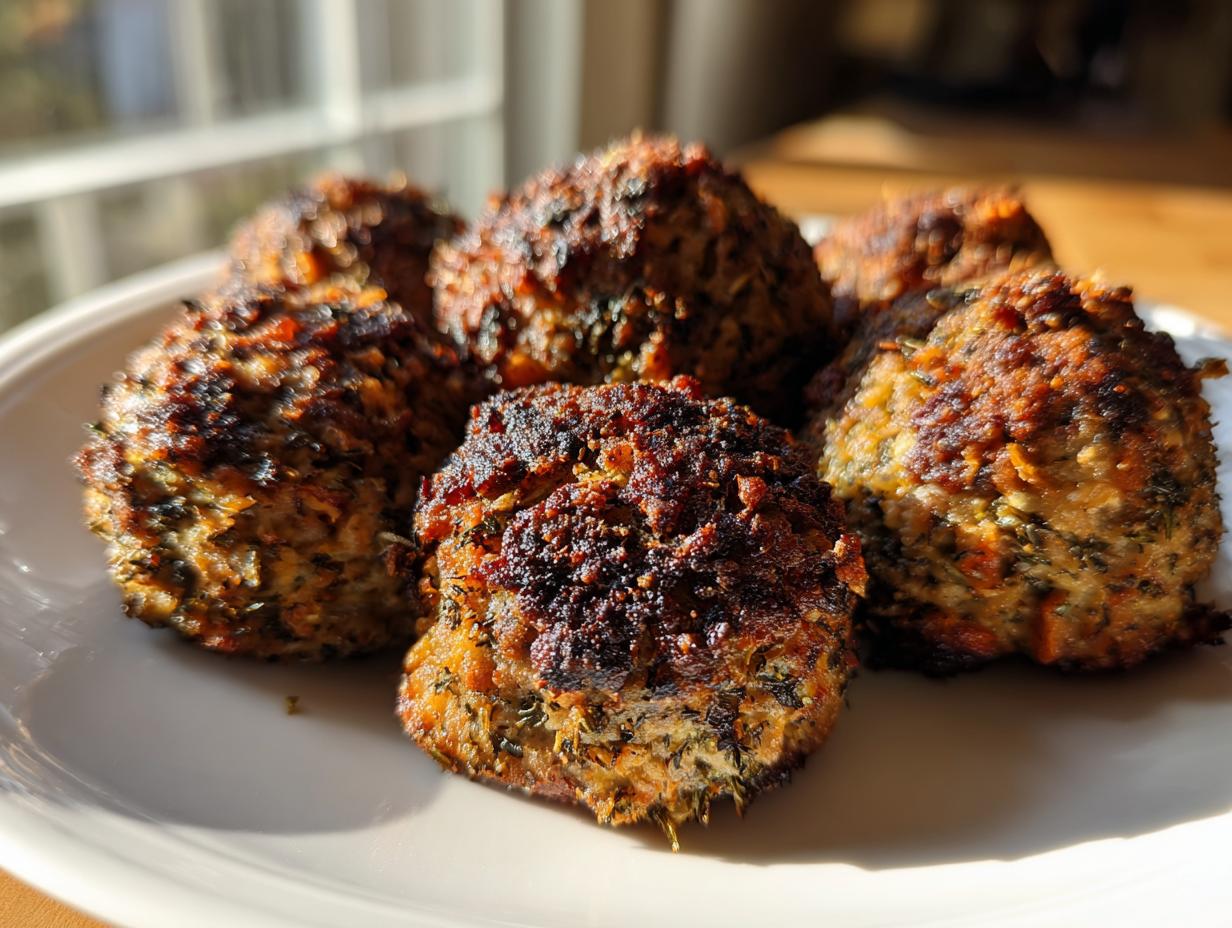
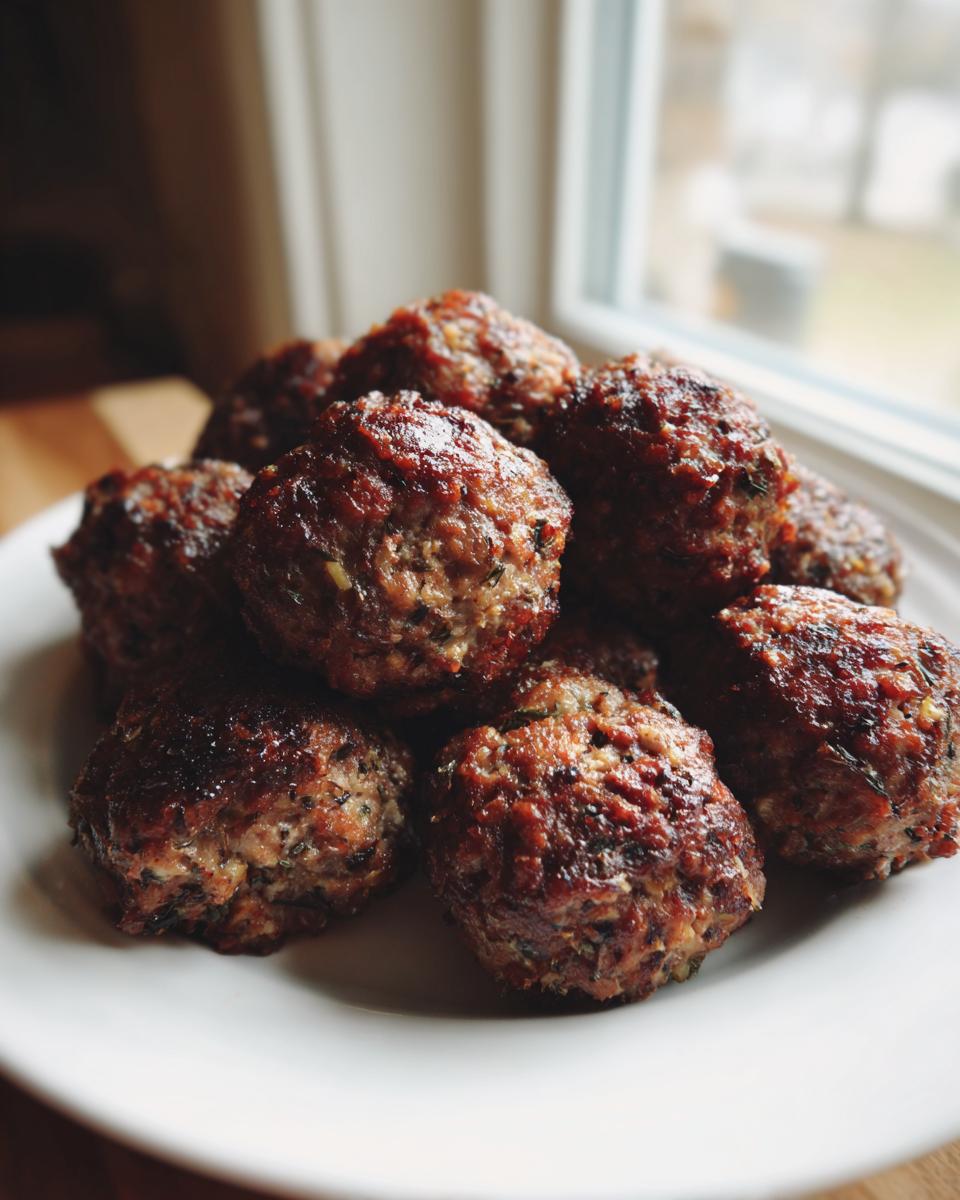
Achieving Crispy Stuffing Balls Side Dish Perfection
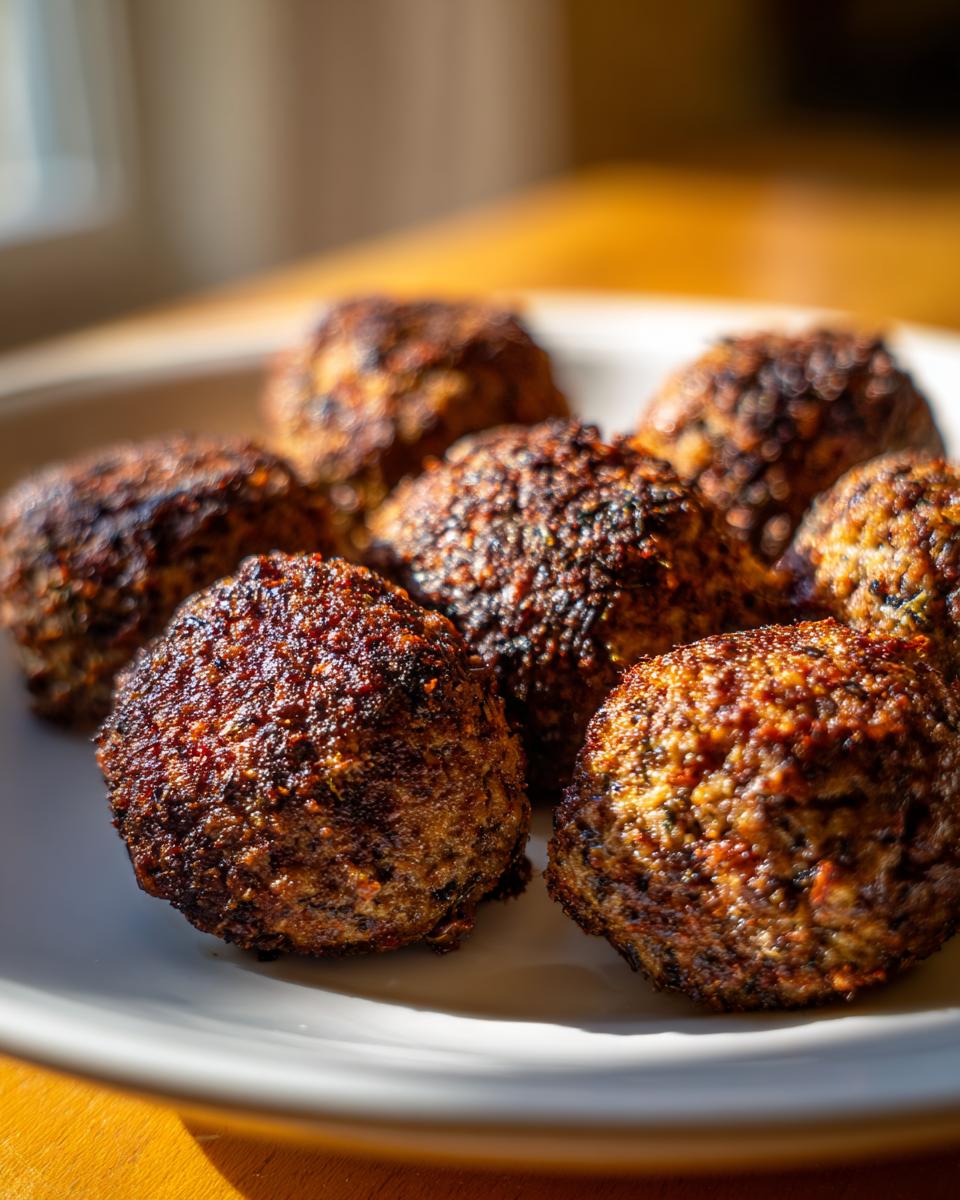
This is honestly what separates the good from the *must-have* holiday sides. The goal for any great stuffing balls recipe is that shatteringly crisp exterior. The sausage fat helps crisp things up beautifully right out of the oven. But fear not, the broth and egg keep the inside so tender and flavorful that you get that perfect textural balance every time. It’s the ultimate crispy stuffing balls side dish experience!
Essential Ingredients for Your Sausage Stuffing Balls Recipe
Okay, let’s talk about what actually goes into making these bite-sized wonders. I kept this ingredient list simple because the holidays are already complex enough! We need good quality sausage for that savory depth, some aromatics to build a great base flavor, and, of course, the bread. The richness from the sausage fat really helps drive that crisp exterior we are chasing in this holiday stuffing recipe.
Ingredient Notes and Substitution Guidance
When you gather your supplies, pay close attention to the bread. You absolutely must use dried bread cubes; they need to be sturdy enough to soak up the broth without turning to complete mush. Day-old bread works wonders, or if you need a switch, feel free to use a good quality gluten-free cube! As for the meat, I wrote this for bulk sausage because it’s flavorful, but swapping it out for ground turkey works great if you want a lighter touch or are serving guests who prefer poultry. Just season that turkey mixture well!
How to Prepare This Simple Baked Stuffing Recipe Step-by-Step
I always start by getting the oven ready—preheat to 375°F and grease your sheet pan right away so you’re ready when the mix is done. Seriously, proper prep saves so much scrambling later! This part is about building that deep, savory flavor base that makes this holiday stuffing recipe shine.
Sautéing Aromatics and Browning the Meat for Flavor
Get your skillet hot, add the oil, and toss in whatever meat you chose—sausage or turkey. Brown it really well, making sure you break it up into nice little crumbles. Now, here is a big tip for getting things crispy later: drain off every bit of excess grease you can! Next, toss in your chopped onion and celery to soften them up until they look translucent, about five minutes. Stir in those herbs—sage and thyme bring that classic holiday aroma—and cook just until you can really smell them. Take that whole skillet blend off the heat immediately.
Mixing and Forming the Perfect Stuffing Balls Recipe
Now for assembly! In a big bowl, combine your dried bread cubes with that savory meat and veggie mix. Pour in your broth and the single beaten egg—this is the glue, folks! Mix everything gently. I mean it—gently. If you mash it too hard, you’ll compress the bread, and you’ll end up with heavy, dense orbs instead of light, fluffy ones. Let the mixture rest for about five minutes so the bread can drink up all that liquid richness. Then, scoop and roll them into balls about an inch and a half across. Pop them onto that prepared tray, ready for the oven! If you want more reading on how to make these amazing bites, check out this guide on sausage stuffing balls appetizers.
Tips for the Best Thanksgiving Stuffing Balls
This recipe is already solid, but if you want to push your stuffing balls recipe from great to legendary, I have a few little tricks up my sleeve. Remember, the whole point here is that beautiful textural dichotomy—crispy out, tender in. That takes just a tiny bit more attention when it comes to the baking phase. You want that golden-brown crust to sing!
Boosting Crispiness and Moisture in Your Stuffing Balls
If you’re worried about them looking a little pale after the initial 20 minutes, don’t panic. Here’s my favorite trick: grab a little bit of melted butter and brush the tops of the balls lightly halfway through baking. It sounds simple, but that extra layer of fat browns up perfectly and gives you that desirable color and extra crunch we look for in a Thanksgiving stuffing balls side dish. You asked why 20 to 25 minutes works? Because these are small, individual portions, they don’t need the long, slow bake that a huge casserole dish demands. That limited time allows the outside structure to set hard and crisp up before the inside loses too much steam. It’s all about hitting that sweet spot right before the moisture completely evaporates!
Make Ahead Stuffing Recipe: Holiday Prep Secrets
Let’s be honest, the day of the big feast, your kitchen looks like a disaster zone, and you’re running around like a crazy person trying to time three different main sides perfectly. That’s why I absolutely rely on recipes that let me get ahead, and this stuffing balls recipe is amazing for that! Having them ready to go, sitting happily in the fridge, saves literal hours on the actual holiday. It helps me manage my sanity, which is worth more than any perfectly cooked side dish, right?
The notes on my original recipe card confirmed that chilling works perfectly for these. You can prepare the entire mix, roll them into those gorgeous little balls (about 1.5 inches!), arrange them on your baking sheet, and cover the whole thing tightly. Then, they can chill in the refrigerator for up to 24 hours. They smell amazing even when they’re cold!
When it comes time to bake, there’s just one small adjustment you have to remember. Since cold ingredients bake slower than room temperature ones, you need to add a little grace period to the timer. If you’re pulling them straight from the fridge and putting them in the 375°F oven, add about 5 extra minutes to that standard baking time. You still want that gorgeous exterior you worked so hard for, so checking them at the 25-minute mark and then letting them go another 3-5 is key to making sure this make ahead stuffing recipe delivers on crispness. It’s one less thing dangling over your head!
Flavor Variations for Your Stuffing Balls Recipe
While the basic, herby sausage blend in this stuffing balls recipe is my go-to comfort food, I love playing dresser-up when I have extra time or ingredients lingering around! The great thing about turning stuffing into a ball is how adaptable it is. You can pivot quickly to suit whatever you are serving it with—like leftover turkey or just sticking to an appetizer theme.
The first variation mentioned right in the notes involves fruit. If you happen to have some dried cranberries lying around, gently fold in about half a cup when you mix the bread cubes. The tart little bursts against that savory sausage and sage are just divine! This creates an amazing cranberry turkey stuffing balls vibe, even if you stick with pork sausage base. It brings a little freshness to the plate, which is nice when everything else is heavy.
If you made a huge batch of roast turkey and have tons of leftovers, you can easily turn this into a recipe specifically for turkey stuffing balls for leftovers. Just swap the bulk sausage out for finely chopped, cooked turkey—maybe a couple of cups worth. You might need to bump up the chicken broth by just a splash since the cooked turkey won’t release any fat to keep things moist. That’s a genius way to make sure none of that holiday goodness goes to waste!
For a deep, rich flavor, leaning into the sausage component is the best bet. You can keep this recipe exactly as written for phenomenal sausage stuffing balls, but maybe throw in a tablespoon of finely chopped caramelized onion along with the raw onion and celery. That little bit of sweetness complements the salty sausage perfectly. Honestly, once you master this base **stuffing balls recipe**, the variations are endless—think mushrooms, shredded Brussels sprouts, or even a pinch of fennel seed if you like adding a bit of Italian flair!
Serving Suggestions and Storage for Leftover Stuffing Balls
Once these golden little guys come out of the oven, the real fun begins—figuring out how to serve them! These aren’t just for Thanksgiving dinner, either. If you have any leftover, I promise they taste just as good the next day, provided you store them right. The goal is always to preserve that crucial crisp exterior, which means we have to be smart about storage, especially when dealing with something so tender on the inside.
For serving fresh, you can’t beat the classics. They are absolutely incredible dipped straight into a hot, savory gravy. I have a fantastic recipe for gravy made without drippings if you didn’t make a roast, or you can serve them alongside cranberry sauce for that traditional sweet, tart, and savory bite. Picture these on a platter next to a cheese board—they work perfectly as a dinner party appetizer idea, too! They are just so versatile.
Now, let’s talk about leftovers, because you definitely want to save some. When they cool down, transfer your stuffing balls into a single layer on a platter, let them cool completely, and then store them in an airtight container. Don’t try to store them warm; that steam is the enemy of crispness! If you stack them while cooling, they’ll essentially steam themselves into a soft, slightly damp situation the next morning, which is just sad.
When you are ready to enjoy your leftovers, you absolutely must reheat them in the oven or, even better, an air fryer. Never use the microwave if you care about texture! The microwave will make your perfectly crispy stuffing balls go soft immediately. Set your oven low, maybe 325°F, just until they are heated through—about 8 to 10 minutes. If you use the air fryer, pull them out after just 4 or 5 minutes. That quick blast of dry heat revives that crispy crust beautifully. They come back to life tasting almost as good as fresh!
Frequently Asked Questions About Stuffing Balls Recipe
It’s funny how the simplest things always lead to the most questions, right? I find that when people are trying to nail down a technique for the holidays, they want absolute certainty. I’ve gathered the most common things I hear about this stuffing balls recipe here, hoping to clear up any last-minute worries before your big meal. If you know how to tackle these few points, you’ll be set for the best side dish ever!
Can I use Stove Top Stuffing instead of dried bread cubes?
Oh, the age-old shortcut question! Yes, you absolutely can! Sometimes you just need things to move faster, and I totally get that. Stove Top stuffing mix is already seasoned and moist, though, so you need to be careful. If you use the traditional mix, you should skip adding any extra broth or egg, as it probably already has enough binder. Just mix the prepared stuffing according to the box instructions, maybe adding your sausage or turkey mix, and proceed to roll them into balls right away. Be careful rolling them, though; they can be gooier than the traditional recipe because the bread is softer. You might need a tiny bit of extra time in the oven, too, to make sure they firm up!
What is the best way to reheat crispy stuffing balls side dish?
This is the most important question if you want to keep that beautiful work you did! Please, I beg you, do not use the microwave! The microwave turns everything soft and steamy, and you’ll instantly lose that amazing crust we worked so hard to achieve in this crispy stuffing balls side dish. The best two methods are the oven or the air fryer. If you’re reheating a larger batch, spread them in a single layer on a baking sheet and pop them into a 350°F oven for about 8 to 10 minutes. If you are just warming up a few, toss them into an air fryer for 3 to 5 minutes at 375°F. That dry, circulating heat brings that crispiness right back better than anything else! It’s the key to enjoying leftovers.
I always have extra horseradish sauce on hand for dipping these, too, just saying! Knowing exactly how to make stuffing balls successfully means knowing how to revive them the next day!
Share Your Perfect Stuffing Balls Recipe Experience
Now that you have the secrets for whipping up a batch of the most flavorful, perfectly crisp and tender stuffing balls, I really want to hear about them! Honestly, cooking is just more fun when we share our creations, isn’t it? Did you stick to the sausage, or did you try the turkey variation for your leftovers?
If you followed this stuffing balls recipe and ended up loving how much time it saved your holiday schedule, please take a moment to drop a rating down below! A 5-star review really helps other home cooks find simple, reliable recipes like this one. And if you got creative—maybe you added dried cherries or a little dash of maple syrup to the mix—tell me all about it in the comments! I’m always looking for ways to inspire the next batch, just like you’re inspired to try these incredible savory herbed stuffing balls.
PrintEasy Sausage Stuffing Balls Recipe for a Crispy Holiday Side

Make these easy stuffing balls for a flavorful holiday side dish or appetizer. This recipe yields perfectly portioned, crispy-on-the-outside, moist-on-the-inside bites that simplify your festive meal prep.
- Prep Time: 15 min
- Cook Time: 25 min
- Total Time: 40 min
- Yield: 18 servings 1x
- Category: Side Dish
- Method: Baking
- Cuisine: American
- Diet: Vegetarian
Ingredients
- 1 tablespoon olive oil
- 1 pound bulk sausage (or ground turkey for variation)
- 1 medium yellow onion, finely chopped
- 2 celery stalks, finely chopped
- 1 teaspoon dried sage
- 1/2 teaspoon dried thyme
- 1/4 teaspoon black pepper
- 1/2 teaspoon salt
- 4 cups dried bread cubes (gluten-free bread recommended for adaptation)
- 1 cup chicken broth (low sodium)
- 1 large egg, lightly beaten
- 1/4 cup fresh parsley, chopped
Instructions
- Preheat your oven to 375 degrees Fahrenheit. Lightly grease a baking sheet.
- Heat the olive oil in a large skillet over medium heat. Add the sausage and cook, breaking it up with a spoon, until browned. Drain off any excess grease.
- Add the chopped onion and celery to the skillet with the sausage. Cook until the vegetables soften, about 5 to 7 minutes.
- Stir in the dried sage, thyme, pepper, and salt. Cook for 1 minute until fragrant. Remove the skillet from the heat.
- In a large bowl, combine the bread cubes, the sausage and vegetable mixture, chicken broth, beaten egg, and fresh parsley. Mix gently until the bread is evenly moistened. Do not overmix.
- Let the mixture stand for 5 minutes to allow the bread to absorb the liquid.
- Scoop the mixture and roll it into balls about 1.5 inches in diameter. Place the stuffing balls on the prepared baking sheet, leaving a little space between each one.
- Bake for 20 to 25 minutes, or until the stuffing balls are golden brown and crispy on the exterior.
- Serve warm as a festive side dish or appetizer.
Notes
- For a cranberry turkey stuffing balls variation, gently fold in 1/2 cup of dried cranberries with the bread cubes.
- To make ahead, prepare the balls, place them on a tray, cover, and refrigerate for up to 24 hours. Bake as directed, adding 5 minutes to the baking time if baking directly from the refrigerator.
- For extra crispiness, you can brush the tops lightly with melted butter before baking.
Nutrition
- Serving Size: 1 ball
- Calories: 180
- Sugar: 1
- Sodium: 350
- Fat: 12
- Saturated Fat: 4
- Unsaturated Fat: 8
- Trans Fat: 0
- Carbohydrates: 10
- Fiber: 1
- Protein: 8
- Cholesterol: 35