
If you’re anything like me, you love a dessert that tastes incredibly indulgent but doesn’t require you to turn on your oven—especially when you’re getting ready for a busy weekend or a big family gathering. That’s exactly what inspired me to perfect this ultimate **no-bake Butterfinger pie** recipe. Here at DelishCraze, my goal, just like when I first started cooking in my own kitchen, is to share reliable American classics that deliver maximum flavor with minimum fuss. This pie is cool, creamy, and packed with that irresistible crunch we all love. Trust me, this quick candy bar dessert is about to become your new go-to!
- Why This Easy No-Bake Butterfinger Pie Recipe Works (E-E-A-T)
- Gather Your Ingredients for the Ultimate Butterfinger Pie
- Step-by-Step Instructions for No Bake Butterfinger Pie
- Tips for Success with Your Easy Butterfinger Pie Recipe
- Serving Suggestions for Your Family Gathering Pies
- Storage and Making Ahead for Your Butterfinger Pie
- Frequently Asked Questions About This No Bake Butterfinger Pie
- Estimated Nutrition for Your Indulgent Dessert Recipes
- Share Your Experience Making This Butterfinger Pie
Why This Easy No-Bake Butterfinger Pie Recipe Works (E-E-A-T)
When I’m testing recipes for DelishCraze, reliability is everything. Especially when it comes to crowd-pleasers like this! What makes this recipe stand out as the **best no bake pie** is how perfectly structured it is, even without the oven. You get that fantastic, refreshing texture that makes it one of the best **potluck desserts easy** to travel with. I tested batches until they held their shape perfectly after chilling—no slumping allowed! For more reliable creamy favorites, you should check out my recipe for easy creamy garlic lemon chickpea soup; simple is always better!
This recipe is fantastic because it relies on simple, accessible steps. You don’t need complicated techniques, just good quality ingredients combined correctly. If you need a dessert that looks impressive but comes together in about 20 minutes of actual work, this creamy treat is it. We’re talking about a true American classic made simple.
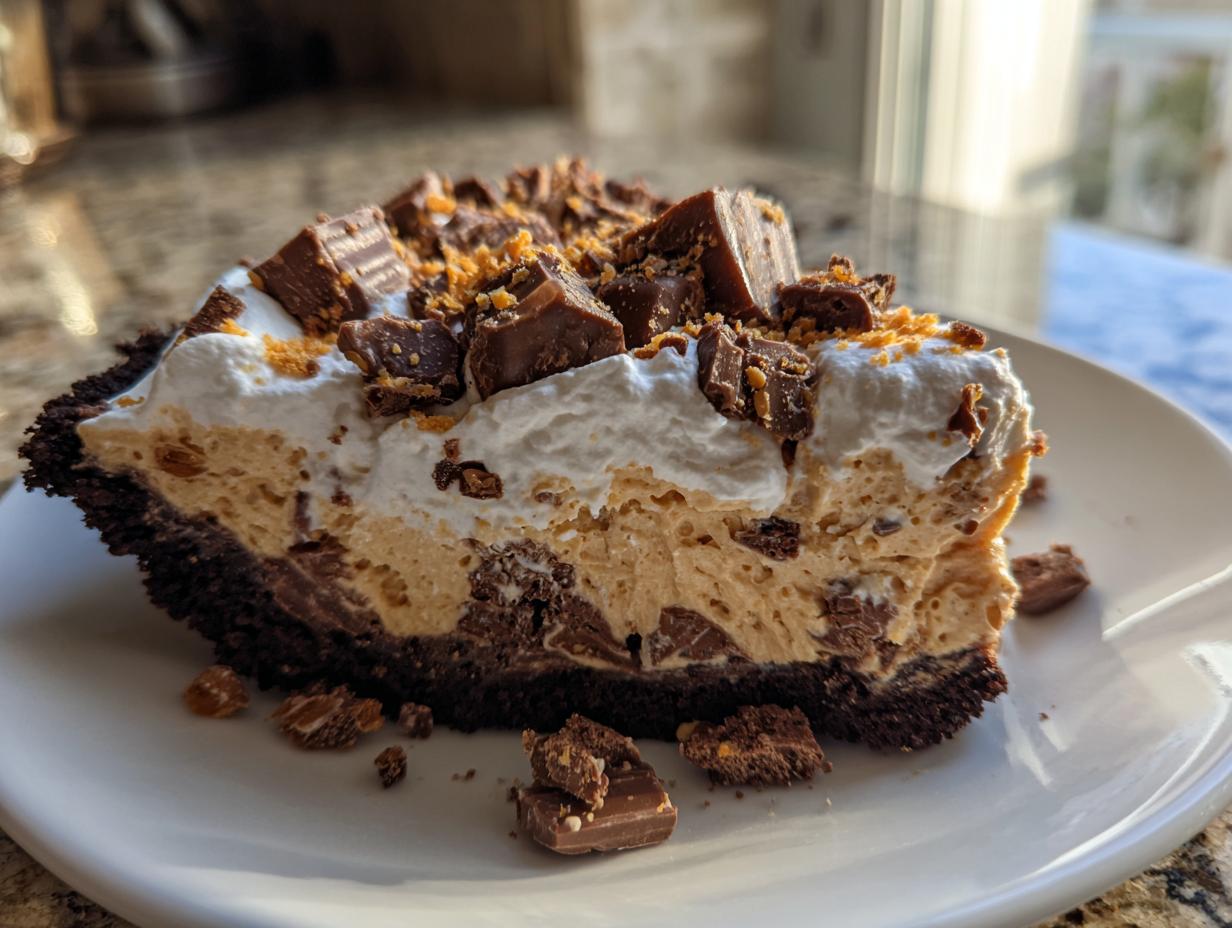
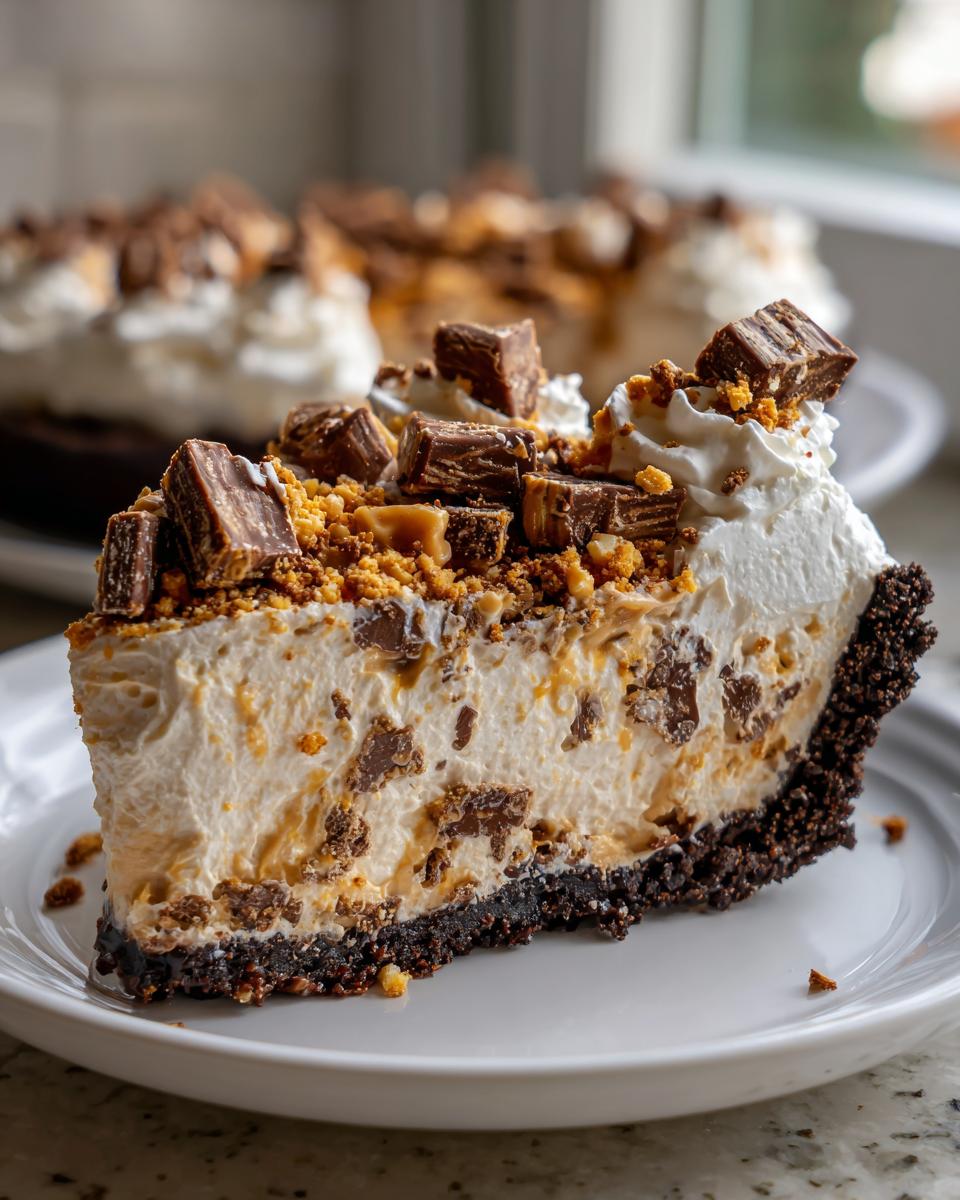
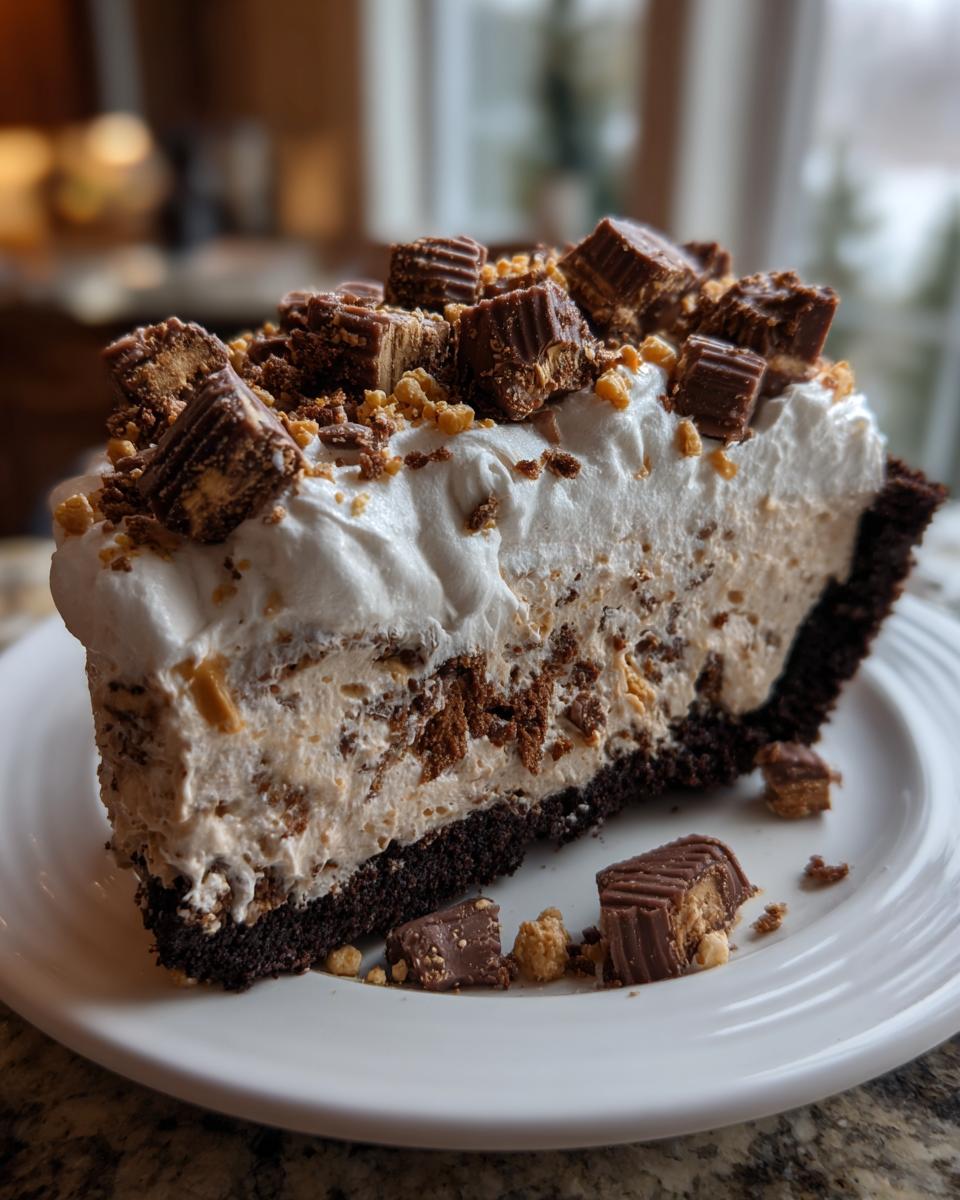
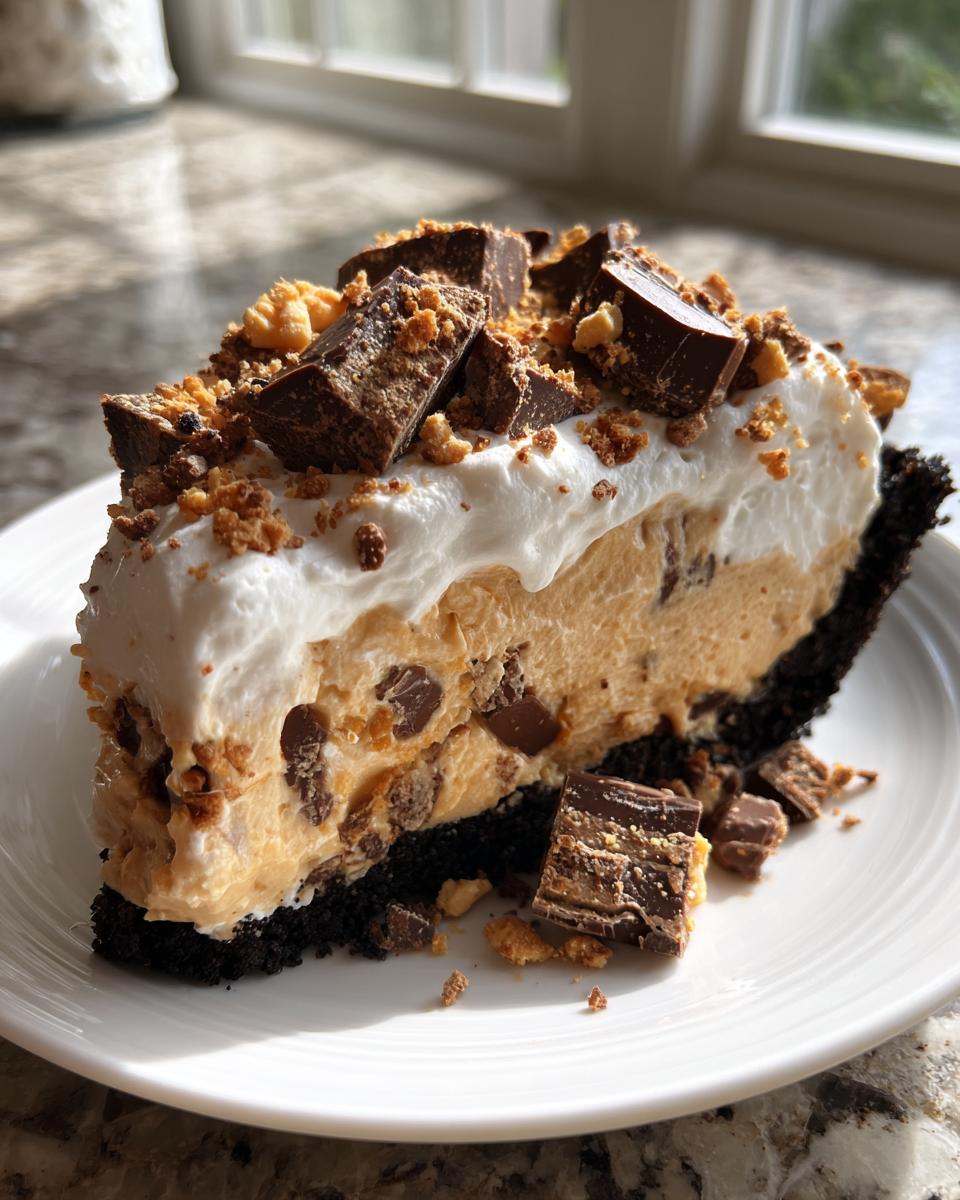
The Perfect Crunch and Cream Balance in Your Butterfinger Pie
The real secret weapon here is the texture. We layer that smooth, slightly tangy peanut butter and cream cheese dream base against the signature crispity, crunchety texture of the Butterfinger pieces. Folding some candy right into the filling and saving the rest for the top means you get that satisfying crunch in every single bite. It’s just heavenly!
Gather Your Ingredients for the Ultimate Butterfinger Pie
Okay, gather your crew! While some people brag about a super simple 4 ingredient butterfinger pie, I like giving you the full, reliably perfect version. This ingredient list is straightforward, built on familiar staples, and guaranteed to give you deep flavor. Like my easy creamy broccoli cheddar soup, we skip the complexity and go straight for deliciousness. We definitely want that chocolate crust though—it just grounds the sweetness perfectly!
Crust Components for Your Chocolate Crust Pie
- 1 1/2 cups chocolate cookie crumbs (like Oreo—don’t forget to crush them finely!)
- 6 tablespoons unsalted butter, melted
Making the Creamy Filling Dessert
This is where all the magic happens to create our signature **creamy filling dessert**.
- 1 (8 ounce) package cream cheese, softened completely
- 1 cup powdered sugar (sifted if you want zero lumps!)
- 1 cup creamy peanut butter (or crunchy if you’re feeling wild!)
- 1 teaspoon vanilla extract
- 1 cup heavy cream, cold (and I mean *cold*!)
- 1 cup crushed Butterfinger candy bars (divided for filling and topping)
Garnish for Your Butterfinger Dessert
Don’t skip these final touches for your stunning **Butterfinger dessert**!
- 1/2 cup whipped topping, for garnish
- Extra crushed Butterfinger, for that final crunch
Step-by-Step Instructions for No Bake Butterfinger Pie
This is the fun part! Since this is a **no bake Butterfinger Pie**, we are skipping the oven entirely, which already saves us half the battle. Just grab your mixing bowls and get ready to build this masterpiece layer by layer. If you’re looking for other fantastic oven-free treats while you wait for this to chill, you absolutely have to try my recipe for chocolate mousse pie! You can also check out this great guide on making a pie crust that never needs baking by looking at this recipe for inspiration.
Preparing the Chocolate Crust Pie Base
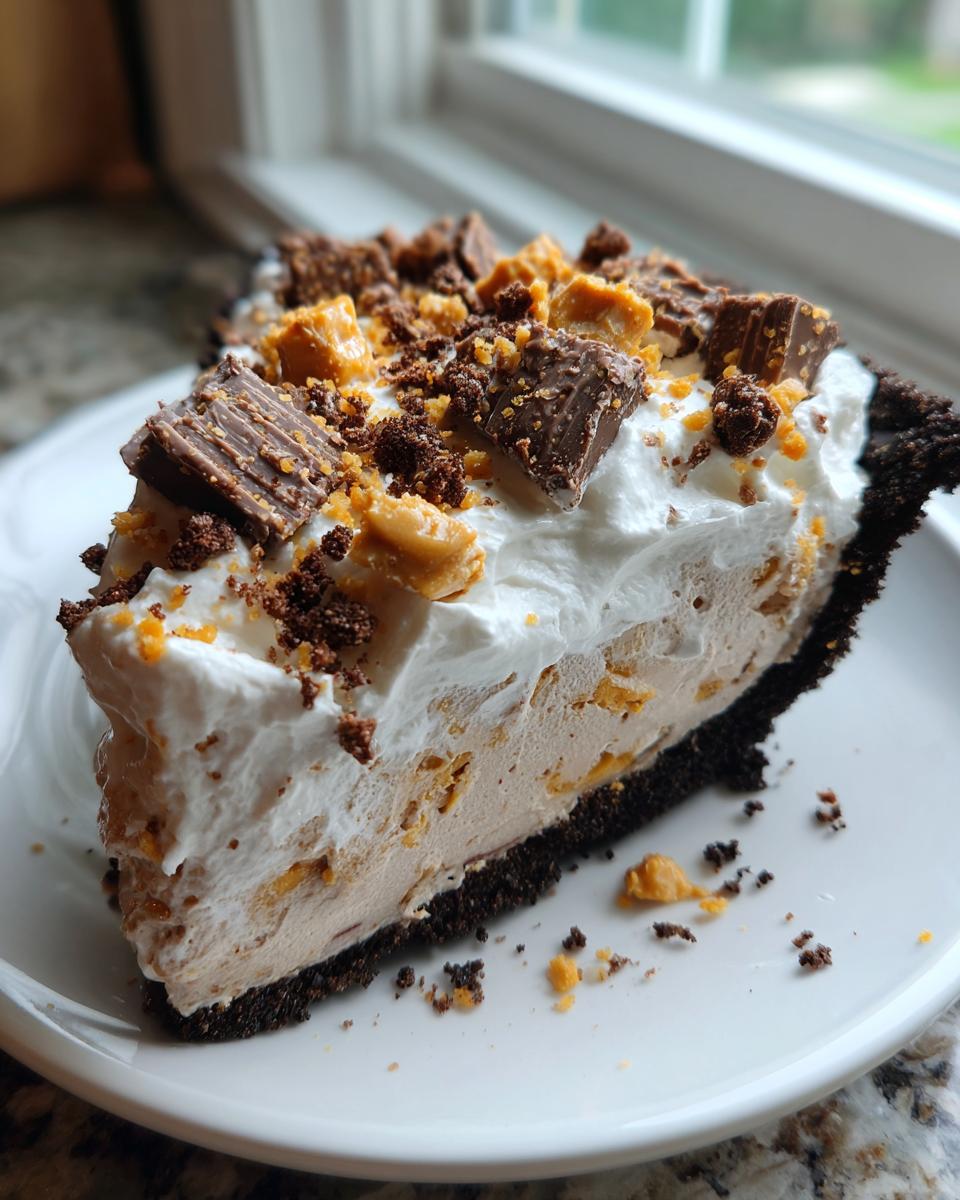
First things first, we need a secure home for our filling. Whisk together your chocolate cookie crumbs and the melted butter until everything looks like wet sand. You really need to press this mixture down firmly into your 9-inch pie plate. I like to use the bottom of a dry measuring cup to really compact it along the bottom and up the sides—we need a solid **chocolate crust pie** that won’t crumble when we slice it! Pop that whole plate into the freezer while you get your creamy filling ready. That quick chill helps lock it in place.
Whipping Up the Creamy Peanut Butter Pie Filling
Now for the star of the show! In your main bowl, use an electric mixer to beat together that softened cream cheese, the powdered sugar, the peanut butter, and the vanilla until it’s completely smooth—no lumps allowed in this **creamy peanut butter pie**! Then, grab a *separate* clean bowl and whip up your cold heavy cream until stiff peaks form. This separate whipping step is key; it incorporates all that air! Gently, and I mean gently, fold that whipped cream into your rich peanut butter mixture. Don’t overmix here, we want to keep those beautiful air bubbles intact!
Assembling and Chilling the Butterfinger Pie
Once that base is chilled, it’s time to put things inside! Take one cup of your crushed Butterfinger candy bars and carefully fold them into your creamy filling. See? That’s what’s going to give us that amazing crunch inside the smooth part! Pour that entire mixture into your chilled crust and smooth the top out nicely. Now, sprinkle that extra crushed Butterfinger we saved over the top. Remember, this needs time to set up properly for our **easy butterfinger pie recipe** to work its magic! Pop it into the refrigerator for a *minimum* of four hours. Seriously, don’t cheat the chill time; overnight is even better!
Tips for Success with Your Easy Butterfinger Pie Recipe
I’ve made this **quick candy bar dessert** more times than I can count, so let me share a few little things I learned so your Pie sets up perfectly every single time. The biggest mistake people make is rushing the chilling period, but honestly, that hard set time is mandatory for a solid slice!
Ingredient Notes and Substitutions for Butterfinger Pie
If you are truly in a rush, grab one of those store-bought frozen pie crusts; it works just fine, though I always think the homemade chocolate one tastes richer. Also, if you want a little extra texture in the filling, go ahead and swap the creamy peanut butter for crunchy! Now, about that heavy cream: it *must* be cold—like refrigerator cold. If it’s not cold, it won’t whip up into those stiff peaks we need to keep the **creamy filling dessert** light and airy when we fold it in. If you want more delicious, easy recipes, check out my pecan pie dip for similar holiday vibes!
For an extra layer of flavor, some people love to drizzle melted butterscotch along the sides right before chilling, based on tips I’ve seen from other bakers, like the folks over at The Gracious Wife. See? We all share the best secrets!
Serving Suggestions for Your Family Gathering Pies
Once that long chilling time is over, the fun part begins—making this **Butterfinger Pie** look as amazing as it tastes! Since this recipe screams **family gathering pies**, you want it to look perfect on the buffet table. Remember that final garnishing step? That’s where we shine! We finish it off just like Step 9 says: dollop generous spoonfuls of whipped topping all around the edge. Then, generously sprinkle those last few crunches of Butterfinger candy right over the top. It looks impressive, it serves a crowd easily, and it satisfies everyone looking for fantastic **potluck desserts easy** to grab! You can serve slices right after garnishing, or if you want more ideas for sweet showstoppers, check out how I finish off my coffee cake streusel sometime!
Storage and Making Ahead for Your Butterfinger Pie
You know me, I love making things ahead of time when I know a busy weekend is coming up, and luckily this pie loves to wait! You can absolutely make this entire beauty one day in advance. In fact, I think the flavors meld together a little better overnight in the fridge, making it an ideal **make-ahead** option. Just keep it covered tightly in the refrigerator. Since it’s a **no bake** treat, it will stay perfectly creamy and delicious for about three or four days nestled in there. If you want another great recipe you can bake ahead, try my chocolate crinkle cookies!
Frequently Asked Questions About This No Bake Butterfinger Pie
I know you might have a few little questions once you start gathering ingredients for this amazing **no bake Butterfinger pie**. It’s totally normal! I’ve collected the questions I get asked the most so you can feel totally confident before you even start making the crust. We want this to be your easiest **quick candy bar dessert** experience ever!
Can I use a different crust for my butterfinger pie?
Absolutely! While I’m obsessed with the deep flavor of a **chocolate crust pie**—especially using Oreos—you are never locked in here. If you don’t have chocolate cookies, a standard graham cracker crust works beautifully and keeps that buttery crunch going. You could even use a plain shortbread cookie crust if you prefer something a bit more neutral. Just remember to press it firmly into the plate and give it a good freeze before you add the filling!
How long does the no bake butterfinger pie need to chill?
This is probably the most important question! You absolutely must chill this pie for a minimum of four hours. That time allows the heavy cream and cream cheese mixture to firm up completely so you can cut clean slices. Now, if you are aiming for that truly perfect, sliceable texture that holds up well on a dessert table—perfect for those big **family gathering pies**—I always push for chilling it overnight. It’s worth the wait, I promise!
Is this considered a budget friendly pie?
For how impressive this dessert looks and tastes, yes, I definitely consider this a **budget friendly pie**! We are using common pantry staples like cream cheese, powdered sugar, and peanut butter. Aside from the Butterfinger bars, there aren’t any expensive specialty ingredients required. It’s a fantastic way to create an **indulgent dessert recipe** without breaking the bank, which is perfect if you’re bringing something to a huge event!
If you love no-bake desserts that are ridiculously easy, you should take a peek at my recipe for dirt cake—another guaranteed showstopper! Also, for more community tips about this type of candy dessert, check out what others are saying over at Recipes Flavors.
Estimated Nutrition for Your Indulgent Dessert Recipes
I always encourage everyone to enjoy these delicious treats without worrying too much about the numbers, but I know some of you like to see the breakdown! Here are the general estimates for one slice of this amazing **Butterfinger Pie**. Keep in mind, because we’re dealing with candies and full-fat dairy here, these values are estimates only. The actual amounts will swing a bit depending on which brand of cream cheese or peanut butter you decide to use in your final creation.
- Calories: 450
- Sugar: 35g
- Fat: 30g
- Protein: 8g
Share Your Experience Making This Butterfinger Pie
Now that you have the tools and the secrets to the **best no bake pie**, I really hope you take the time to whip this up! It’s just too good to keep secret. When you finally cut into that perfectly chilled slice of **Butterfinger dessert**, I want to know what you think. Did the chocolate crust hold up? Was the peanut butter filling as creamy as you dreamed?
Please jump down to the comments section below and leave me a star rating—it helps other cooks find reliable recipes! Tell me if you added any fun twists, like maybe using crunchy peanut butter or trying a different cookie for the base. I love seeing how you make these classics your own. If you snap a picture of your beautiful, crunchy creation, tag me on social media! It truly makes my day to see your kitchen successes.
If you enjoyed this simple treat and are looking for another easy, crowd-pleasing recipe to wow your friends next time, you have to try my easy homemade applesauce—it’s surprisingly good on top of this pie, too! And if you need even more no-bake inspiration, check out the tips shared by the good people at Family Fresh Meals.
PrintEasy No-Bake Butterfinger Pie with Chocolate Crust
Make this cool, creamy, and crunchy no-bake Butterfinger Pie. It uses a simple chocolate cookie crust and is perfect for potlucks or family gatherings.
- Prep Time: 20 min
- Cook Time: 0 min
- Total Time: 4 hr 20 min
- Yield: 8 servings 1x
- Category: Dessert
- Method: No Bake
- Cuisine: American
- Diet: Vegetarian
Ingredients
- 1 1/2 cups chocolate cookie crumbs (like Oreo)
- 6 tablespoons unsalted butter, melted
- 1 (8 ounce) package cream cheese, softened
- 1 cup powdered sugar
- 1 cup creamy peanut butter
- 1 teaspoon vanilla extract
- 1 cup heavy cream, cold
- 1 cup crushed Butterfinger candy bars
- 1/2 cup whipped topping, for garnish
- Extra crushed Butterfinger, for garnish
Instructions
- Combine the chocolate cookie crumbs and melted butter in a bowl. Press the mixture firmly into the bottom and up the sides of a 9-inch pie plate. Place the crust in the freezer while you prepare the filling.
- In a large bowl, beat the softened cream cheese, powdered sugar, peanut butter, and vanilla extract until the mixture is smooth and creamy.
- In a separate bowl, whip the cold heavy cream until stiff peaks form.
- Gently fold the whipped cream into the peanut butter mixture until just combined.
- Fold in one cup of the crushed Butterfinger candy bars.
- Pour the filling into the chilled chocolate crust and spread evenly.
- Sprinkle the top with additional crushed Butterfinger pieces.
- Refrigerate the pie for at least 4 hours, or until firm.
- Before serving, top with dollops of whipped topping and extra crushed Butterfinger candy.
Notes
- You can use a pre-made frozen pie crust to save time.
- For a richer peanut butter flavor, use crunchy peanut butter in the filling instead of creamy.
- Chill time is necessary for the pie to set properly.
Nutrition
- Serving Size: 1 slice
- Calories: 450
- Sugar: 35g
- Sodium: 300mg
- Fat: 30g
- Saturated Fat: 12g
- Unsaturated Fat: 18g
- Trans Fat: 0g
- Carbohydrates: 40g
- Fiber: 2g
- Protein: 8g
- Cholesterol: 50mg