
You know those moments? When only something intensely sweet, creamy, and crunchy will do the trick? Trust me, I know them well. After long days designing and now juggling family life, I need treats that hit the spot instantly without turning on the oven. That’s why this rich **oreo fudge** recipe is the absolute hero of my kitchen right now. It tastes like pure indulgence, yet it requires only three simple ingredients and zero baking time. If you’re looking for something quick, check out my other easy no-bake protein balls too! It’s the kind of dessert that brings back that comforting feeling of home, no complicated steps required whatsoever. I promise this simple fudge recipe is here to save your sweet tooth!
- Why This Easy Oreo Fudge Recipe is Your New Go-To
- Gathering Ingredients for Your Oreo Fudge
- How to Prepare This No Bake Fudge Recipe
- Tips for Perfect Oreo Fudge Every Time
- Storage and Serving Suggestions for Your Oreo Fudge
- Variations on Classic Oreo Fudge
- Frequently Asked Questions About Oreo Fudge
- Estimated Nutritional Profile for Simple Fudge Candy
- Share Your Cookies and Cream Fudge Creations
Why This Easy Oreo Fudge Recipe is Your New Go-To
When I started DelishCraze, my goal was always to prove that incredible homemade food doesn’t have to be complicated. This batch of **oreo fudge** perfectly captures that feeling. Seriously, if you need a dessert for an unexpected gathering—or just need something now—this mold-breaking recipe should be your first stop. Forget spending hours over a stove; we are making magic with minimal stirring!
Here is why this recipe bumps every other snack idea off my list:
Quick Dessert Recipes Ready in Minutes
I mean it when I say this fudge is fast. Your active time is seriously under ten minutes! You melt some chocolate, stir in the milk, and fold in the cookies. That’s it. It sets up beautifully while you’re tackling your email inbox or watching your favorite show. It’s the definition of a quick dessert recipe that totally satisfies that deep, demanding sweet craving fast.
Creamy Fudge Squares with Maximum Crunch
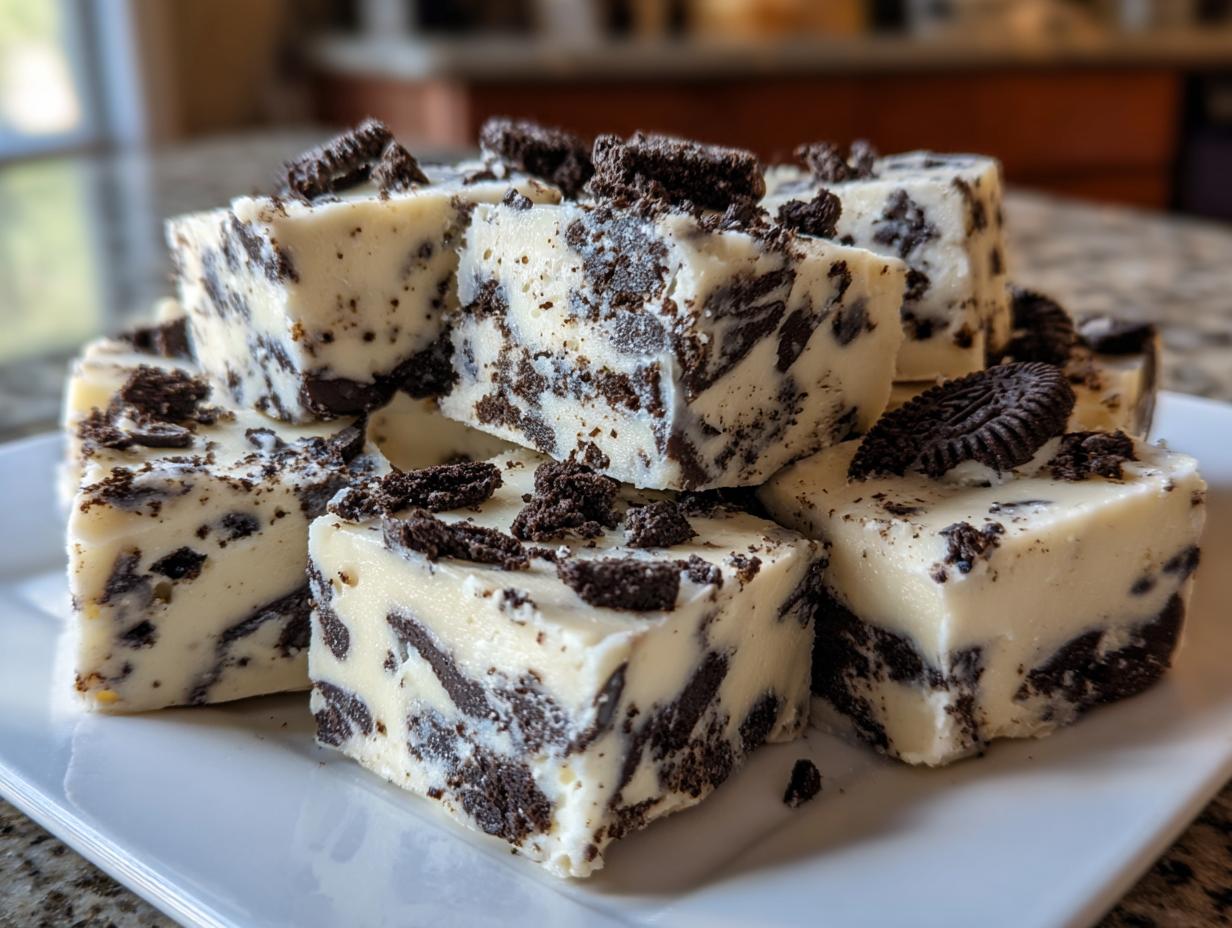
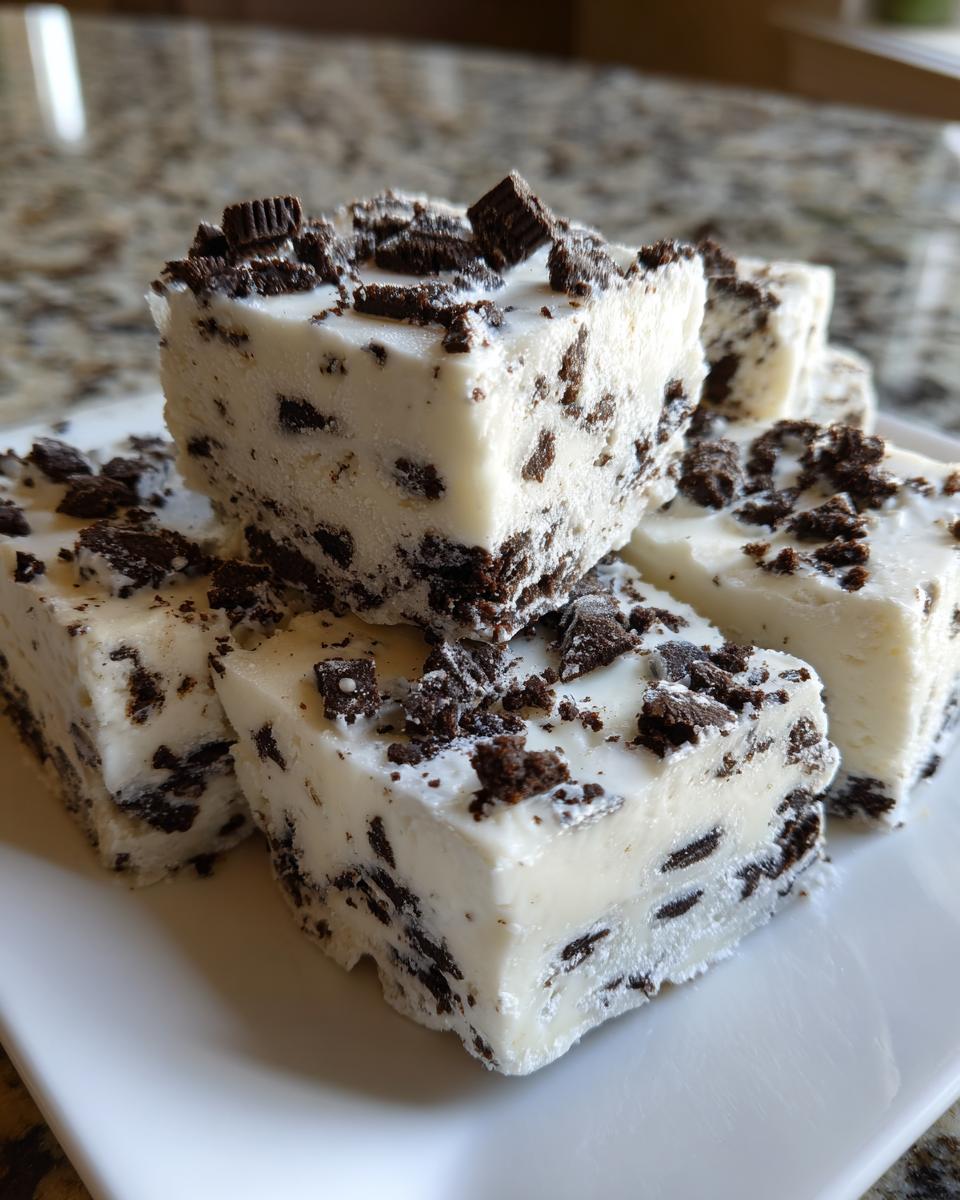
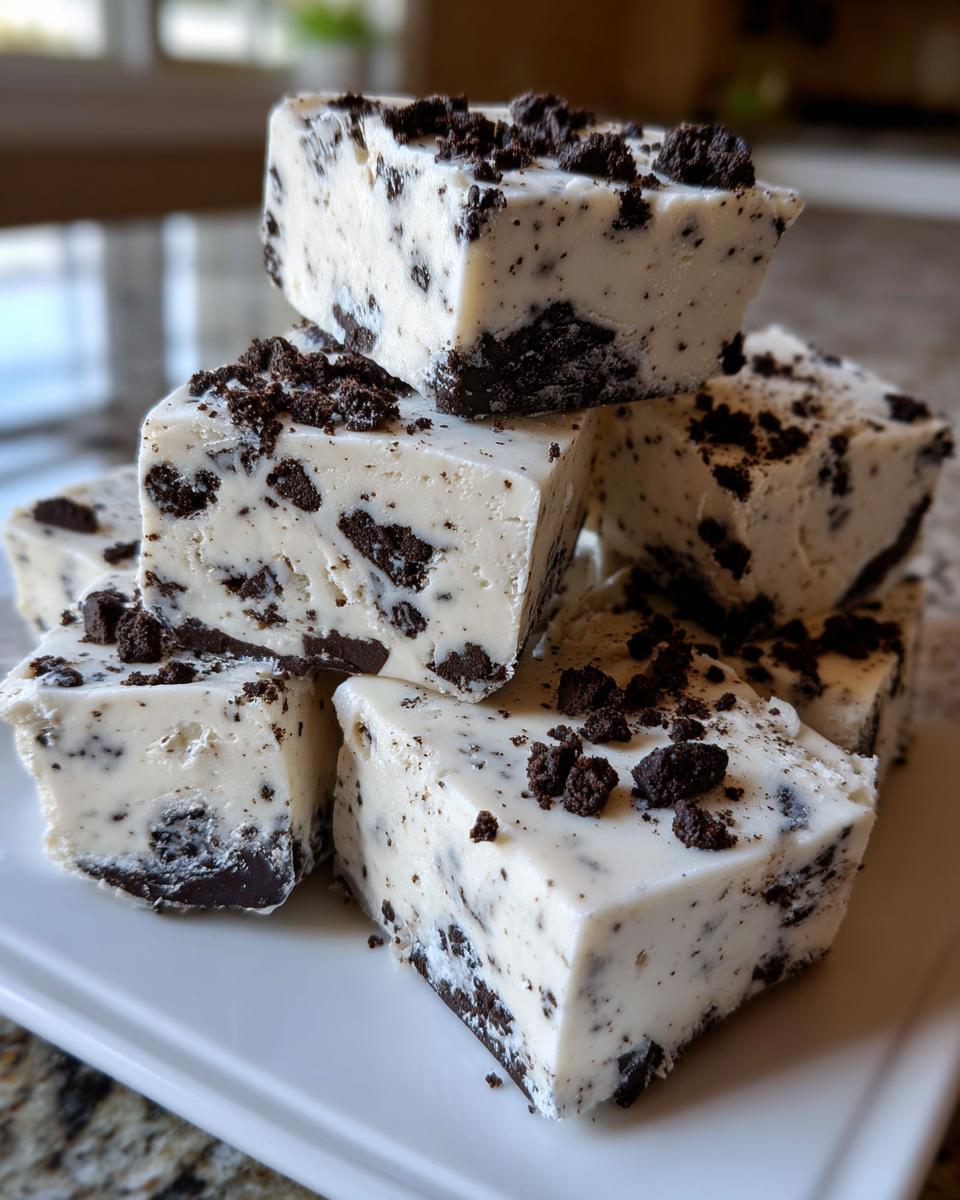
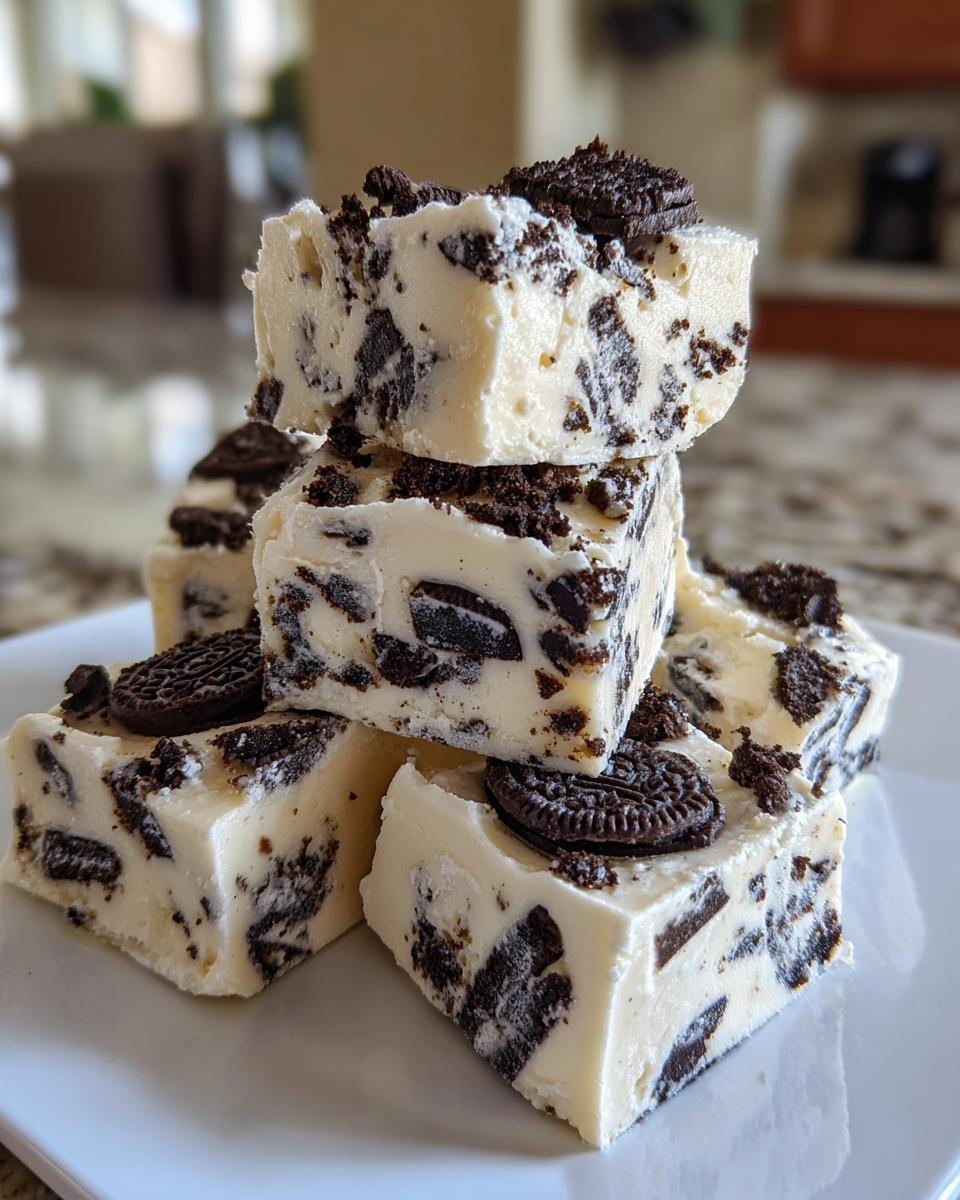
The best part about this cookies and cream fudge has to be the texture contrast. The melted white chocolate and condensed milk create an unbelievably rich, glossy background—so smooth, it practically melts before it hits your tongue. But then—BAM!—you get that satisfying crunch from the Oreo pieces throughout every single one of the creamy fudge squares. It’s the perfect bite, every time.
The Simplest 3 Ingredient Fudge
Yes, you read that correctly! We only need three core components. That means less shopping, less measuring, and honestly, fewer things that can go wrong. If you’ve been intimidated by traditional candy making, don’t worry about it here. This truly is the **3 ingredient fudge** solution for anyone who needs homemade candy goodness without the fuss.
Gathering Ingredients for Your Oreo Fudge
Okay, so since this is such a simple recipe—truly just three items—the quality of those items really makes a difference in making it the best Oreo fudge recipe out there. Don’t skimp on the good stuff here because every ingredient is going to shine through in that final creamy square!
Expert Tips for Ingredient Selection
When it comes to the white chocolate chips, I always recommend using a good quality brand. Cheaper chips sometimes don’t melt as smoothly, and nobody wants grainy fudge! Also, for the Oreos, you absolutely must crush them well. If you just bash them up in a bag, you might get big chunks that make the fudge hard to cut later. A food processor works wonders for getting that perfect, even distribution of cookies and cream throughout the base.
Here’s exactly what you need to have on hand before you even think about heating anything up:
- 1 (14 ounce) can sweetened condensed milk
- 2 cups white chocolate chips
- 2 cups crushed Oreo cookies (about 20 cookies)
That’s it! Quick trip to the pantry and you are ready to go. If you’re looking for more chocolate ideas, check out my guide on making the best white chocolate fudge recipes for other fun swaps!
How to Prepare This No Bake Fudge Recipe
Alright, let’s get this **oreo fudge** put together! Since this is a no-bake fudge recipe, the whole process is wonderfully quick. The key here is managing the microwave time so we get that perfect, smooth consistency for our creamy fudge squares without burning the white chocolate. Don’t panic if you don’t have a microwave; we totally have an alternative method built right in!
Melting the Base for Creamy Fudge Squares
First things first, line that 8×8 pan with parchment paper and make sure you have those little overhang “handles” sticking up. That’s my secret weapon for getting the fudge cleanly out later—no sticking drama here! Next, combine your sweetened condensed milk and those white chocolate chips in a bowl safe for the microwave. You’re going to zap this for 30 seconds at a time, giving it a serious stir in between each burst. Usually, it takes about a minute and a half total to get it completely smooth. If you prefer the old-fashioned way, you can definitely use a double boiler over low heat, but you have to stir constantly so it doesn’t scorch. Stop heating the second it’s smooth!
Mixing and Setting Your Simple Fudge Candy
Once that chocolate is liquid silk, toss in your already crushed Oreos. Gently fold them in with a sturdy spatula. You want those cookies evenly distributed so every piece of your simple fudge candy gets that lovely crunch. Don’t overmix, though! Just fold until you don’t see any white streaks showing. Press the mixture evenly into your prepared pan—I like using the bottom of a greased measuring cup to get a really flat top. A few extra crushed Oreos sprinkled evenly on top make it look extra professional! Now, this is crucial: the setting time. Pop it into the fridge for a solid two hours. Seriously, don’t rush it! Chilling ensures you can lift it out easily and slice perfect no-bake desserts.
Tips for Perfect Oreo Fudge Every Time
Even though this is the easiest no-bake fudge recipe imaginable, there are just a couple of little secrets I’ve picked up over the years to make sure your oreo fudge comes out flawlessly. We want that perfect, melt-in-your-mouth texture, not a hard or grainy mess, right? Getting the melting stage just right is the absolute key to achieving those gorgeous creamy fudge squares.
Achieving the Best Cookies and Cream Fudge Consistency
The biggest mistake people make with white chocolate mixtures is overheating! White chocolate is temperamental; if you cook it too hot or too long, it seizes up and becomes grainy or clumpy instead of smooth. When you are nuking it in the microwave, stop heating the instant you see just a few hard lumps left in there. The residual heat from the hot milk and the stirring will take care of the rest. If you see it start to look oily or separate, you’ve gone too far. Next time, try shorter 15-second bursts!
Cutting Clean Creamy Fudge Squares
Patience during the chilling stage really pays off here. Make sure that fudge is completely firm—at least two full hours in the fridge, maybe even three if your kitchen is warm. For the absolute cleanest cuts, heat up a nice sharp chef’s knife under hot water for about 30 seconds. Wipe the knife completely dry, and then slice through the fudge. Wipe the blade clean between every single cut. You’ll get these incredibly sharp, professional-looking creamy fudge squares that look like they came straight from a candy shop!
Storage and Serving Suggestions for Your Oreo Fudge
So you’ve made the best **oreo fudge** ever—now we need to keep it perfect! Luckily, since this is a no-bake treat, storing it is a breeze. If you plan on devouring this amazing **cookies and cream fudge** within a few days, just pop it into an airtight container at cool room temperature. It usually stays lovely and fresh for about a week that way.

If you need it to last longer, or if your kitchen tends to run warm, the fridge is your best friend. Storing it in the fridge keeps those creamy fudge squares ultra-firm, which is great if you are cutting them right before a big event. For holiday gifts, carefully wrap individual squares in small pieces of wax paper before boxing them up. If you’re prepping for the holidays early, you can even freeze this fudge! Wrap it tightly in plastic wrap and foil, and it should be great for up to two months. Want more ideas for gifting sweet things? You should definitely check out my guide on making holiday fudge gifts!
Variations on Classic Oreo Fudge
While I swear by the classic white chocolate and Oreo combination—because, hello, it’s perfection—sometimes you just need to switch things up, especially if you’re making a big batch! This oreo fudge is super adaptable. It’s all about playing chemist in the kitchen, which I love! You can easily tailor this for different tastes or seasons with just a few minor tweaks. It makes these simple squares feel brand new every time you pull them out.
If you’re thinking of making a dark chocolate version, swap out those white chocolate chips for semi-sweet or dark chocolate chips. You’ll want to add an extra splash of sweetened condensed milk, maybe just a tablespoon or two, to make sure that mixture still melts down nicely and stays silky smooth. For a fun twist, try adding a little almond or peppermint extract right before folding in the cookies. I made a batch with peppermint for the holidays last year, and everyone went crazy for them! They tasted just like those chocolate peppermint cookies we use to make.
Also, who says it has to be Oreos? Feel free to crush up any sandwich cookie you love! The vanilla wafer cookies make a fantastic, lighter version of this simple fudge candy, or you can use brownie cookies for an extra fudgy kick. It’s your kitchen, so have fun experimenting!
Frequently Asked Questions About Oreo Fudge
I know buying candy or deciding on a new sweet snack can bring up questions, especially when you are trying to adapt a recipe like this one! It’s my job to make sure you feel completely confident making this the best Oreo fudge recipe for your family. Don’t worry if you’re new to making candy; this is very straightforward, but here are the common things people ask me about making these easy chocolate treats.
Can I make this White Chocolate Oreo Fudge without a microwave?
Absolutely, yes! I made sure to give the double boiler method in the main instructions because I know not everyone loves using a microwave for melting chocolate, especially when you’re aiming for perfection. To make this No Bake Fudge Recipe on the stovetop, you just need a heat-safe bowl set over a saucepan containing an inch or two of gently simmering water. Make sure the bottom of your bowl isn’t touching the water! You stir that mixture constantly until it’s perfectly smooth. It takes a little more attention, but it gives you fantastic results for your base.
How do I store homemade fudge to keep it fresh?
This is a great question, especially if you are making a big batch for holiday fudge gifts. When storing your oreo fudge, humidity is the enemy! Always use an airtight container. If you are storing it at room temperature, it should be in a cool, dark spot, and it will last about a week. If you plan on keeping those creamy squares longer than that, definitely move the airtight container to the refrigerator. That keeps the texture firm and stops the white chocolate from getting too soft if your house gets warm.
Do you have any other questions about making the perfect simple fudge candy? Drop them in the comments below so I can help you out!
Estimated Nutritional Profile for Simple Fudge Candy
When you’re whipping up treats like this, I always feel it’s important to have a rough idea of what you are serving, even if it’s pure indulgence! Since this recipe uses simple ingredients, we can get a pretty good estimate of what’s in each square of this glorious **oreo fudge**. Remember, these numbers are just helpful guides based on my ingredient portions and typical serving sizes—they aren’t lab-tested, but they give you the ballpark figure for this sweet snack!
Based on the recipe breakdown, here is the estimated nutritional profile for one square of this simple fudge candy:
- Serving Size: 1 square
- Calories: 250
- Sugar: 25g
- Sodium: 120mg
- Fat: 15g
We see a bit of sugar in there, which is expected from the condensed milk and cookies, but 250 calories for a rich, homemade treat like this? I tell you what, that’s a bargain for satisfying a serious craving! Enjoy every bit of this quick dessert recipe!
Share Your Cookies and Cream Fudge Creations
Now that you have your pan full of glorious, creamy, crunchy **oreo fudge**, I truly hope you enjoy every last bite! But honestly, the fun doesn’t stop there for me. I absolutely love connecting with you all and seeing how my recipes turn out in your kitchens. It’s the best part of running DelishCraze after all those years in design!
Did you try adding a twist? Did it become the star of your holiday cookie plate? Please don’t keep those triumphs to yourself! I’d be thrilled if you took a moment to let me know how it went. You can leave a star rating right here on the page—that really helps other home cooks know they can trust this simple recipe.
If you snap a picture of your beautiful cookies and cream fudge squares, please tag me on social media! Seeing my recipes out in the world, being shared and loved, is what keeps me inspired to keep tinkering and sharing more baking and dessert recipes. I read every comment, every rating, and I cherish seeing your creations. Happy baking, and I can’t wait to hear how you enjoyed this super quick treat!
PrintEasy 3-Ingredient White Chocolate Oreo Fudge

Make this simple, no-bake Oreo fudge using just three ingredients. This recipe delivers creamy, crunchy cookies and cream squares quickly, perfect for a sweet snack or holiday gift.
- Prep Time: 10 min
- Cook Time: 0 min
- Total Time: 2 hours 10 min
- Yield: About 16 squares 1x
- Category: Dessert
- Method: No-Bake
- Cuisine: American
- Diet: Vegetarian
Ingredients
- 1 (14 ounce) can sweetened condensed milk
- 2 cups white chocolate chips
- 2 cups crushed Oreo cookies (about 20 cookies)
Instructions
- Line an 8×8 inch baking pan with parchment paper, leaving an overhang on the sides for easy removal. Lightly grease the paper.
- Place the white chocolate chips and sweetened condensed milk in a microwave-safe bowl.
- Microwave in 30-second intervals, stirring well after each interval, until the mixture is completely smooth and melted. This usually takes 1 to 1.5 minutes total.
- Stir in the crushed Oreo cookies until they are evenly distributed throughout the mixture.
- Pour the fudge mixture into the prepared pan and spread it into an even layer using a spatula.
- If desired, sprinkle a few extra crushed Oreos on top for garnish.
- Refrigerate the fudge for at least 2 hours, or until firm enough to cut.
- Use the parchment paper overhang to lift the fudge from the pan. Cut into small squares before serving.
Notes
- For the best texture, crush your Oreo cookies in a food processor or by placing them in a sealed bag and crushing them with a rolling pin.
- Store this homemade fudge in an airtight container at room temperature for up to one week, or in the refrigerator for longer storage.
- If you do not have a microwave, melt the chocolate and milk using a double boiler over low heat, stirring constantly.
Nutrition
- Serving Size: 1 square
- Calories: 250
- Sugar: 25
- Sodium: 120
- Fat: 15
- Saturated Fat: 9
- Unsaturated Fat: 6
- Trans Fat: 0.5
- Carbohydrates: 27
- Fiber: 1
- Protein: 3
- Cholesterol: 15