
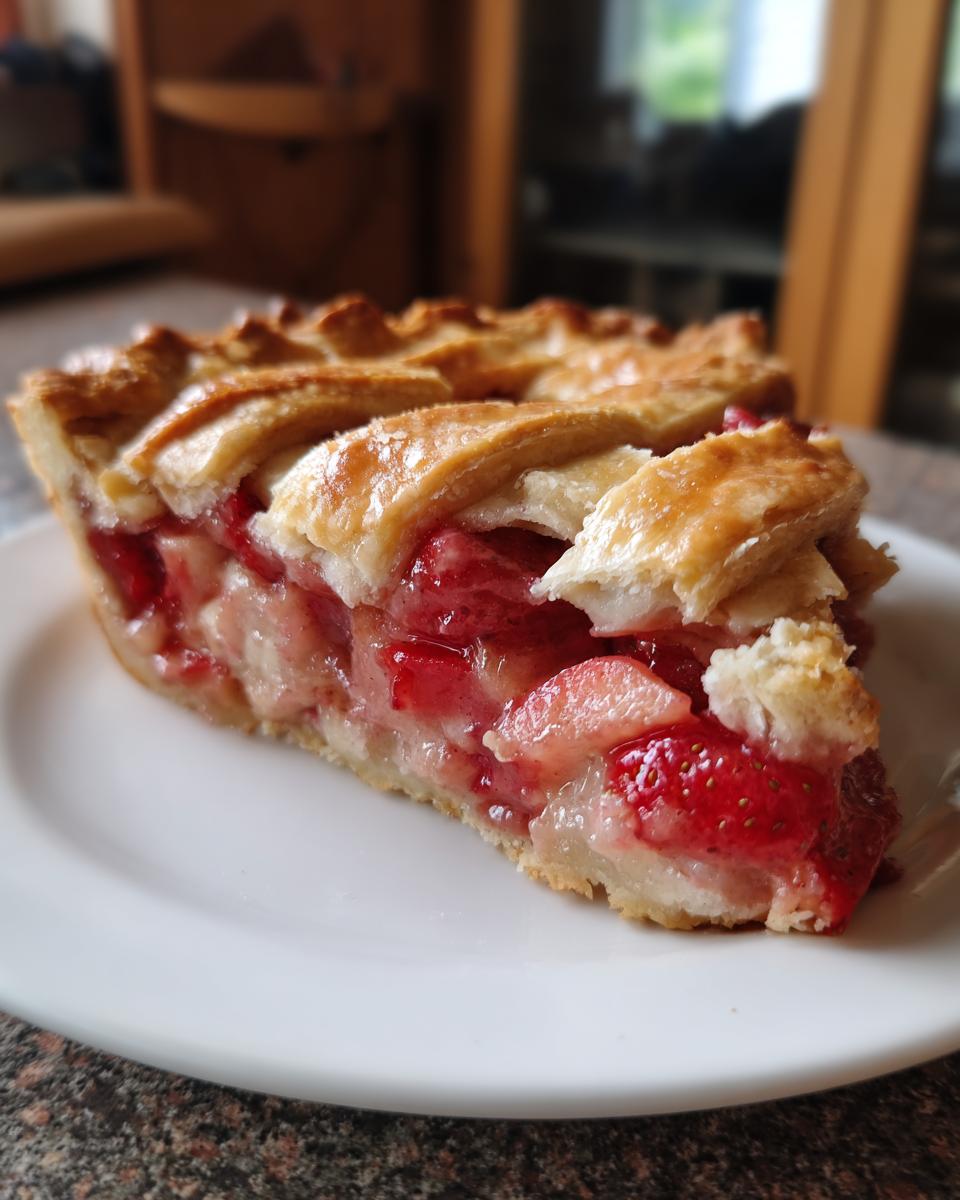
When the weather gets warm, my focus immediately switches to bright, fresh fruit desserts. There’s nothing that screams summer gathering—or a triumphant return to the kitchen after a long winter—like a show-stopping fruit pie. And honestly, nothing beats cutting into a perfect strawberry rhubarb pie. Here at DelishCraze, my goal, as Olivia Rosewood, is to take these beloved classics and strip away all the fuss. We aren’t aiming for complicated pastry school techniques here. We’re aiming for reliable, fork-tender results that taste like an award winning pie recipe, built on simple ingredients handled with care. This recipe is the one I come back to every single year.
- Why This is the Best Strawberry Rhubarb Pie Recipe You Will Make
- Gathering Ingredients for Your Homemade Rhubarb Dessert
- Step-by-Step Instructions for the Strawberry Rhubarb Pie
- Tips for Success When Making Strawberry Rhubarb Pie
- Serving Suggestions for This Classic Spring Pie
- Storage and Reheating Instructions for Leftover Pie
- Frequently Asked Questions About Making Strawberry Rhubarb Pie
- Nutritional Snapshot of This Homemade Rhubarb Dessert
- Share Your Seasonal Baking Recipes Success
Why This is the Best Strawberry Rhubarb Pie Recipe You Will Make
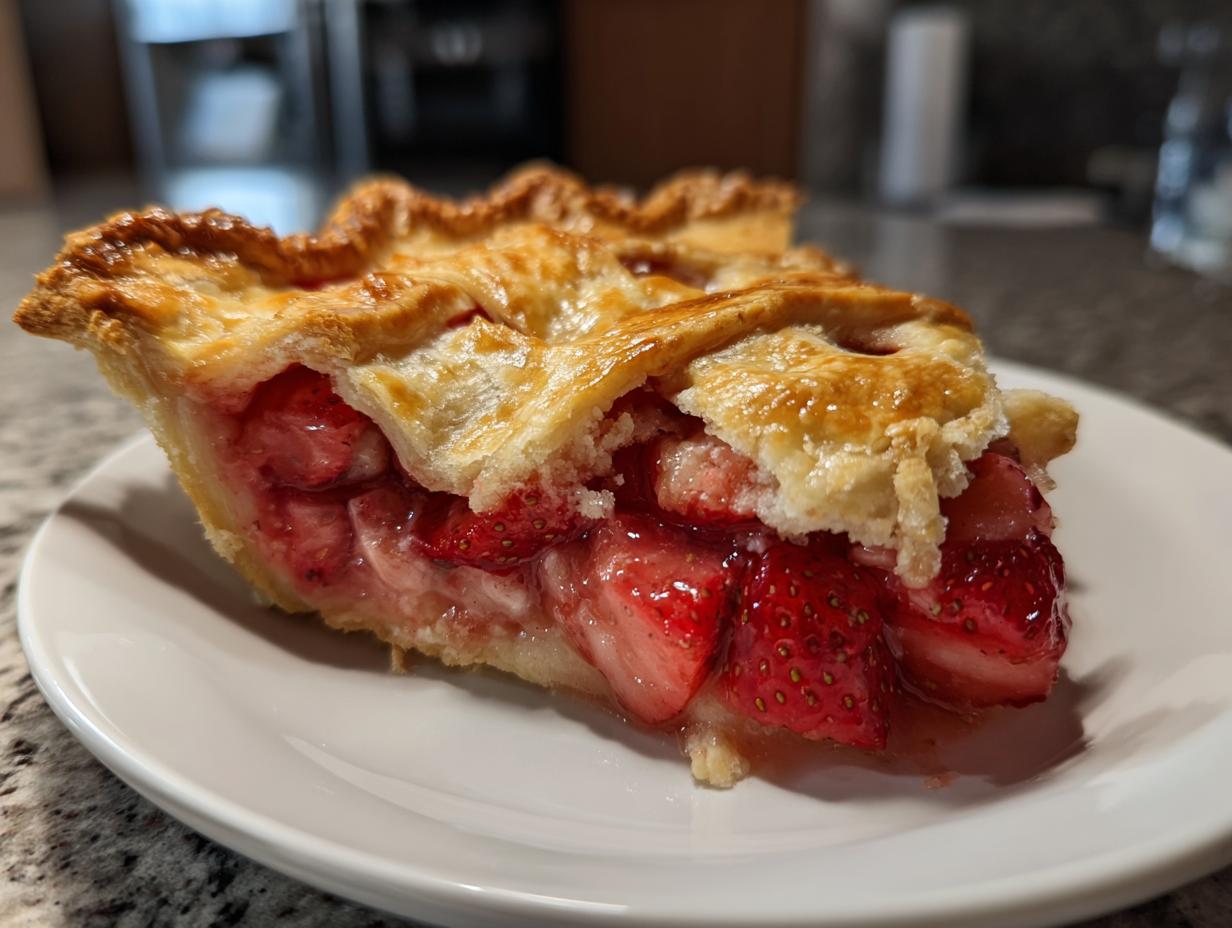
Listen, I’ve made my share of sad, soupy pies where all the juices run out onto the pan. We aren’t doing that today! This recipe proves why it’s truly the best strawberry rhubarb pie you’ll ever undertake. When I set out to create this, I wasn’t messing around; I wanted that brag-worthy, award winning pie recipe quality without having to wrestle with complicated techniques that only pastry chefs learn. I even saw how much buzz the recipe on The Kitchn was getting, but I promise mine has the buttery texture payoff you want!
The secret isn’t just luck; it’s two very specific focuses. We are nailing two things: texture and taste. If you follow what I tell you below, you’ll have a crisp, buttery base holding firm against that vibrant fruit inside. Trust me, the effort you put in upfront pays off huge when you slice into that first perfect piece.
Achieving the Perfect Sweet Tart Pie Filling Balance
Rhubarb, bless its heart, can be incredibly tart. And strawberries are sweet, but their sweetness varies wildly depending on when you buy them! This is why you can’t just guess at the sugar. We use a bit more granulated sugar than some recipes call for, but it’s balanced by the lemon juice.
The real game-changer, though, is cornstarch. Don’t skip it! This is my secret weapon against a watery strawberry rhubarb pie mess. It cooks down into a thick, glossy sauce that hugs the fruit perfectly instead of leaking everywhere. It’s simply the best way to ensure your filling sets beautifully.
Secrets for a Ridiculously Flaky Pie Crust Tutorial
If you’ve ever been intimidated by homemade pastry, this section is for you. This is my all-butter crust, and it performs like a dream, giving you that shattering flakiness every time. Forget hardened shortening; real butter gives the best flavor, period.
The entire trick of this flaky pie crust tutorial comes down to temperature. Everything—and I mean *everything*—must be painfully cold. If your butter starts to feel soft in your hands, stop, put the bowl in the freezer for five minutes, and come back. Cold fat turns to steam in the oven, and that steam creates those beautiful, airy layers you see in professional baking. Remember to check out a few tips on make-ahead breakfast helpers if you want to prep your crust dough the day before!
Gathering Ingredients for Your Homemade Rhubarb Dessert
Alright, let’s get down to the good stuff. You can’t make an amazing homemade rhubarb dessert without amazing ingredients, right? Because we are aiming for that top-tier taste, sourcing the freshest seasonal fruit you can find is step one. This pie shines when the strawberries are actually sweet and the rhubarb snaps when you cut it. If you need great ideas for other seasonal treats, you should check out my recipe for easy homemade applesauce while you’re planning your next baking session.
It’s tempting to just throw everything from the pantry in, but for this recipe to really sing, we need precision in our measurements—that’s how we get that beautiful, sturdy structure. I’ve gone over my notes countless times to make sure the ratios here are perfect for baking success.
Pie Dough Components for the Ultimate Strawberry Rhubarb Pie
For the crust—remember, this is the foundation of our whole creation—we are sticking strictly to butter and ice water. We need two and a half cups of all-purpose flour, seasoned with just one teaspoon of salt. The butter, though, is the star here. You must use an entire cup of unsalted butter, and I mean *very* cold, cubed up into little pieces. If it’s not cold, it won’t flake! Keep that ice water handy, too; you might not use all of it, but you need it ready to go.
Components for the Sweet Tart Pie Filling
For the fruit, you’ll want four cups of chopped fresh rhubarb and four cups of halved strawberries. Now for the magic blend that creates the perfect sweet tart pie filling: start with one and a half cups of granulated sugar. But the real hero is the thickener: one-quarter cup of cornstarch. Seriously, this is what guarantees you won’t have soup oozing everywhere when you slice into this beauty. We finish the filling off with just a splash of lemon juice for brightness and one teaspoon of vanilla extract for warmth. Oh, and don’t forget the egg wash and coarse sugar for that stunning, crunchy top layer later!
Step-by-Step Instructions for the Strawberry Rhubarb Pie
Okay, deep breath! This is where we bring all those amazing ingredients together to create the ultimate strawberry rhubarb pie. Don’t let the steps scare you; we are moving methodically, which is the secret to getting that gorgeous lattice top and that firm filling. You might want to check out my guide on scone making afterward, because once you master cold dough, everything gets easier!
Making the Dough: Tips for the Flaky Pie Crust Tutorial
First things first: the dough. You want to whisk your flour and salt together, and then it’s time to tackle that cold butter. You absolutely have to cut that butter into the flour until it looks pebbly, with some pieces still remaining the size of a little green pea. That’s the secret to the flaky pie crust tutorial success!
Next, add your ice water slowly, just a splash at a time, maybe a tablespoon at a time, mixing it until the dough starts to look shaggy, but *just* comes together when you squeeze a handful. If it feels stiff and dry, add a tiny bit more water. Then, immediately split it, flatten those two halves into disks, wrap them tight in plastic, and pop them into the fridge for at least an hour. Don’t rush the chilling; it lets the gluten relax, which keeps your crust tender, not tough!
Mixing the Perfect Strawberry Rhubarb Pie Filling
While that dough is chilling, we tackle the filling. In a big bowl, combine your chopped rhubarb and strawberries. Now, take your sugar and cornstarch and whisk them together in a separate smaller bowl until they are totally uniform—we don’t want lumps of cornstarch hiding in our fruit!
Gently toss that sugar mixture over the fruit until everything looks lightly dusted. Then add your lemon juice and vanilla. The most important part here is to let this sit for about 15 minutes. This gives the fruit a little soak time, which starts the juicing process. While that’s sitting, you can check out this great strawberry rhubarb pie recipe for more inspiration!
Assembling Your Lattice Crust Pie
Time to roll! Take one cold disk of dough and roll it out to about 12 inches on a lightly floured surface. Don’t panic about making a perfect circle; we are trimming later anyway. Carefully drape that into your 9-inch pie plate. Trim the overhang to about an inch, and pop that whole thing back in the fridge while you work on the top. You need that bottom crust chilled before it meets the juicy filling!
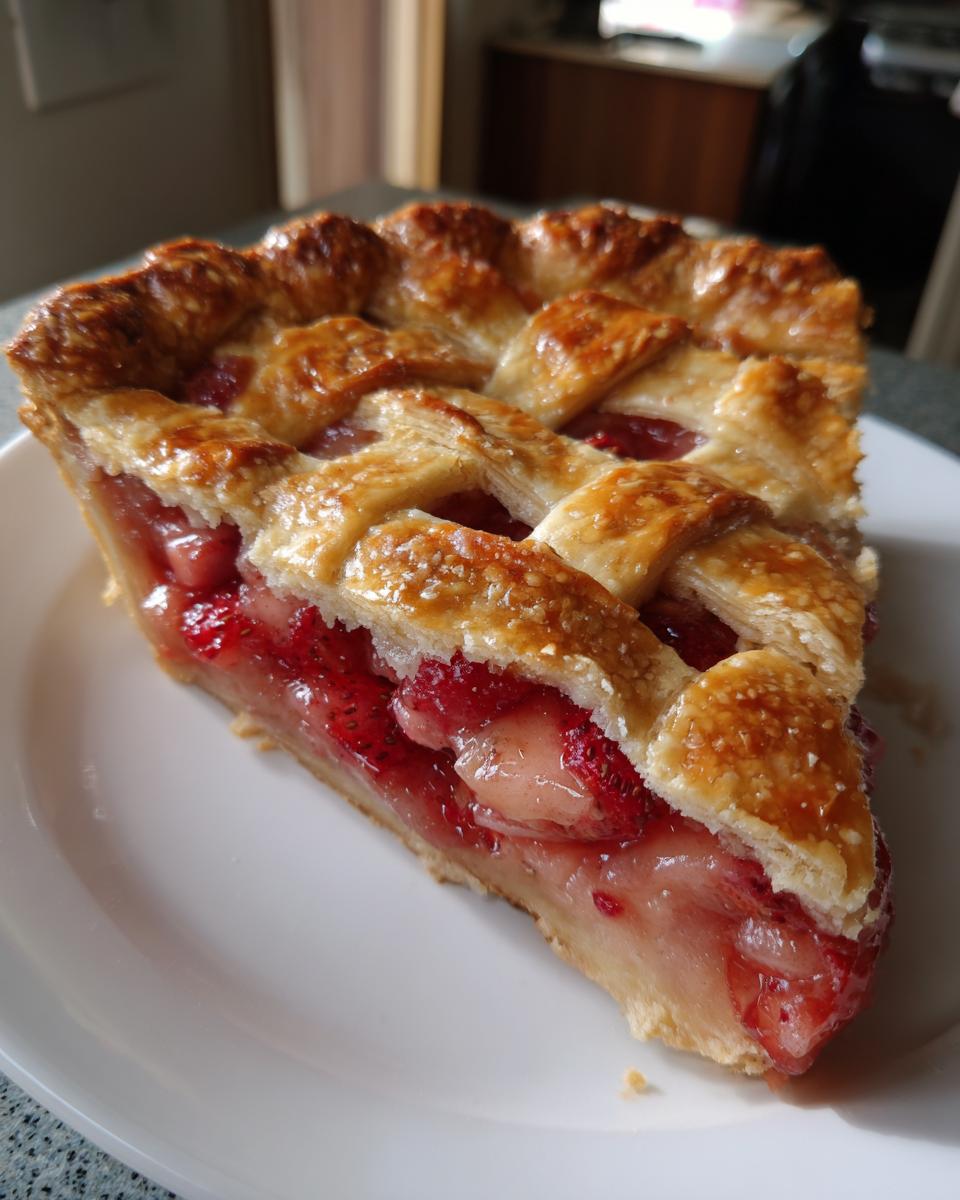
Roll out the second dough disk and cut it into even strips—I like mine about 3/4 inch wide for a nice, rustic lattice crust pie. Weave them over the filling. If you’ve never done a lattice, just start by laying strips parallel, then tuck back every other strip to weave the perpendicular ones over and under. Once you’ve done that, trim and crimp those edges together firmly to seal the whole thing up.
Baking and Setting: Key Steps for a Great Strawberry Rhubarb Pie
When it comes to baking this amazing strawberry rhubarb pie, we start hot! Brush the top crust with your egg wash—that’s just one egg mixed with a tiny bit of water—and sprinkle it generously with coarse sugar for that crunch. Have a rimmed baking sheet underneath to catch any inevitable drips!
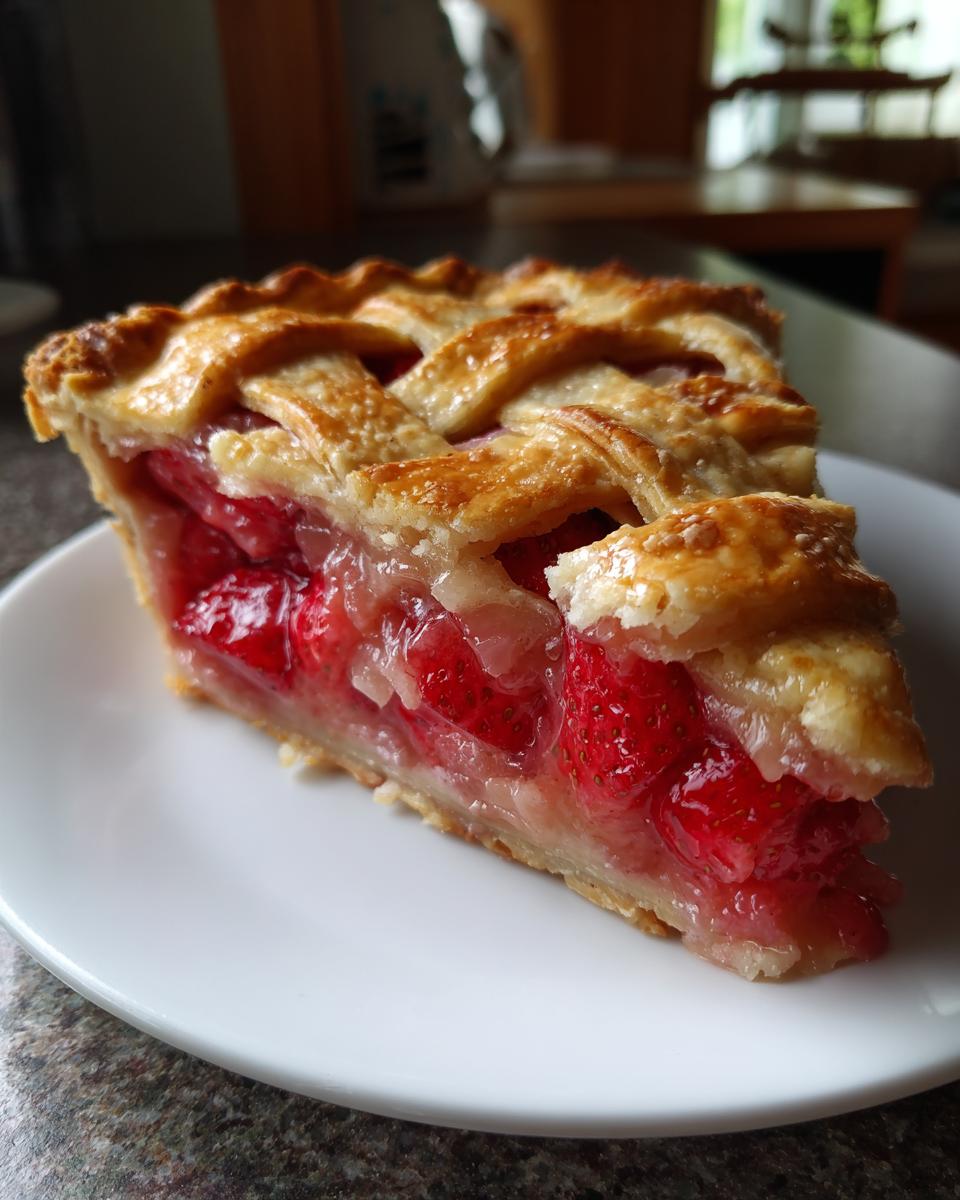
Bake first at 400 degrees F for 20 minutes. This blast of heat helps set the bottom crust quickly. Then, drop the oven temp down to 375 degrees F and keep baking for another 40 to 50 minutes. You know it’s done when the crust is deeply golden brown and you can see the filling bubbling slowly and thickly in the center holes. But here’s the absolute hardest part: you must, *must*, let this cool for at least four hours before you even think about slicing it. That time allows those starches to fully thicken the juices. If you slice it hot, you get soup!
Tips for Success When Making Strawberry Rhubarb Pie
Even with the best recipe, baking is kind of like chemistry, and sometimes you need a little troubleshooting charm. I’ve learned a few tricks over the years that keep this strawberry rhubarb pie tasting exactly how it should every single time. Remember, we are aiming for that perfect blend of tart and sweet in this beautiful strawberry rhubarb pie.
Ingredient Substitutions for Your Summer Fruit Pie
I always push for fresh because it tastes better, but let’s be real—sometimes we need to bake when the season isn’t quite perfect. If you have to use frozen fruit for this summer fruit pie, you absolutely can, but you need to take a couple of extra steps. Don’t thaw them first! Throw them in frozen, but plan on increasing your cornstarch measurement by about a tablespoon. Frozen fruit releases tons more water, so we need that extra thickening power.
If you happen to be out of cornstarch, don’t panic. You can use instant tapioca instead, measuring cup for cup, though I find cornstarch gives a slightly clearer, glossier finish that I prefer. If you’re curious how other seasonal fruit bakes up, check out my favorite flaky strawberry rhubarb pie guide link!
Alternative Topping: The Rhubarb Crumble Topping Option
While I absolutely love the look of my lattice top, sometimes you just want something rustic and easy, right? If you’re short on time or just prefer texture over decoration, ditch the lattice strips and go for a total crumble top! This is so easy; it just takes one cup of flour, a half-cup of brown sugar, a half-cup of rolled oats for bite, and you mix in a half-cup of cold butter until it looks like coarse crumbs.
Sprinkle that glorious rhubarb crumble topping right over your fruit filling before baking. It bakes up buttery and crunchy, and you still get that wonderful filling exposure since you don’t fully cover everything. It’s a fantastic alternative for a casual weeknight treat.
Serving Suggestions for This Classic Spring Pie
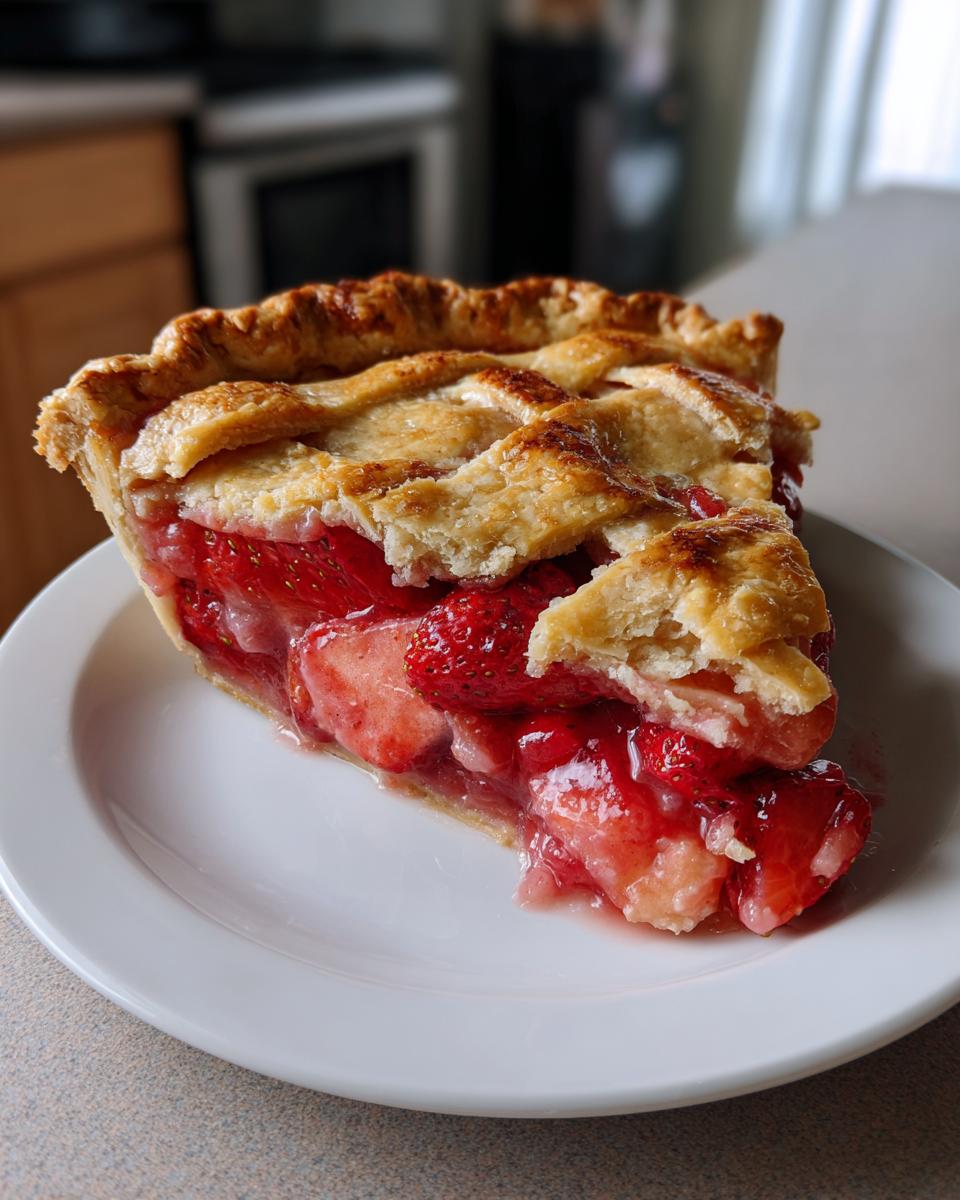
When you finally pull that gorgeous, golden classic spring pie out of the oven and wait those agonizing four hours for it to set, the presentation matters! This pie is so rich on its own, but a few simple additions just elevate it to something truly unforgettable.
My absolute favorite thing to serve alongside a warm slice is a big scoop of simple, high-quality vanilla bean ice cream. The cold creaminess against the sweet-tart filing is just heaven. If you’re feeling a little fancy, whip up some fresh heavy cream—it takes just minutes—and sweeten it with just a tiny bit of powdered sugar. That light airiness cuts through the richness of the all-butter crust perfectly, don’t you think?
If you’ve got leftover energy, you could even try whipping up some of these easy no-bake protein balls for a snack later, but honestly, this pie just needs cream or ice cream. Keep it simple!
Storage and Reheating Instructions for Leftover Pie
Now, that’s the tough part—having leftovers! Because this strawberry rhubarb pie is so famously juicy, you should never store the whole thing uncovered at room temperature. If you have leftovers, cover the entire pie loosely with plastic wrap or foil and keep it in the fridge. It lasts really well for about three days this way.
When you want a slice later, resist the urge to microwave the whole thing! That traps moisture and instantly ruins the flaky crust. Instead, just take the slice you want and warm it gently in a low oven—say, 300 degrees F—for about 10 minutes. That little toast reheats the fruit and crisps the bottom crust right up again. You can also eat it cold straight from the fridge, which I sometimes prefer when it’s really hot outside. If you need some chocolate inspiration for after, try my recipe for homemade chocolate pudding!
Frequently Asked Questions About Making Strawberry Rhubarb Pie
I know you might have a few lingering questions before you dive into rolling that dough. That’s totally normal when you’re aiming for the absolute best. I tried to cover everything in the main instructions, but whenever I share a recipe, these are the questions that pop up the most. Don’t let any little doubt stop you from baking this! If you’re looking for quick savory ideas after all that sweet baking, you should definitely check out my BLT pasta salad recipe.
Can I use frozen rhubarb or strawberries in this recipe?
Yes, you absolutely can, especially if it means you get to enjoy this pie outside of peak season! However, you usually need to account for extra liquid released during baking. If you use frozen fruit, skip the 15-minute rest time where the fresh fruit sits in the sugar mixture. Just toss the frozen fruit right away with the sugar/cornstarch blend. I also recommend bumping your cornstarch up by an extra tablespoon just to be totally safe against a runny filling. You might also need about 5 to 10 extra minutes in the oven, too.
How do I know when my pie is fully baked?
This is crucial! A lot of folks pull their pies out too early hoping to prevent the crust from burning, but that just results in watery fruit. You need to look past the crust color initially. The true sign that your strawberry rhubarb pie is done is the bubbling. You should see the filling bubbling slowly and thickly through the vents or any gaps in your lattice. It shouldn’t look thin or splashy; it should look like thick gravy slowly roiling. On top of that, the crust should be a deep, rich golden brown—not pale yellow! Remember, those last 10 minutes of baking are essential for setting the juices.
What is the best way to prevent a soggy bottom crust?
Ah, the dreaded soggy bottom! We fight this battle with temperature. Since the fruit filling heats up the bottom crust while the top is exposed to the direct heat source above, we want to concentrate heat on the bottom first. The best thing you can do is place your pie right on the lowest rack in your oven for the first 20 minutes while it bakes at that higher 400 degrees temperature. This blast of heat cooks the bottom pastry quickly, setting it before the juices have a chance to seep in and soak it. After you drop the temperature, you can move it to the middle rack, but that initial lower placement makes a huge difference.
Nutritional Snapshot of This Homemade Rhubarb Dessert
Okay, so we’ve made what is arguably the best dessert of the season, and naturally, you might be wondering about the numbers behind that glorious slice. I want to be super clear here: because this is made from scratch and depends on how tart your fruit is, these are just estimates based on my standard recipe measurements. This isn’t professional lab work, but it gives you a general ballpark figure for enjoying this wonderful homemade rhubarb dessert.
When you slice this baby into eight generous servings, here is generally what you’re looking at per piece. If you are whipping up things like my protein cheesecake on the side, you’ll need to factor those in separately, of course!
- Calories: About 450
- Sugar: Roughly 45 grams (Remember, a lot of this is natural fruit sugar!)
- Fat: Around 25 grams (Hello, all-butter crust!)
- Carbohydrates: About 58 grams
- Protein: A modest 5 grams
See? It’s a treat, and rightfully so! But honestly, looking at that flaky crust and that sweet-tart filling, I think it’s a number worth happily accepting once in a while. Enjoy every single bite—you earned it!
Share Your Seasonal Baking Recipes Success
Well, my friend, that’s it! You’ve done the work, you’ve mastered the cold butter, and now you have the most perfect, seasonally appropriate dessert sitting on your counter. I am so excited for you to finally slice into that beautiful strawberry rhubarb pie.
When you do finally cut that first piece—and I know it’s hard to wait those four hours!—I truly want to hear about it! Did your crust shatter the way mine does? Did you manage to get that filling to set perfectly? Don’t be shy! Drop a comment below and let me know how you liked this recipe. A quick star rating means the world to me and helps others see that this recipe is worth their time, too.
If you take a picture of your finished beautiful pie, especially if you went for the fancy lattice, tag me on social media! Seeing your creations is honestly the best part of my day, and it reminds me why I love sharing these family-tested recipes. If you need something savory for dinner after all that fruit, perhaps try my recipe for an easy, creamy, cheesy vegetable casserole!
PrintThe Absolute Best Strawberry Rhubarb Pie with Flaky Crust
This recipe delivers the ultimate summer dessert: a strawberry rhubarb pie with a perfectly balanced sweet-tart filling and a ridiculously flaky, all-butter crust. Follow these simple steps for award-winning results.
- Prep Time: 45 min
- Cook Time: 1 hr 5 min
- Total Time: 3 hr 50 min
- Yield: 8 servings 1x
- Category: Dessert
- Method: Baking
- Cuisine: American
- Diet: Vegetarian
Ingredients
- 2 1/2 cups all-purpose flour
- 1 teaspoon salt
- 1 cup (2 sticks) unsalted butter, very cold and cubed
- 1/2 cup ice water, plus more if needed
- 4 cups fresh rhubarb, chopped into 1-inch pieces
- 4 cups fresh strawberries, hulled and halved or quartered
- 1 1/2 cups granulated sugar (adjust based on fruit tartness)
- 1/4 cup cornstarch (secret for no runny filling)
- 1 tablespoon lemon juice
- 1 teaspoon vanilla extract
- 1 large egg, beaten with 1 teaspoon water (for egg wash)
- 1 tablespoon coarse sugar, for sprinkling
Instructions
- Prepare the Pie Crust: In a large bowl, whisk together the flour and salt. Cut in the cold butter using a pastry blender or your fingers until the mixture resembles coarse crumbs with some pea-sized pieces of butter remaining. Gradually add the ice water, one tablespoon at a time, mixing until the dough just comes together. Do not overmix. Divide the dough in half, form each half into a disk, wrap in plastic, and chill for at least 1 hour.
- Prepare the Filling: In a separate bowl, combine the chopped rhubarb and strawberries. In a small bowl, whisk together the granulated sugar and cornstarch. Pour the sugar mixture over the fruit. Add the lemon juice and vanilla extract. Gently toss to coat everything evenly. Let the filling sit for 15 minutes while you roll out the dough.
- Assemble the Bottom Crust: On a lightly floured surface, roll out one disk of dough into a 12-inch circle. Carefully transfer the dough to a 9-inch pie plate. Trim the edges, leaving a 1-inch overhang. Chill the crust while you prepare the top.
- Create the Lattice Top: Roll out the second disk of dough. Cut the dough into even strips (about 3/4 inch wide). Weave the strips over the filling to create a lattice pattern. Trim the strips and crimp the top and bottom crust edges together to seal.
- Prevent Runny Filling (Secret Tip): If your fruit mixture seems very juicy after sitting, gently drain off any excess liquid before pouring the fruit into the bottom crust. The cornstarch will thicken the rest during baking.
- Bake the Pie: Brush the lattice top with the egg wash and sprinkle generously with coarse sugar. Place the pie on a baking sheet (to catch drips). Bake at 400 degrees F (200 degrees C) for 20 minutes. Reduce the oven temperature to 375 degrees F (190 degrees C) and continue baking for another 40 to 50 minutes, or until the crust is golden brown and the filling is bubbling thickly.
- Cool Completely: This step is crucial for a set filling. Let the pie cool on a wire rack for at least 4 hours before slicing. This allows the starches to fully set the juices.
Notes
- For the flakiest crust, keep all your butter and water extremely cold. Work quickly to prevent the butter from melting.
- If the crust edges brown too quickly during baking, cover them loosely with strips of aluminum foil.
- If you prefer a crumble topping instead of lattice, use 1 cup flour, 1/2 cup brown sugar, 1/2 cup rolled oats, and 1/2 cup cold butter mixed until crumbly.
Nutrition
- Serving Size: 1 slice
- Calories: 450
- Sugar: 45g
- Sodium: 250mg
- Fat: 25g
- Saturated Fat: 15g
- Unsaturated Fat: 10g
- Trans Fat: 0g
- Carbohydrates: 58g
- Fiber: 3g
- Protein: 5g
- Cholesterol: 60mg