
Oh, I have something truly special for you today! If you are looking for that perfect little sweet bite that takes you right back to church socials or Grandma’s candy dish, this is it. We are diving deep into the world of cream cheese mints. Forget complicated tempering or hours over a stove—these are the absolute easiest, melt-in-your-mouth treats you can make with zero baking required! Here at DelishCraze, founder Olivia Rosewood is all about reliable home cooking, and these classic candies prove that simple ingredients, handled with love, result in the most delightful treats. Trust me, once you try this homemade cream cheese mints recipe, you’ll never go back to store-bought.
- Why Our Easy Cream Cheese Mints Recipe is a Must-Try
- Gathering Ingredients for Classic Cream Cheese Mints
- Step-by-Step Guide to Making Perfect Cream Cheese Mints
- Expert Ingredient Notes and Substitutions for Cream Cheese Mints
- Tips for Success When Making Homemade Cream Cheese Mints
- Storage and Make Ahead Party Candy Tips for Cream Cheese Mints
- Answering Your Cream Cheese Mints Questions (FAQ)
- Estimating the Nutritional Value of Cream Cheese Mints
- Share Your Melt-in-Your-Mouth Mints Creations
- Estimating the Nutritional Value of Cream Cheese Mints
- Share Your Melt-in-Your-Mouth Mints Creations
Why Our Easy Cream Cheese Mints Recipe is a Must-Try
Honestly, what’s better than a quick homemade candy that tastes incredibly fancy? These easy cream cheese mints fly off the plate at every single event I bring them to! The best part, hands down, is that melt in your mouth texture. They are so light and creamy; you barely even have to chew them before they dissolve. They are truly the best simple homemade candy.
You don’t need specialty equipment either, which is why I love them for speedy holiday prep. We aren’t going deep into convection ovens or tricky stages here—this is a classic no bake cream cheese candy that is ready for shaping almost instantly. Whether you need easy holiday mints for Christmas or elegant little bites for a bridal shower, you can change the color and shape to match anything. Since this recipe is so foolproof, you can even whip up a batch alongside things like my easy 3-ingredient fudge for a gorgeous candy spread!
Gathering Ingredients for Classic Cream Cheese Mints
When you’re making something this simple, the honesty of the ingredients really shines through. You only need four main things, which is why you can whip these up anytime! I always make sure to grab the best quality I can find, especially for the flavor components. Because we want that perfectly smooth result—no grit, please!—we’re aiming for a super fine mixture.
Here is exactly what you need for this homemade cream cheese mints recipe, yielding about six dozen little treats:
- 8 ounces full-fat cream cheese, make sure it’s totally softened!
- 4 cups powdered sugar, sifted really well.
- 1 teaspoon peppermint extract (the good stuff!).
- 1-2 drops food coloring (only if you are making colored mints).
Getting that cream cheese just right—soft but not melty—is crucial for getting the right dough texture. If you’re planning ahead for your next chocolate platter, you can easily dip these after they dry by referring to my guide on the easy chocolate dip recipe!
Step-by-Step Guide to Making Perfect Cream Cheese Mints
Okay, this is where the magic happens! Because we’re dealing with four cups of powdered sugar, the first step is critical for keeping your kitchen counters clean. Seriously, don’t skip my mixing advice, or you’ll be wearing sugar for the rest of the afternoon!
Mixing the Cream Cheese Mints Dough
First things first: grab your softened cream cheese and put it right into your stand mixer bowl, or grab your favorite hand mixer. We want that cream cheese nice and smooth before we introduce the sugar. Once it looks creamy, start adding that sifted powdered sugar slowly. And here is the big secret: start your mixer on the absolute lowest speed possible! If you start high, you release a giant cloud of sugar dust everywhere. Ask me how I know! Once the sugar is mostly incorporated and no longer looks like a powder storm has hit your kitchen, you can crank it up to medium.
Next, drizzle in that teaspoon of peppermint extract. Mix it until everything comes together into one big, stiff dough. It shouldn’t be sticky anymore—it should feel pliable, almost like play-dough. If it’s still super tacky, just add a tablespoon or two more of powdered sugar until it holds its shape nicely.
Coloring and Shaping Your Cream Cheese Mints
Now you get to play dress-up with your cream cheese mints! This is where we add color to our colored mint candy recipe. If you want plain white mints, skip ahead to rolling them. If you want pastel colors, gently tear off pieces of the dough—maybe a quarter of the batch—place them in separate little bowls, and gently mix in one tiny drop of food coloring into each portion. You want a uniform color, so mix until you don’t see any streaks.
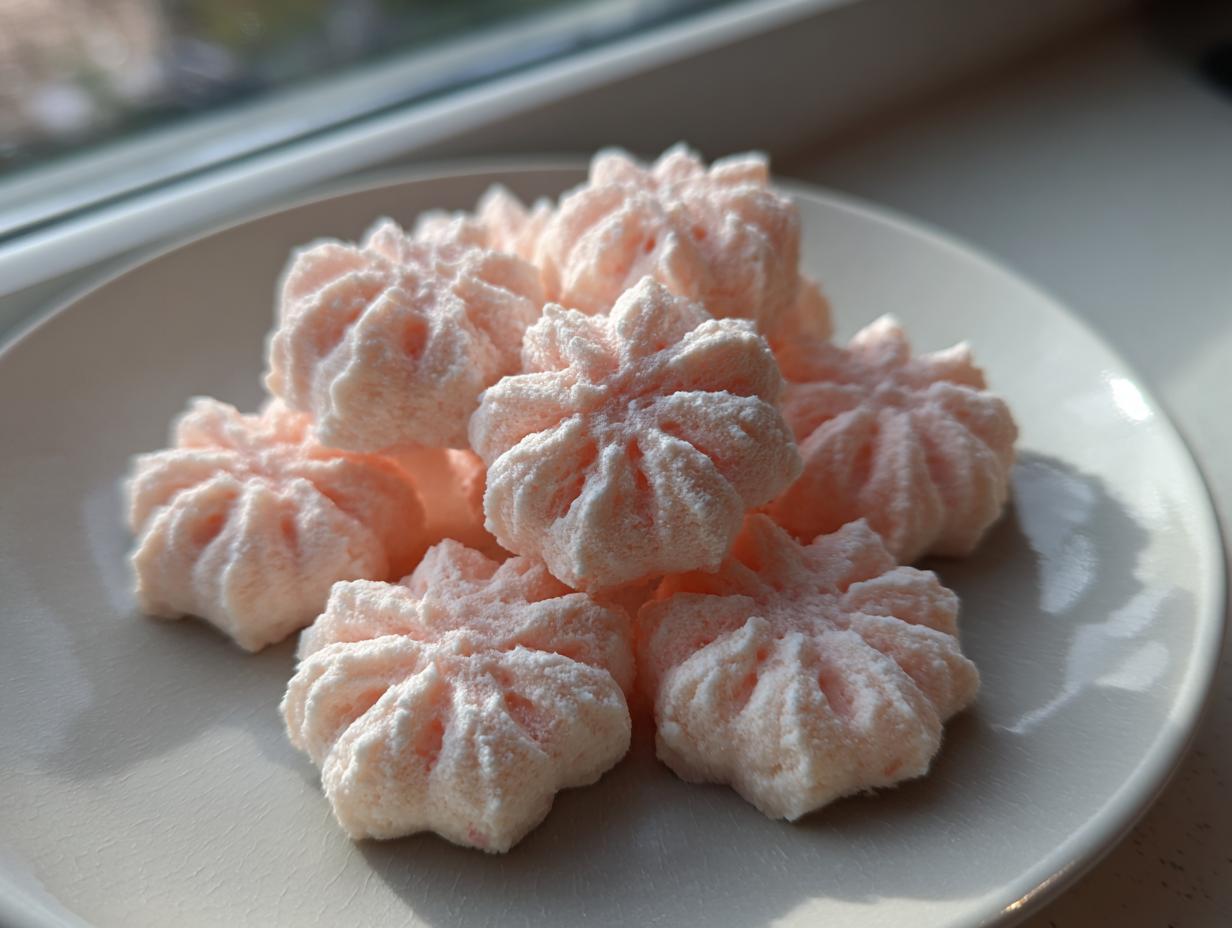
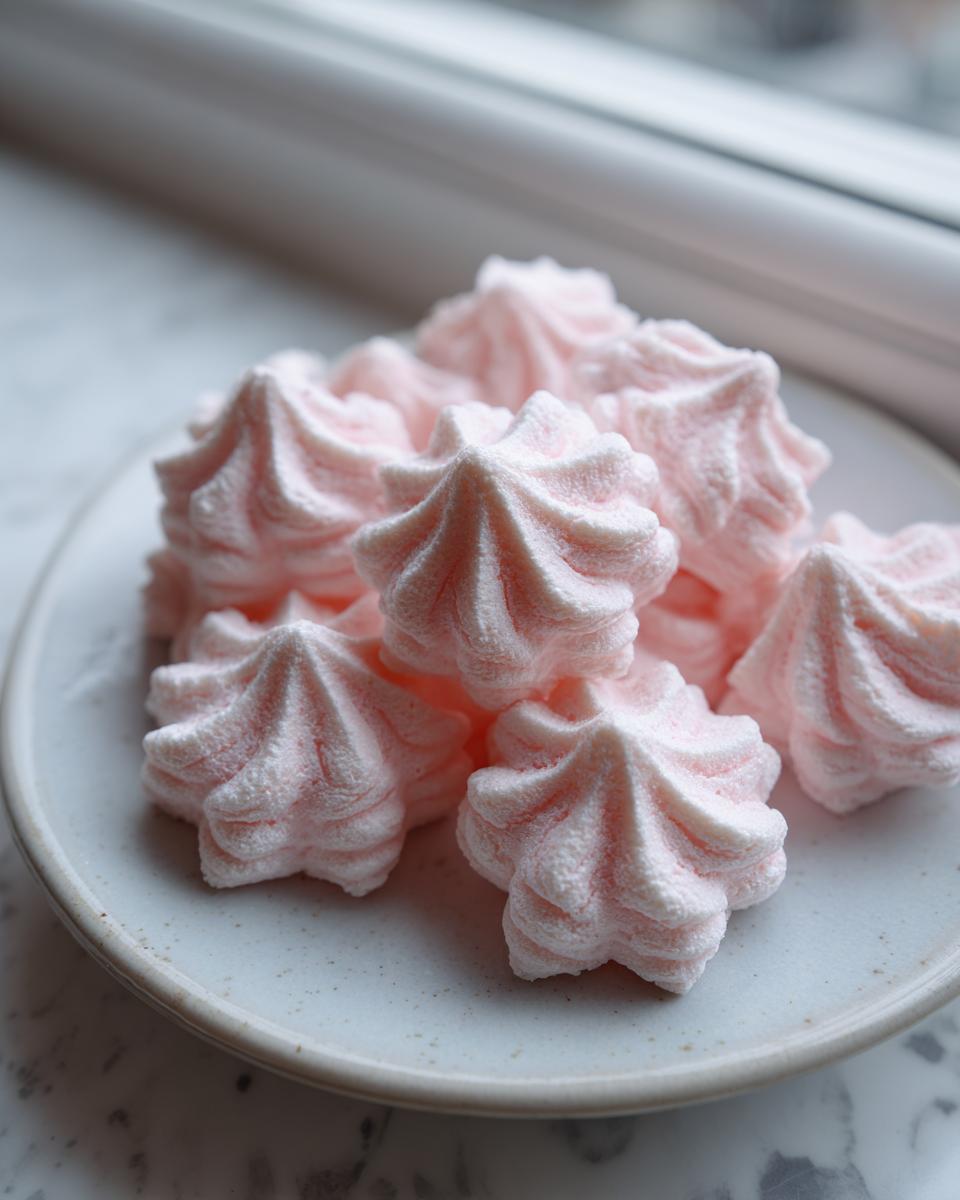
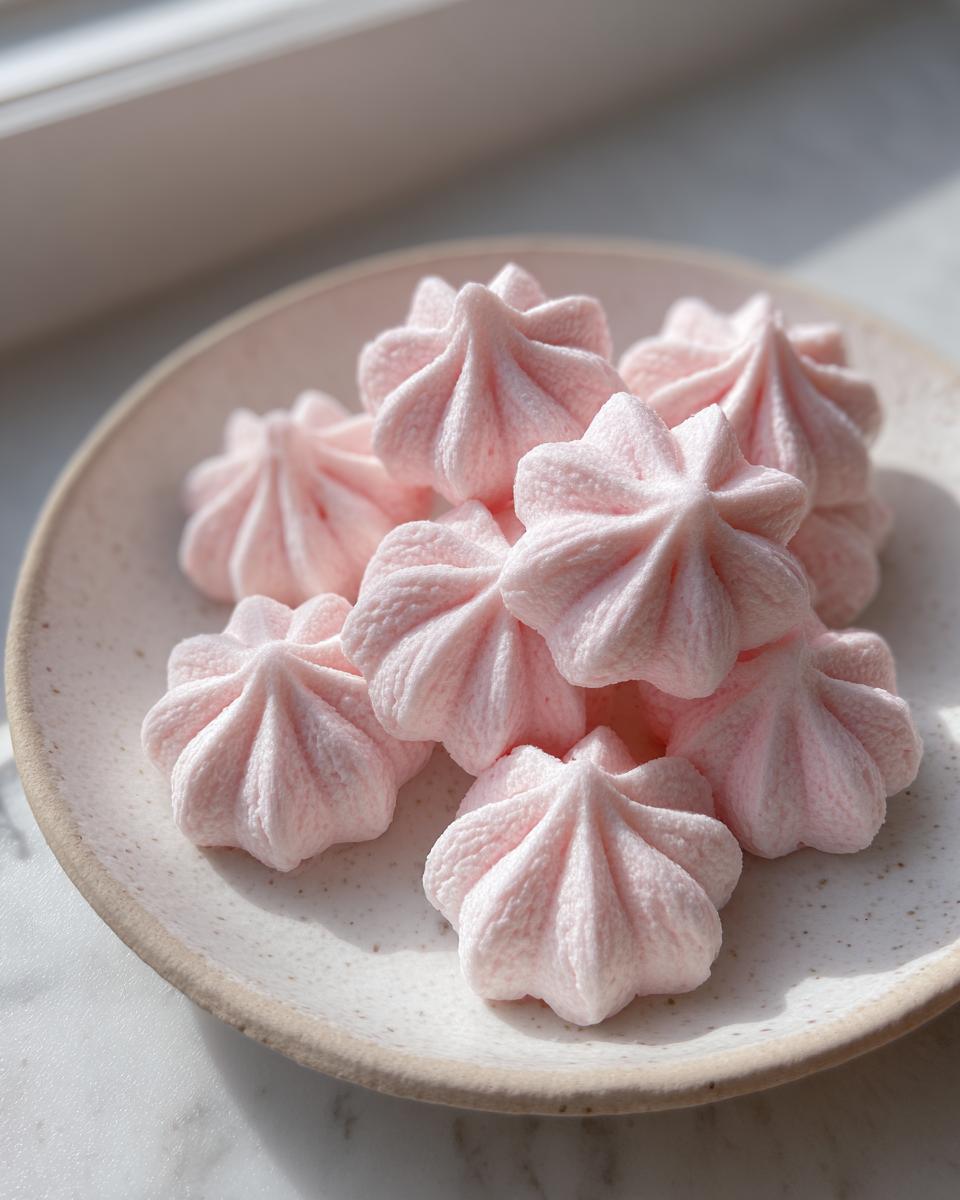
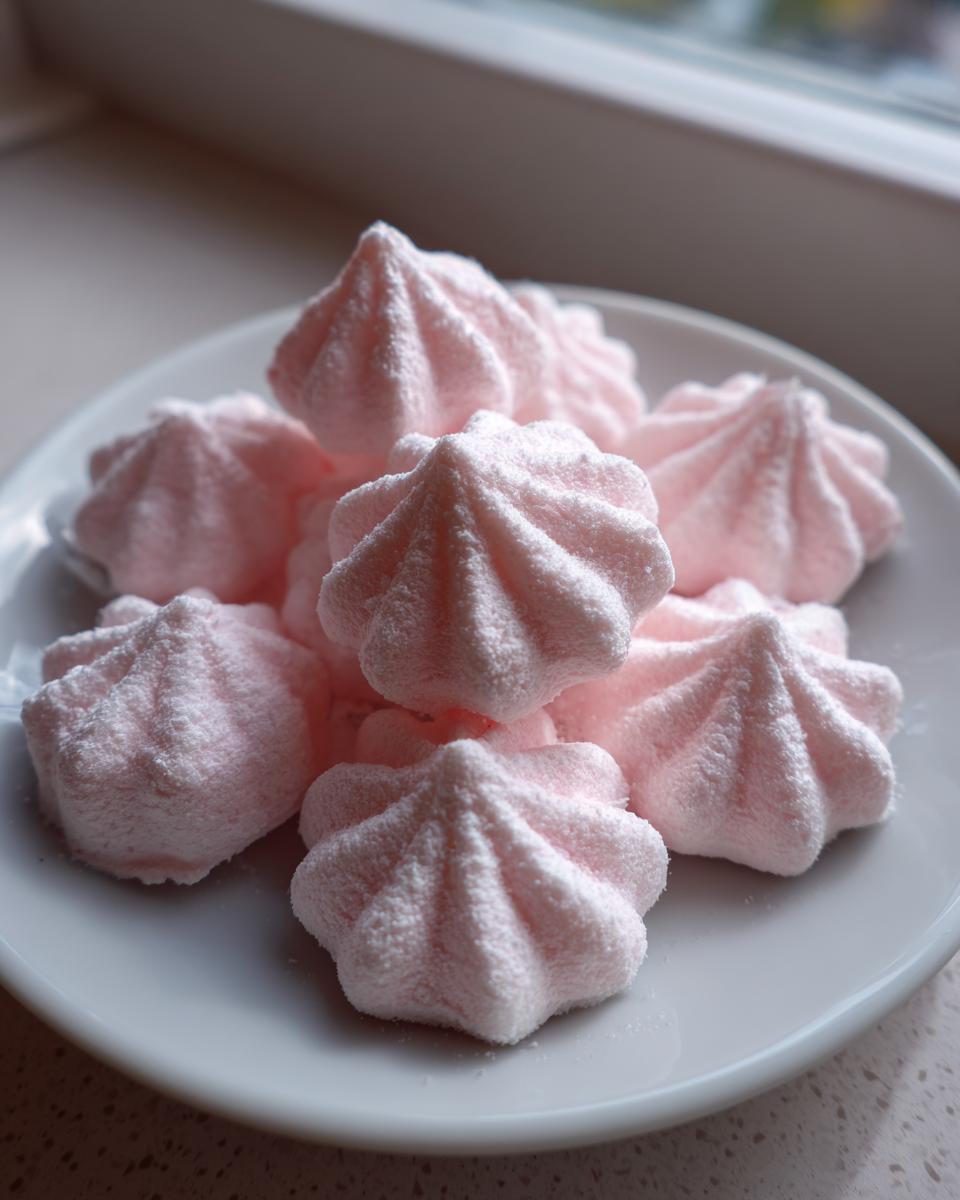
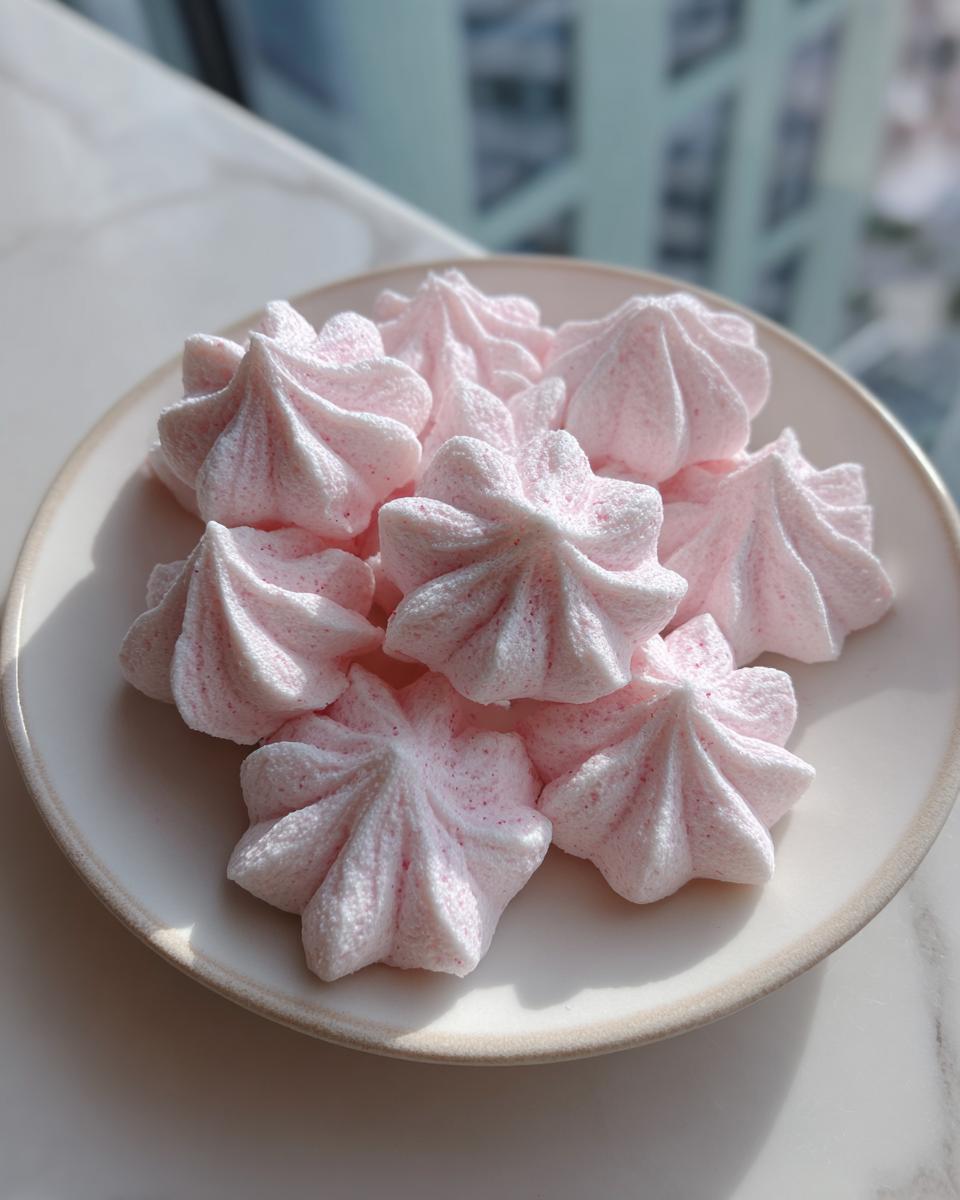
You have three main ways to shape them, depending on your mood. The old fashioned cream cheese mints look usually comes from rolling small teaspoon-sized balls and then gently flattening the top with the tines of a fork. For a super elegant look, use a silicone candy mold; these are great for wedding mints! Just press the dough firmly into the crevices. For a professional flourish, you can pipe the mixture, just like frosting, using a star tip. If you need a refresher on piping techniques, my guide on sugar cookie icing that hardens has some great piping tips that translate perfectly here!
The Essential Drying Time for Cream Cheese Mints
This is the step everyone wants to rush, but resist the urge! The payoff is huge if you let them rest. Lay all your shaped homemade cream cheese mints out on a parchment-lined baking sheet. They need to sit out, uncovered, at room temperature for at least four hours. Honestly, overnight is even better.
This resting period is what transforms that soft dough into a firm, melt in your mouth mints confection. If you don’t let them dry, they’ll stay gooey and stick to everything when you try to store them. Don’t worry about covering them; we want that moisture to evaporate. If humidity is high where you are, just give them an extra hour or two. For more great simple candy ideas, check out these steps from Skip To My Lou on how to make cream cheese mints!
Expert Ingredient Notes and Substitutions for Cream Cheese Mints
Since this recipe relies on only a few components to achieve that signature texture, we really need to pay attention to quality. If you use subpar ingredients, well, you end up with substandard results, and we don’t want that for our beautiful cream cheese mints!
First, can we talk about the cream cheese for a second? You absolutely must use the full-fat bricks. Please, avoid the low-fat or Neufchâtel versions unless you are trying to achieve a specific, maybe slightly less dreamy, outcome. The fat content in full-fat cream cheese is what helps give these the body they need so they don’t completely dissolve into a puddle while they dry. If you’re looking for other creamy recipes that depend on good quality dairy, my creamy horseradish sauce relies on the same principle!
Now, let’s talk flavor customization! While peppermint is the classic for making these treats taste like actual mints, these are so versatile. If you want to branch out beyond the standard peppermint cream cheese treats, go for it! You can easily make flavored cream cheese mints by swapping out the extract.
Try these swaps:
- For a bright, citrusy flavor, use 1/2 teaspoon of high-quality lemon extract.
- Orange extract also works beautifully, especially if you are making these for springtime parties.
- You can even use almond extract for a different kind of sweet richness.
What if, despite your best efforts, your dough is still feeling a bit too sticky after mixing? This happens, especially if your cream cheese was slightly warmer than intended or if the humidity in your kitchen is running high. Don’t panic and definitely don’t throw it out! Just add a tablespoon of extra sifted powdered sugar at a time until the dough firms up just enough to handle. It should feel firm enough that when you pick it up, it doesn’t immediately squash through your fingers.
Tips for Success When Making Homemade Cream Cheese Mints
Even though this is one of the easiest no bake cream cheese candy recipes out there, there are always a few little tricks I’ve picked up over the years that really elevate these from ‘good’ to ‘the best’!
First, let’s talk about the environment. Since these cream cheese mints rely on air drying to get that perfect crisp outside and soft center, humidity is your enemy. If you live somewhere super humid, like I do sometimes in the summer, you might need to extend that drying time significantly. I’ve found that on a sticky day, they need a full 12 hours instead of just four to firm up properly. If you notice they still feel tacky after 6 hours, just let them sit longer. You want them to feel solid, not gummy.
Secondly, when you are shaping them—whether you are rolling balls or pressing them into molds—work quickly! The warmth from your hands transfers to the dough, making it softer and stickier as you go. If you are working with a large batch, keep the dough you aren’t actively shaping tucked away in the fridge. Pull out just enough dough to roll/shape for 20 minutes, then return the rest to keep it cool and firm. This keeps your final products looking clean and sharp.
For those of you who love the classic look, here’s my secret for the smoothest finish: before you roll or press, give your hands a tiny coat of shortening or non-stick cooking spray. Just rub a tiny bit between your palms. It stops the dough from sticking to you, which keeps the surface of your old fashioned cream cheese mints perfectly smooth and free of fingerprints or lumps. It’s a small step, but it makes a huge difference when you are trying to make them look really pretty for serving!
Finally, if you are making these for a big event like a wedding, remember they freeze beautifully! Once they are fully dried and firm, arrange them in a single layer in a quality freezer-safe container, interspersing layers with wax paper. They last for up to three months, making them the ultimate make ahead party candy. When you need them, just thaw them on the counter for a few hours. For more inspiration on making delicious, easy treats that last, take a peek at the secrets behind my best soft chewy homemade caramels.
For some excellent alternative ideas on presentation, especially for parties, check out how the folks over at Northern Yum handle their shaping techniques here!
Storage and Make Ahead Party Candy Tips for Cream Cheese Mints
Since these little gems are perfect for parties, showers, and holidays, you absolutely need to know how to store them so they are always ready when you need them! That’s the joy of them being make ahead party candy—you can prep them way in advance and forget about them until the big day arrives. Consistency is everything, so you have to treat the finished product gently.
The most important thing to remember is that they must be fully dried before they go into any container. If they are even slightly tacky, they will melt into each other and become one big, sad blob of peppermint goo. Once you are certain they are firm all the way through (remember that crucial overnight drying time?), you have two main storage routes.
For short-term storage, maybe just a few days before your event, you can keep them in an airtight container at cool room temperature. I usually layer them between pieces of wax paper just to be extra safe against any sticking. They stay perfectly fine like this for about a week, retaining that lovely soft interior.
Now, for the real lifesaver: freezing! Yes, you can totally freeze your cream cheese mints, and they freeze like a dream. Once they are fully dry and set, arrange them in a single layer in a freezer-safe container. I like to use one of those rigid plastic containers and put a sheet of wax paper down first, then one layer of mints, then another sheet of wax paper, and repeat. This prevents any pressure from squishing them.
They last beautifully in the freezer for up to three months! When it’s time to use them, just take the container out of the freezer while still sealed and let it sit on the counter for about four hours to come to room temperature. Don’t open it until they are at room temperature, or condensation could ruin that nice dry coating. Prep weeks ahead and save yourself loads of stress right before the party! If you want to see how Heart’s Content Farmhouse handles storage on their batch, you can check out their notes here. For more tips on making party food ahead of time, check out my list of make ahead party candy ideas!
Answering Your Cream Cheese Mints Questions (FAQ)
I love that so many of you are jumping into making these! It’s always fun when a recipe crosses over from simple snack to essential—especially for big events. Since these cream cheese mints are such a classic, I get a ton of questions about variations and troubleshooting. Here are a few of the most common things people ask me about pulling off the perfect batch of this no bake cream cheese candy.
Can I use salted butter instead of cream cheese for cream cheese mints?
That’s a great question, and it really gets into the history of these candies! You know, you mentioned the term butter mints recipe. Old-fashioned butter mints are a close cousin to these, but they rely solely on butter and confectioners’ sugar, often with a much firmer texture once dried. When we use cream cheese, we get that signature dense, yet creamy, melt-in-your-mouth quality.
If you try to swap the cream cheese out completely for butter, you are technically making a different candy altogether! The cream cheese adds moisture and a slight tang that cuts through the intense sweetness of the sugar in a way butter just can’t replicate. Stick with the cream cheese for this recipe if you truly want that soft, luxurious mouthfeel we are aiming for here. If you’re looking for other great creamy, easy recipes, check out my guide to easy whipped hot chocolate recipe!
How do I get the best results when using candy molds for cream cheese mints?
Candy molds are fantastic for making these look super professional, especially if you are making wedding mints recipe favorites where presentation is everything! The key to getting those beautiful edges and clean releases is all about temperature and handling. You want the dough to be firm, but not rock hard.
My biggest tip for clean releases when using cream cheese mints with molds is this: chill your dough for about 15 to 20 minutes before you try to press it. You want it cool enough so it holds its shape firmly when you press, but still pliable enough that it smooshes right down into every tiny corner of the mold design. Once you press it firmly—really pack it in there—gently turn the mold over onto your parchment-lined sheet and tap the back of the mold once or twice. They should pop right out looking gorgeous and intact!
Are these cream cheese mints suitable for wedding mints recipe needs?
Oh, absolutely! They are one of the most popular homemade candies for weddings, engagement parties, and showers for a reason. They look so elegant and refined, especially if you get creative with your shaping! Because we can control the color so easily, they are the perfect little dessert to match whatever fancy color scheme your reception has going on.
I recommend using gel food coloring instead of liquid drops if you are aiming for vibrant colors like deep blues or rich pinks, as the liquid coloring can sometimes add too much moisture back into the dough, which we worked so hard to dry out! Stick to white, pale pink, pale blue, or even a light green for classic pastels. If you do a lovely pale pink or ivory and press them into a pretty shell mold, they look just as good as anything store-bought, and everyone loves knowing they are homemade!
Estimating the Nutritional Value of Cream Cheese Mints
Since these are a sweet treat made mostly of dairy and sugar, we know they are best enjoyed in moderation—but it’s always good to know what you’re working with, right? Keep in mind that since these are simple homemade candy items, the nutrition can shift based on the specific brand of cream cheese or how much sugar you might need to add if your dough is sticky, so these numbers are just an estimate based on the core recipe.
For one single mint (based on a yield of about 6 dozen):
- Calories: Approximately 75
- Sugar: Roughly 14g (mostly from the powdered sugar!)
- Fat: About 3g total
- Protein: About 1g
They are definitely a decadent little bite! Remember this is a homemade treat, not a health food, but enjoying one alongside a cup of coffee is totally my favorite indulgence.
Share Your Melt-in-Your-Mouth Mints Creations
I just love seeing how you all take these simple instructions and turn them into something beautiful for your own gatherings. Seriously, I want to see every fork-pressed diamond, every perfectly molded flower, and every pastel batch you create!
Did you use peppermint or try one of the flavor extracts I mentioned? Were you making these for a special event like one of my favorite tiramisu cookies recipes calls for?
Please leave a rating below, and definitely drop a comment telling me which color or shape you chose for your batch of melt in your mouth mints. I read every single one, and sharing your results inspires me to keep developing these easy classics!
Estimating the Nutritional Value of Cream Cheese Mints
Since these are a sweet treat made mostly of dairy and sugar, we know they are best enjoyed in moderation—but it’s always good to know what you’re working with, right? Keep in mind that since these are simple homemade candy items, the nutrition can shift based on the specific brand of cream cheese or how much sugar you might need to add if your dough is sticky, so these numbers are just an estimate based on the core recipe.
For one single mint (based on a yield of about 6 dozen):
- Calories: Approximately 75
- Sugar: Roughly 14g (mostly from the powdered sugar!)
- Fat: About 3g total
- Protein: About 1g
They are definitely a decadent little bite! Remember this is a homemade treat, not a health food, but enjoying one alongside a cup of coffee is totally my favorite indulgence.
Share Your Melt-in-Your-Mouth Mints Creations
I just love seeing how you all take these simple instructions and turn them into something beautiful for your own gatherings. Seriously, I want to see every fork-pressed diamond, every perfectly molded flower, and every pastel batch you create!
Did you use peppermint or try one of the flavor extracts I mentioned? Were you making these for a special event like one of my favorite tiramisu cookies recipe easy chewy mascarpone calls for?
Please leave a rating below, and definitely drop a comment telling me which color or shape you chose for your batch of melt in your mouth mints. I read every single one, and sharing your results inspires me to keep developing these easy classics!
PrintEasy Cream Cheese Mints: Melt-in-Your-Mouth Homemade Candy Recipe

Make classic cream cheese mints that melt in your mouth. This simple, no-bake recipe uses few ingredients and is perfect for holidays, weddings, or any celebration. You can easily color these homemade candies to match your event theme.
- Prep Time: 15 min
- Cook Time: 0 min
- Total Time: 4 hr 15 min
- Yield: About 6 dozen 1x
- Category: Candy
- Method: No Bake
- Cuisine: American
- Diet: Vegetarian
Ingredients
- 8 ounces cream cheese, softened
- 4 cups powdered sugar, sifted
- 1 teaspoon peppermint extract
- 1–2 drops food coloring (optional, for color customization)
Instructions
- Combine the softened cream cheese, powdered sugar, and peppermint extract in a large bowl.
- Mix the ingredients using a hand mixer or stand mixer until a stiff dough forms. Start on low speed to prevent the sugar from flying out, then increase speed to medium.
- If you want colored mints, divide the dough and mix in a few drops of food coloring until the color is uniform in each portion.
- Shape the dough immediately. You can roll small balls and flatten them with a fork, press the dough into candy molds, or pipe the mixture using a pastry bag fitted with a star tip.
- Place the shaped mints on a baking sheet lined with parchment paper.
- Allow the cream cheese mints to dry uncovered at room temperature for at least 4 hours, or preferably overnight, until they firm up.
- Store the finished, dry mints in an airtight container at room temperature for up to one week, or freeze them for longer storage.
Notes
- Use full-fat cream cheese for the best texture. Ensure it is fully softened to avoid lumps in the dough.
- Sifting the powdered sugar prevents lumps in your final mints.
- For different flavors, substitute the peppermint extract with 1/2 teaspoon of lemon extract or orange extract.
- If the dough feels too sticky after mixing, add powdered sugar one tablespoon at a time until it reaches a workable consistency.
Nutrition
- Serving Size: 1 mint
- Calories: 75
- Sugar: 14g
- Sodium: 15mg
- Fat: 3g
- Saturated Fat: 2g
- Unsaturated Fat: 1g
- Trans Fat: 0g
- Carbohydrates: 12g
- Fiber: 0g
- Protein: 1g
- Cholesterol: 10mg