
Oh my goodness, is there anything that beats the smell of warm, freshly baked bread filling your whole house? I swear that aroma instantly lowers my stress levels! If you’ve ever been intimidated by making yeast bread, please stop worrying right now. This recipe is truly The Ultimate Easy Yeast Bread, designed to be totally foolproof and give you that classic, fluffy loaf in half the time. I’m Olivia Rosewood, and after years spent designing logos, I came back to the kitchen to make delicious food accessible, not complicated. This surprisingly quick method guarantees a soft sandwich loaf, even if you’ve never touched dough before!
- Why This Easy Yeast Bread Recipe Works for Everyone
- Ingredients for Your Ultimate Easy Yeast Bread
- Simple Bread Making: Step-by-Step Instructions for Yeast Bread
- Tips for Foolproof Bread Baking Success
- Storage and Reheating Instructions for Homemade Bread From Scratch
- Variations on This Simple Bread Making Recipe
- Frequently Asked Questions About Baking Yeast Bread
- Estimated Nutritional Profile of This Yeast Bread
- Share Your Ultimate Easy Yeast Bread Creation
Why This Easy Yeast Bread Recipe Works for Everyone
I get it—baking that first batch of homemade yeast bread feels like a huge step. But honestly, this formula is the ultimate cheat code for beginner bread baking! Because we’re using instant yeast, we skip the long wait times, making this a fantastic quick yeast bread option. You get all the satisfaction of baking from scratch without the all-day commitment. Trust me, this recipe cuts out all the guesswork!
- It’s forgiving! Even if you don’t weigh your flour perfectly, it comes out great.
- We rely on proven techniques for a manageable dough—no sticky messes here.
- It produces that incredibly soft, melt-in-your-mouth texture we all crave.
- You can have fresh bread ready faster than driving to the store! If you want to branch out into other quick baked goods, check out my guide on making the best homemade English muffins.
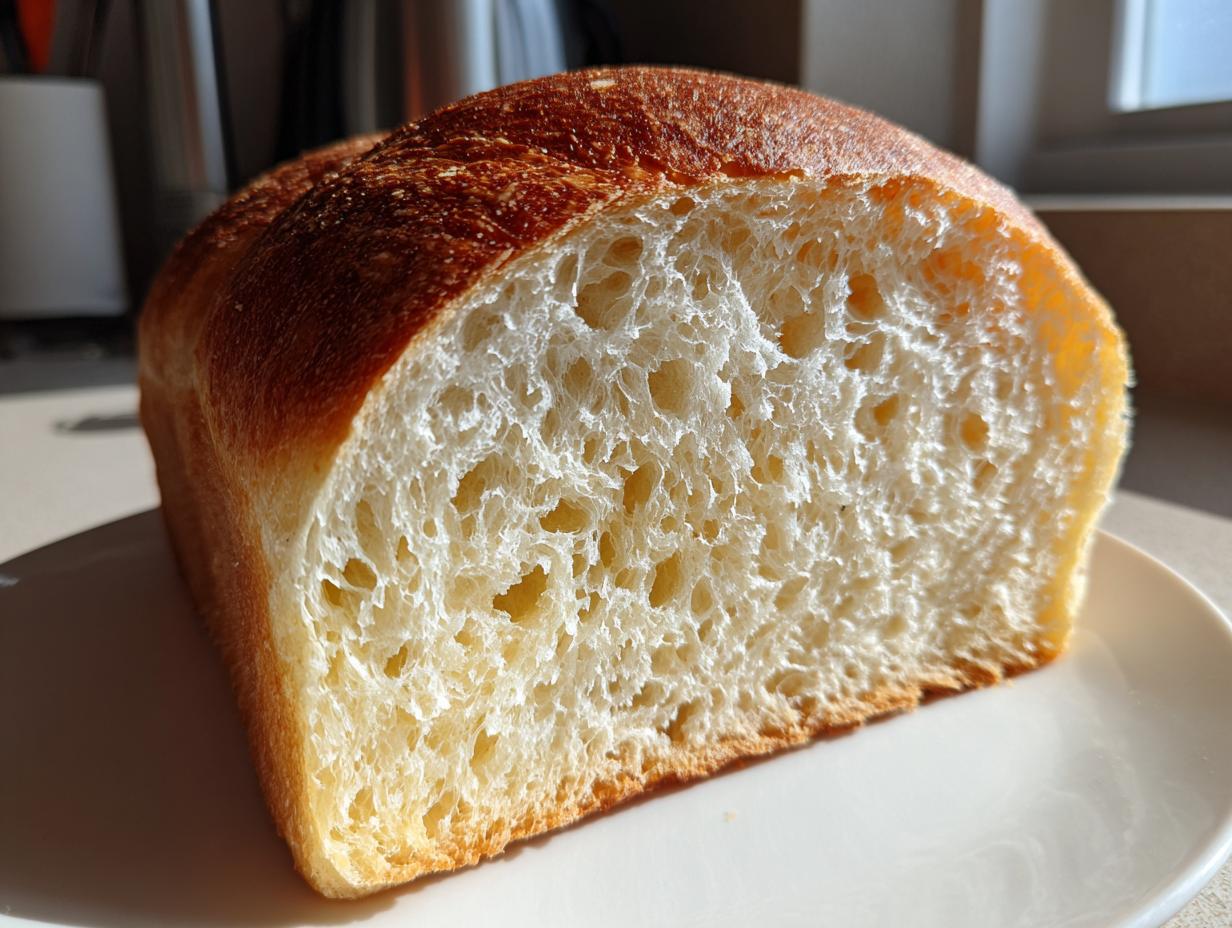
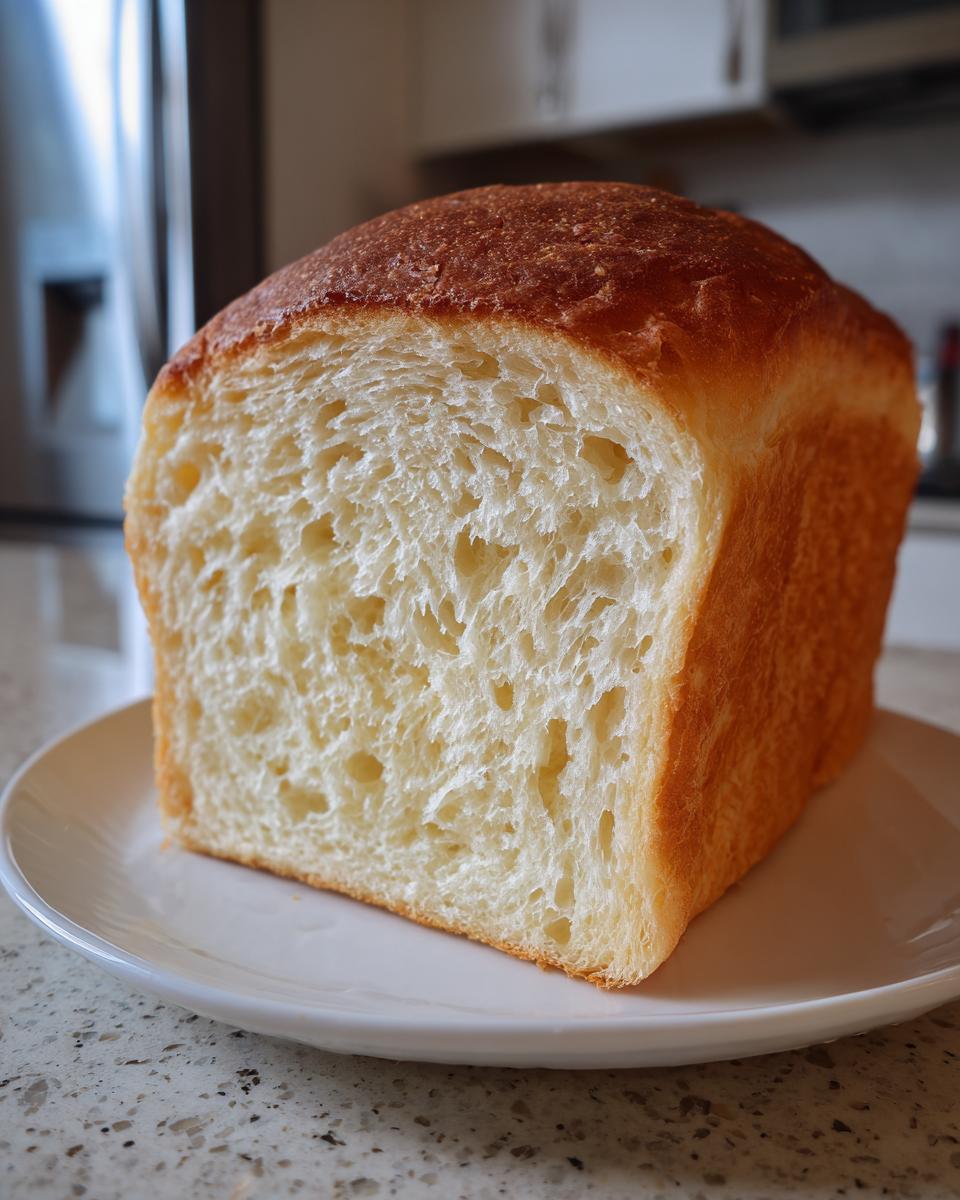
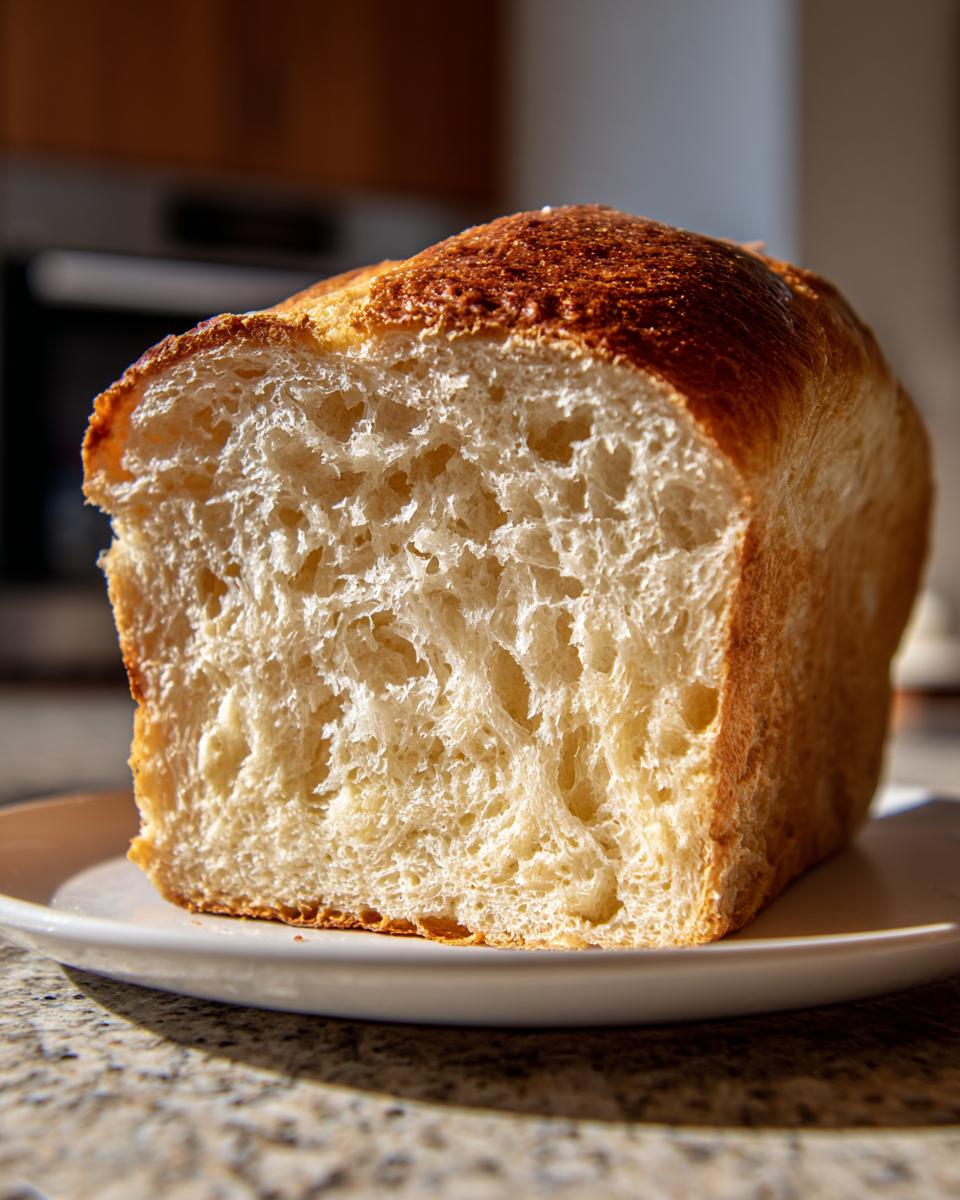
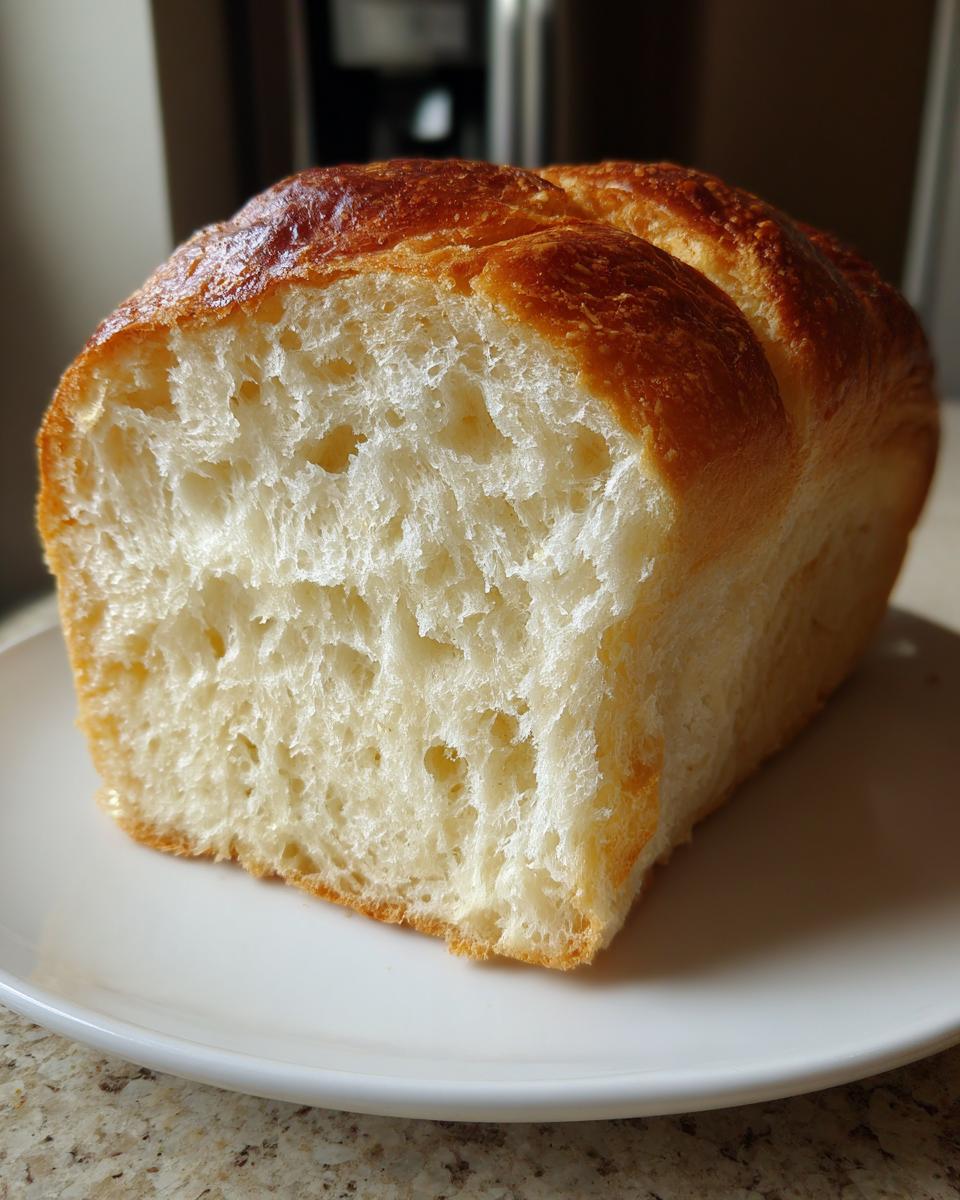
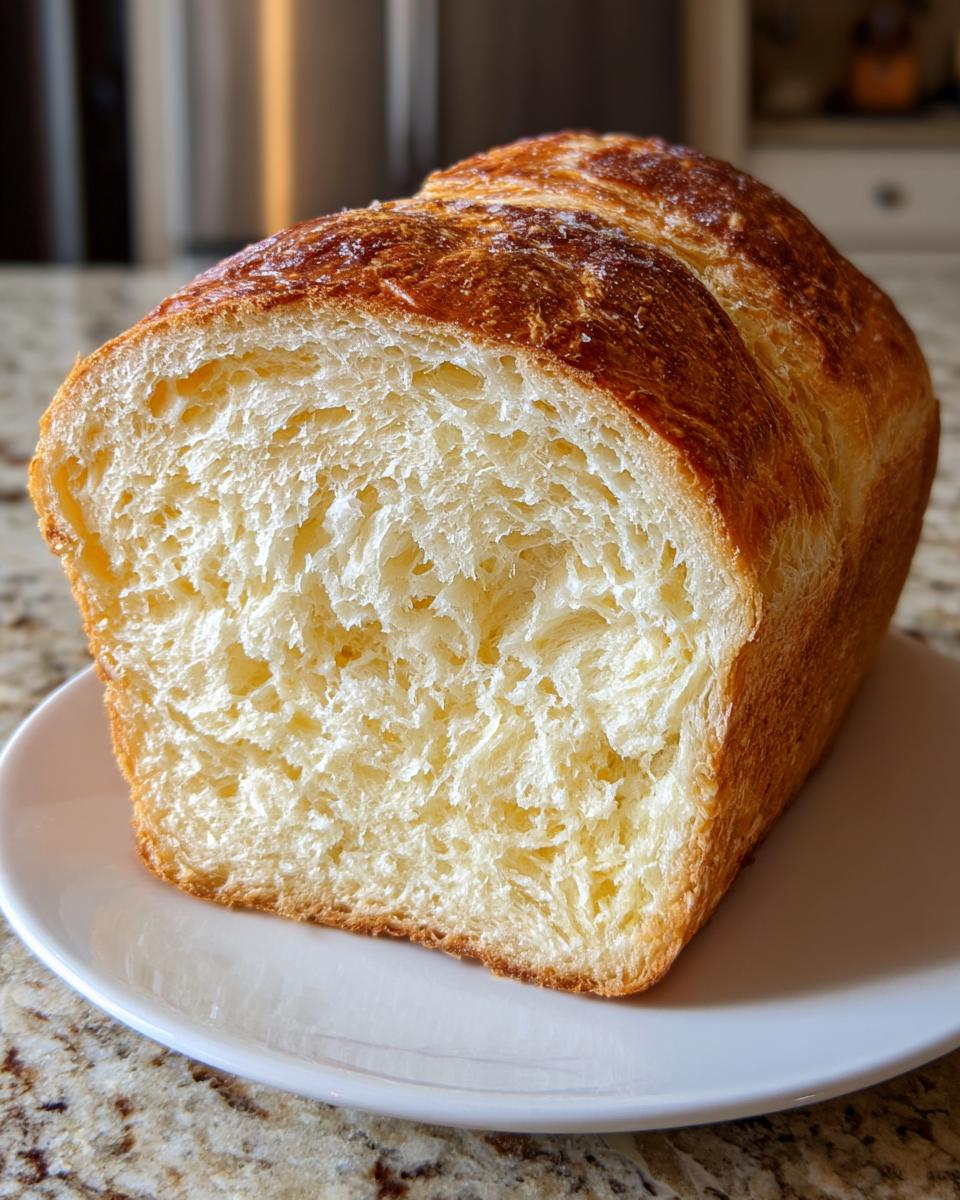
Achieving a Fluffy White Bread Texture
The secret to that cloud-like, fluffy white bread texture is two-fold: using instant yeast and a short, purposeful kneading time. Instant yeast doesn’t need long proofing periods to get going, so we use that speed to our advantage. A good five to seven minutes of kneading develops just enough gluten structure to hold those beautiful air bubbles, creating that perfect soft sandwich loaf crumb without making the dough tough. That’s how we get bakery quality without the bakery commute!
Ingredients for Your Ultimate Easy Yeast Bread
Okay, let’s talk about what you need to make this magic happen! The beauty of this yeast bread is how simple the list is. You probably have most of this stuff kicking around your pantry already. We rely on just a few key players to get that incredibly soft result, so make sure you have your flour, sugar, salt, melted butter, instant yeast, and that all-important warm water ready to go. If you want slightly richer rolls later on, you could try subbing out some liquid for my dinner roll recipe base, but for this loaf, stick to the water!
Ingredient Notes and Substitutions for Yeast Bread
Pay close attention to your water temperature here; it sets the stage for everything! It absolutely *must* be between 105°F and 115°F. If it’s too cold, the yeast sleeps; too hot, and you kill it! That’s why I stress using instant yeast—it’s so much more forgiving for those of us who aren’t precision bakers yet. For the flour, all-purpose is perfect, but if you want that extra bit of richness that keeps the crumb tender, swap the water for whole milk. Just make sure you keep the milk warm, too!
Simple Bread Making: Step-by-Step Instructions for Yeast Bread
Now for the fun part! This is where we turn those boring ingredients into gorgeous, high-rising dough. Since we’re making a yeast bread, timing matters, but don’t stress too much. We are proving to you that homemade bread from scratch doesn’t have to be a massive ordeal. Just follow these steps, and you’ll see the dough transform right before your eyes. If you want something fun to use this bread for later, check out how I make my puffy pita pockets!
Activating the Instant Yeast Bread
First things first: prove the yeast is alive! We start by mixing that warm water (remember: 105°F to 115°F—that’s just warm, not hot!), the sugar, and your instant yeast in a big bowl. You let this sit for about five minutes. If it gets bubbly and foamy on top, great news! Your yeast is working and ready to go. If nothing happens, toss it out and start over with new yeast—it’s the best way to ensure success in baking with yeast for beginners.
Kneading and First Rise for Your Homemade Loaf Tutorial
Next, mix in your melted butter, salt, and start adding the flour slowly. Once you get a shaggy dough, dump it right onto your counter. We need to knead this for about five to seven minutes until it feels smooth and elastic. It should be soft to the touch. Then, oil your bowl, pop the dough in, cover it up, and let it have a nice, warm nap for about 45 to 60 minutes, or until it doubles in size. That’s the first big step in our homemade loaf tutorial!
Shaping and Final Proofing of the Yeast Bread
Once doubled, gently punch the dough down—it’s so satisfying! Shape it into a nice tight log and tuck it into your greased 9×5 pan. Cover it loosely again and let it have its second rise, which takes about 30 minutes. This is when you finally want to get your oven warmed up to 375°F. Keep an eye on it; you want it to crown just about an inch over the pan rim before it goes in. That perfect crown means you are moments away from that glorious warm fresh baked bread smell!
Tips for Foolproof Bread Baking Success
You’ve got the dough mixed and rising, but for the absolute best results, I have three little non-negotiables for you. These tips really help solidify why this yeast bread comes out consistently perfect, tasting like it was made by someone who’s been baking forever!
First, when you punch the dough down after the first rise, be gentle! You want to deflate most of the extra big air pockets but keep the little structures that make the bread light. If you punch it too aggressively, you knock all the rise right out of it. My next big tip is simple: don’t cheat the second rise. That 30 minutes gives the yeast time to create streamers that lead to that tall, gorgeous oven spring. You can use those rising minutes to whip up a quick sauce, maybe my easy homemade BBQ sauce!
Finally, when testing for doneness, don’t just rely on color. Always check the internal temperature if you have a quick read thermometer—200°F is that sweet spot for a fully cooked, soft loaf. If you follow these little tricks, you’ll nail this recipe every single time!
Storage and Reheating Instructions for Homemade Bread From Scratch
Okay, you’ve pulled your gorgeous loaf out, and I know you want to slice into it right now. Don’t do it! Resist the urge! The single most important thing after baking this yeast bread is letting it cool completely on a wire rack. If you slice it too soon, all that beautiful trapped steam escapes, and you end up with a gummy texture inside. Wait at least an hour, seriously.
Once cooled, store it wrapped tightly on the counter; it’s wonderful for three to four days. If you want that fresh-from-the-oven experience again, just pop slices into the toaster or warm the whole loaf slightly in a 300°F oven for about ten minutes. It brings back that amazing aroma, just like my lemon loaf does!
Variations on This Simple Bread Making Recipe
This specific yeast bread recipe is a fantastic foundation, and I love tweaking it when I’m feeling adventurous! If you aren’t strictly after a soft sandwich loaf, try this: skip the loaf pan entirely. Instead, shape the dough gently into a round ball and bake it directly on a hot baking sheet or pizza stone when your oven is preheated. This turns it into a lovely, rustic loaf with a slightly thicker crust. You get that crusty artisan feel with minimal extra work!
Also, don’t feel like you have to keep it plain! For a slightly sweeter approach, follow the notes I mentioned earlier and use whole milk instead of water and throw in about two tablespoons of honey with the sugar. It’s still easy, but it gives you that lovely flavor profile similar to a honey bread recipe. Keep those sweet flavors in mind, or maybe pair that bread with my honey garlic skewers for dinner!
Frequently Asked Questions About Baking Yeast Bread
I know you might still have a few little questions swirling around, especially if this is your first time diving into true yeast bread! Don’t worry, that’s totally normal when you are learning the ropes of baking with yeast for beginners. I put together the things I hear most often so you can bake with confidence!
Why didn’t my dough rise after the first hour?
This almost always comes down to the temperature of your water or the age of your yeast. Remember, yeast is a living thing! If your water was too cold, the yeast is just sleeping. If it was too hot (over 125°F), you might have accidentally killed it. If you used fresh, active yeast and the dough didn’t rise, it means your proofing spot wasn’t warm enough. Try placing the bowl in a slightly warm oven (turned off!) with a glass of hot water next to it to create a cozy little sauna for your dough to wake up!
Can I use Active Dry Yeast instead of Instant Yeast Bread?
You sure can! But here’s the little switch you have to make: Active dry yeast needs to be ‘woken up’ first, which is what our Step 1 does, but it needs a little longer. You still use the same amount, but let the yeast, water, and sugar sit for a full 10 minutes to get foamy before moving on. Instant yeast is blended right in with the dry ingredients, but since this recipe calls for the bloom, you can use either one—just respect that extra five minutes of waiting for the active dry kind!
How essential is kneading the dough for this recipe?
For this specific recipe, which aims for a soft sandwich loaf, kneading is key! We want just enough structure so the loaf holds its shape and doesn’t collapse. Five to seven minutes by hand develops that structure without making the dough tough. If you skipped it entirely, you’d end up with a flatter, denser result, leaning more toward a brick than a delightful loaf. If you are ever struggling, you can always check out how I do things when making my simple fudge—sometimes just switching techniques keeps things interesting!
Estimated Nutritional Profile of This Yeast Bread
I always feel a little bit like a mad scientist when I put this part together, but it’s important to know what you’re enjoying! Since this is a yeast bread recipe made with simple pantry staples, the numbers are pretty straightforward. Remember, this loaf generally makes about 12 good slices, so the data below is based on that typical serving size. I used standard calculations based on the flour and butter amounts we used.
- Serving Size: 1 slice (about 55g)
- Calories: 150
- Total Fat: 3g
- Saturated Fat: 2g
- Cholesterol: 5mg
- Sodium: 200mg
- Total Carbohydrates: 28g
- Dietary Fiber: 1g
- Sugars: 2g
- Protein: 4g
Now, a little disclaimer heads-up: these are just my best estimates based on the ingredients listed. If you swap out regular flour for bread flour, or decide to brush the top with extra butter (which I totally support, by the way!), those numbers might shift a tiny bit. If you want to see how these ingredients compare to something totally different, my fluffy banana pancakes come in close on the carbs front, but with way more sweetness!
Share Your Ultimate Easy Yeast Bread Creation
I truly hope this recipe makes your kitchen smell incredible! Once you slice into that soft, fluffy yeast bread, please come back and drop a rating down below—five stars if you loved it! I live for hearing how your baking adventures turn out. Snap a picture of your beautiful loaf, especially if you made the crusty variation, and let me know how it worked for you. Sharing successes is my favorite part, almost as good as enjoying those soft, chewy snickerdoodles!
PrintThe Ultimate Easy Yeast Bread: Foolproof Fluffy Loaf Ready in Half the Time
Bake a soft, fluffy yeast bread from scratch that tastes like it came from a bakery. This recipe uses simple ingredients and a quick method, making it perfect for beginner bread baking.
- Prep Time: 15 min
- Cook Time: 35 min
- Total Time: 1 hour 50 min
- Yield: 1 loaf 1x
- Category: Baking
- Method: Baking
- Cuisine: American
- Diet: Vegetarian
Ingredients
- 1 cup warm water (105-115°F)
- 2 1/4 teaspoons instant yeast
- 1 tablespoon granulated sugar
- 2 1/2 cups all-purpose flour (plus more for dusting)
- 1 teaspoon salt
- 2 tablespoons unsalted butter, melted
Instructions
- In a large bowl, combine the warm water, instant yeast, and sugar. Let this mixture sit for 5 minutes until it becomes foamy. This confirms your yeast is active.
- Add the salt, melted butter, and 2 cups of the flour to the yeast mixture. Mix with a wooden spoon until just combined.
- Gradually add the remaining 1/2 cup of flour until a shaggy dough forms. Turn the dough out onto a lightly floured surface.
- Knead the dough for about 5 to 7 minutes until it becomes smooth and elastic. You are looking for a soft sandwich loaf texture.
- Place the dough in a lightly oiled bowl, turning once to coat. Cover the bowl with plastic wrap or a clean kitchen towel. Let the dough rise in a warm place for 45 to 60 minutes, or until it has doubled in size.
- Gently punch down the risen dough. Shape it into a uniform loaf and place it into a greased 9×5 inch loaf pan.
- Cover the loaf pan loosely and let the dough rise again in a warm spot for another 30 minutes, or until the dough has crowned about 1 inch over the rim of the pan.
- Preheat your oven to 375°F (190°C) during the last 15 minutes of the second rise.
- Bake for 30 to 35 minutes, or until the top is golden brown and the internal temperature reaches 200°F (93°C).
- Remove the bread from the pan immediately and let it cool completely on a wire rack before slicing.
Notes
- For a richer flavor, substitute whole milk for the warm water.
- If you prefer a crusty artisan loaf, shape the dough into a round and bake it on a preheated baking stone or sheet pan instead of using a loaf pan.
- If you want a soft, fluffy white bread, brush the top of the loaf with melted butter immediately after it comes out of the oven.
Nutrition
- Serving Size: 1 slice
- Calories: 150
- Sugar: 2
- Sodium: 200
- Fat: 3
- Saturated Fat: 2
- Unsaturated Fat: 1
- Trans Fat: 0
- Carbohydrates: 28
- Fiber: 1
- Protein: 4
- Cholesterol: 5