

Oh, I know that sad moment. You pull open the pantry expecting that wonderful, thick filling for dessert, and you find a sad, watery jar of store-bought apples. They’re always too sweet, too mushy, and just nowhere near the cozy flavor you’re craving! When I was transitioning away from the constant rush of my design career and reclaiming my kitchen life, I decided that the filling had to be perfect. That’s why I spent ages perfecting this apple pie filling recipe until it was absolutely foolproof.
This is the best, truly easy homemade apple pie filling you’re going to find. We are talking thick, richly spiced with brown sugar, and absolutely zero mushiness. It’s a quick stovetop job, and honestly, once you taste this vibrant flavor, you’ll never look back. If you’re pairing this with my crust recipe, you simply must check out how I make my classic flaky crust!
I also found a wonderful recipe that dives deep into using brown sugar for depth, which is key here, at this site, but my version incorporates that unique spice blend we’re about to discuss. Making things from scratch is just more satisfying, isn’t it?
- Why This is the Ultimate Apple Pie Filling Recipe (No Mush Allowed!)
- Gathering Ingredients for Your Easy Apple Pie Filling Recipe
- How to Make Apple Pie Filling from Scratch: Stovetop Instructions
- Tips for Success with Your Homemade Apple Pie Filling
- Versatility: Using Your Apple Pie Filling Recipe Beyond the Pie
- Storage and Preservation for Your Apple Pie Filling Recipe
- Frequently Asked Questions About Making Apple Pie Filling
- Estimated Nutritional Snapshot for Apple Pie Filling Recipe
- Share Your Homemade Apple Pie Filling Creations
Why This is the Ultimate Apple Pie Filling Recipe (No Mush Allowed!)
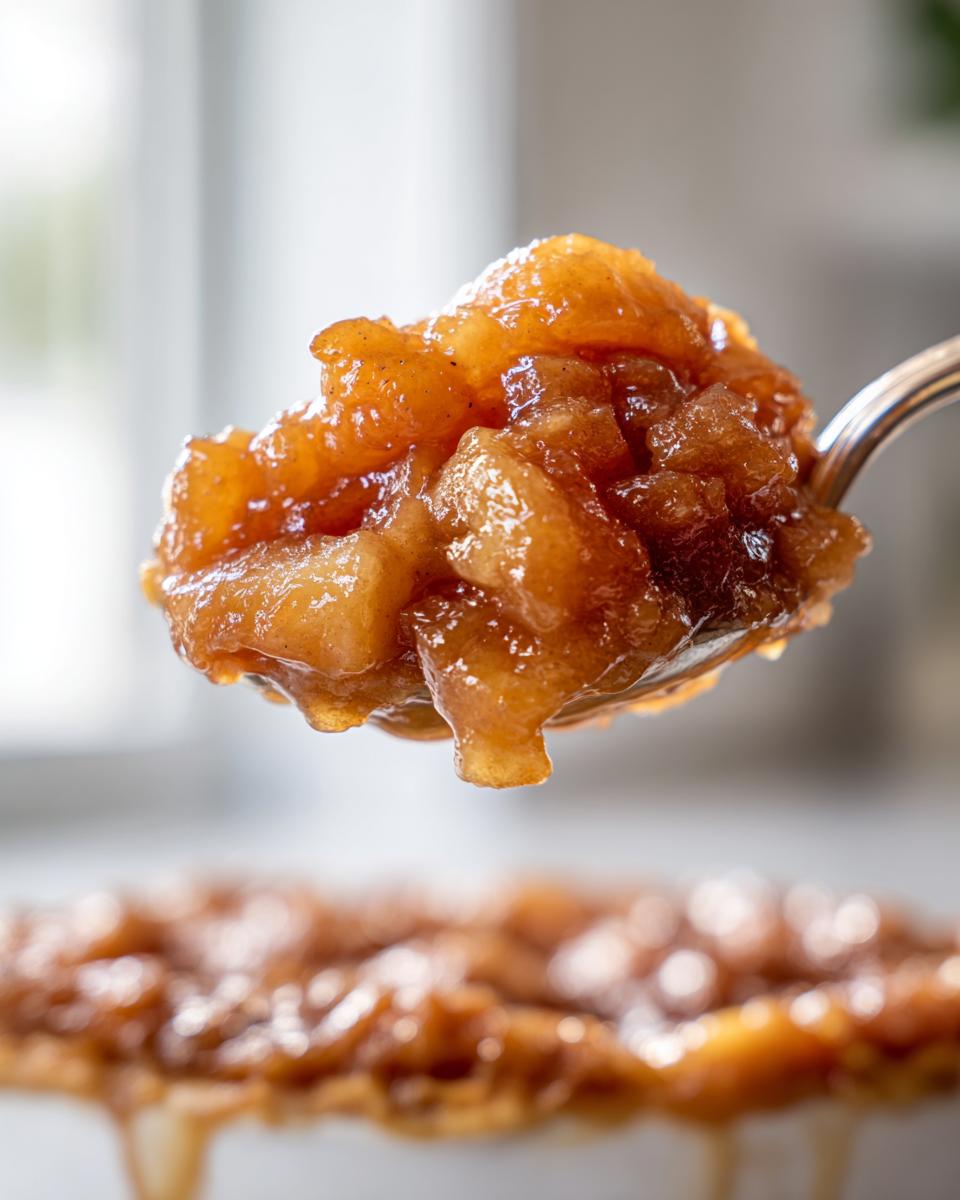
Look, the biggest scandal in store-bought filling is the texture. It’s just applesauce swimming in syrup! We are officially done with that disaster. This stovetop apple pie filling recipe is designed for superior structure. We test and test to get that wonderfully thick glaze, which means we’ve cracked the code to achieving that no mushy apple pie filling result you dream about.
And the flavor? It is just the right amount of sweet apple pie filling balanced by the spices. When you make this quick apple pie filling from scratch, you’re in complete control. If you want more stovetop guidance, I always refer to my own guide on easy stovetop recipes, but trust me, the secret weapon is in the apples themselves!
You can check out some great general tips right over at Everyday Pie, but trust me, the secret weapon is in the apples themselves!
Best Apples for Pie Filling: Texture Secrets
If you want true texture, you simply cannot cheat on the apples. For the best results in this apple pie filling recipe, I always use half Granny Smith for that perfect tartness, and half a sweet, firm apple like Honeycrisp or Fuji. Granny Smiths hold their shape beautifully, and the sweet ones give us great flavor.
When you slice them evenly—about a quarter-inch thick—you ensure they cook at the same rate. This mix is the foundation for that firm, non-mushy bite we’re aiming for every single time you make this stovetop apple pie filling.
Gathering Ingredients for Your Easy Apple Pie Filling Recipe
Okay, let’s get our ingredients together! Trust me, having everything measured out before you even turn on the heat makes this easy apple pie filling recipe feel like a breeze. You’ll need six medium apples—that’s about two and a half pounds, and remember, that mix of tart and sweet is crucial for stopping the mush factor later on!
We use packed brown sugar because that molasses flavor is just spectacular. You need that lovely sweetness, plus the main thickening agent, which is cornstarch, and finally, two tablespoons of lovely unsalted butter right at the end for that glossy finish. If you’re looking for rich, tasty variations, you can check out my maple brown sugar cookies for inspiration, but stick to the list here for the best pie outcome!
For a deeper dive into quick stovetop methods, I always found the tips over at Spend With Pennies really helped me streamline this process!
Ingredient Notes and Substitutions for this Apple Pie Filling Recipe
A couple of quick notes here to make sure your homemade apple pie filling sets up beautifully. When measuring your brown sugar, really pack it down into the cup—that ensures we get the right balance of sweetness and moisture that prevents gaps.
Now, about the thickening! Yes, we are using cornstarch because it gives us that fast, clear set we want for a perfect pie. If you absolutely needed an apple pie filling without cornstarch, sometimes you can use flour, but you have to cook it much longer to eliminate the raw flour taste, and I find the clarity just isn’t the same. Stick to the cornstarch for this one, I promise!
Also, don’t skip that lemon juice! It might seem minor, but it keeps your sliced apples from turning brown while you get everything else ready. It’s a tiny trick that makes the final product look so much more appealing.
How to Make Apple Pie Filling from Scratch: Stovetop Instructions
Making this incredible apple pie filling recipe is faster than driving to the store, I swear! We’re doing this all in one big saucepan, which means less cleanup, which is always a win around here. First things first: get those apples peeled, cored, and sliced uniformly—about a quarter-inch thick. Toss them with lemon juice right away to keep them looking bright.
Next, we make the magic potion. In your saucepan, whisk together all those gorgeous brown and white sugars with the water and all those warming spices—cinnamon, nutmeg, and allspice. Heat this over medium heat until the sugar dissolves and it just starts to bubble gently. That usually takes about five minutes before you even add the apples!
Now, gently fold in your prepared apples. You’ll let those simmer for about 5 to 7 minutes. We want them to soften slightly, but seriously, do not overcook here! We are aiming for tender slices, not applesauce. Keep an eye on them while they simmer. For inspiration on fast dips that keep your mind off the stove, check out my dill dip recipe!
My friend Rachel has an amazing straightforward method for getting this done fast, you can see her general approach here, but now for the key thickening step…
Achieving the Perfect Thickness in Your Apple Pie Filling Recipe
This is the moment of truth! You need to make a slurry: whisk your cornstarch with just a splash of *cold* water until there are absolutely no lumps left. Pour that slurry right into your simmering apples and sugar mixture. It immediately starts to look a little cloudy.
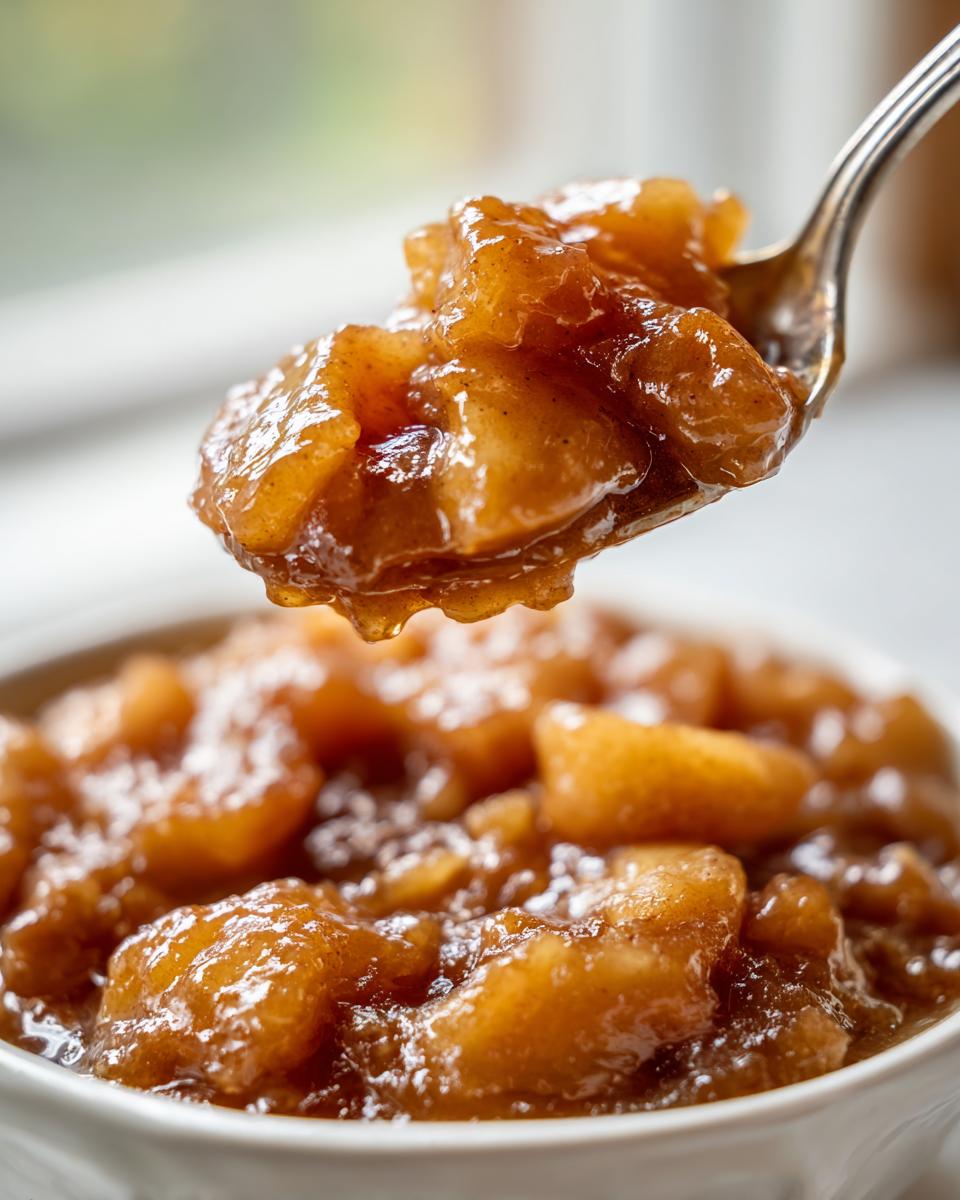
You must stir constantly now! Seriously, don’t walk away. It will bubble up and thicken up super fast, usually within a minute or two. The visual cue that your sweet apple pie filling is ready is when it coats the back of a spoon beautifully. If you drag your finger across the spoon, the line should hold! That means we’ve avoided the dreaded watery filling and achieved that glorious texture.
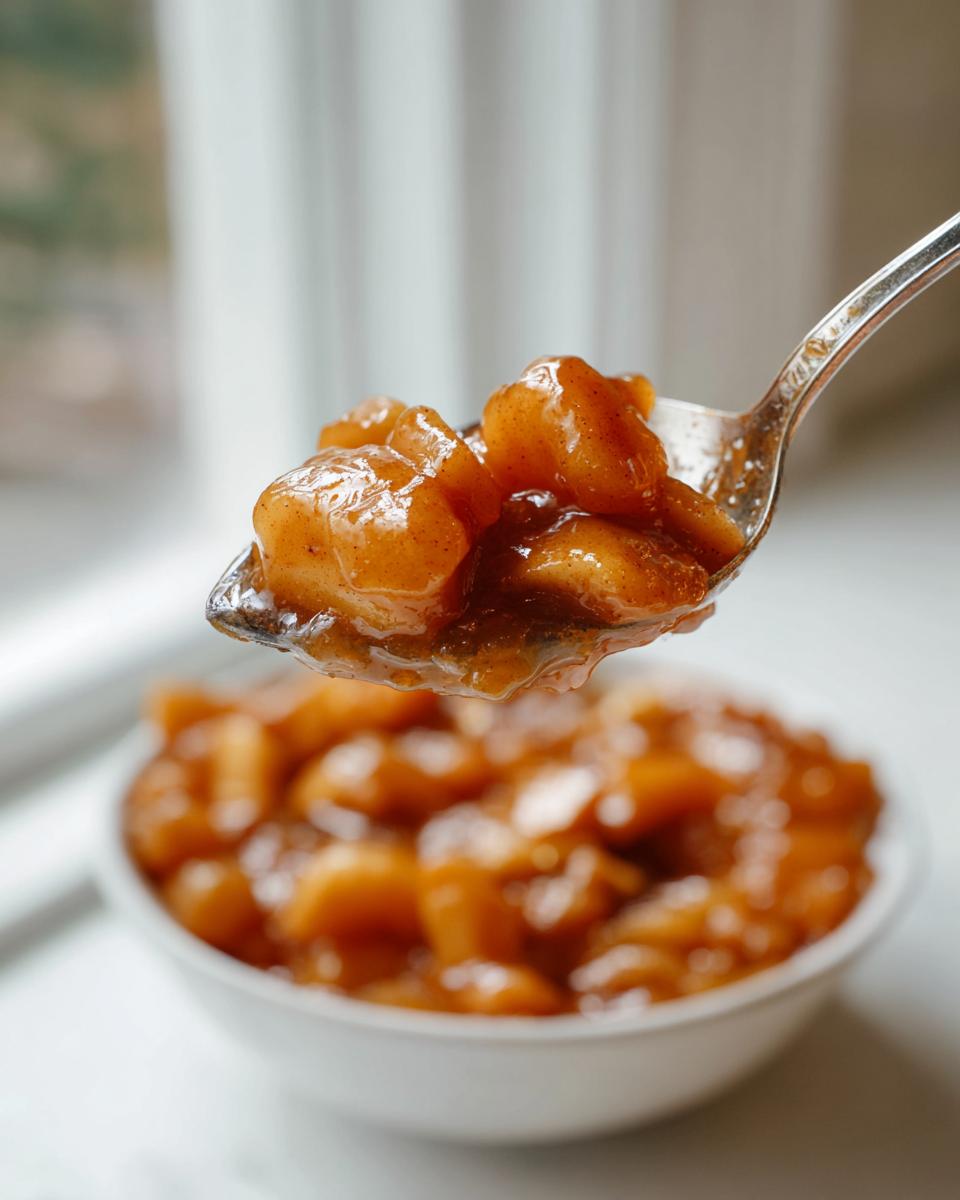
Right at the end, kill the heat and stir in those last two tablespoons of butter. It melts right in, giving this stovetop apple pie filling an incredible shine and richness. Seriously, taste it! You’ll see why this is the best!
Tips for Success with Your Homemade Apple Pie Filling
You’ve made the best apple pie filling recipe, now let’s make sure it performs perfectly in the oven! My number one rule, and I cannot stress this enough, is that you must let the filling cool completely before pouring it into your bottom pie crust. If it’s hot, it steams the crust, resulting in a soggy bottom—and we worked too hard for that!

Also, remember that little bit of lemon juice you added earlier? That wasn’t just flavor! It keeps your apples looking bright and fresh, not oxidized brown, right up until baking time. For an extra gorgeous crust, you should definitely review my butter pie crust recipe.
Finally, if you want to see how others kept their filling from turning to soup, check out the tips on texture over at Savory Experiments. Proper cooling is key for that perfect set!
Versatility: Using Your Apple Pie Filling Recipe Beyond the Pie
Just making pie? Oh, you are selling this amazing stovetop apple pie filling short! This recipe sings in so many ways. It is frankly my favorite apple dessert topping for weekend breakfast. Spoon a generous amount over my fluffy pancakes or waffles—heavenly! It’s also fantastic stirred into plain Greek yogurt or oatmeal for an instant cozy breakfast.
You can also use it as the base for a super quick apple crisp! Just top it with your favorite oat crumble topping and bake until bubbly. This recipe is so versatile, which is why it’s worth making a big batch!
If you’re looking for other ways people are serving their homemade filling, check out the creative ideas over at Dinner Like Mom.
Making this Apple Pie Filling Recipe Freezer Friendly
Because this recipe is so quick to make, it’s perfect for making ahead! If you won’t eat it all in a week, packing it up for later is a lifesaver. This is a wonderful freezer friendly apple pie filling. The trick is cooling it down completely first. You don’t want any steam in those containers!
I generally use rigid, airtight containers or heavy-duty freezer bags. If you use bags, flatten them out before sealing—it saves so much space in the freezer! Make sure to leave about half an inch of space at the top, though, since liquids expand a bit when frozen solid. It keeps beautifully for six months, ready whenever you need that little taste of fall!
Storage and Preservation for Your Apple Pie Filling Recipe
Storing this delicious apple pie filling recipe is wonderful because it keeps so well, whether you plan to use it next week or next season! For short-term, just pop any leftovers into an airtight container in the fridge. It’ll stay perfectly fresh and flavorful for about ten days—though honestly, it usually disappears faster than that in my house!
If you are thinking long-term, this recipe is fantastic when preserved, making it a wonderful source for a canned apple pie filling recipe later in the year. If you plan to can it using a water bath method, please, PLEASE make sure you follow current, established safety guidelines for high-acid fruit fillings. We want deliciousness, not guesswork, when it comes to preservation safety!
If canning feels like too much work right now, remember the freezing tips from the last section. It’s so much easier than buying that jarred stuff, and you can see firsthand why this homemade apple pie filling is superior. For a look at how I keep other fresh ingredients around, check out my guide on easy refrigerator pickles!
For those of you who really want to master the canning process, the details over at The Rooted Farmhouse offer some really clear step-by-step documentation.
Frequently Asked Questions About Making Apple Pie Filling
How do I make sure my apple pie filling isn’t too soupy?
That’s the number one concern, isn’t it? The key to stopping that soupiness in our quick apple pie filling is twofold: using the right apples—the firm ones—and letting the filling cool completely! When you stir in that cornstarch slurry toward the end, you need to let it simmer until it visibly thickens and coats the back of a spoon. But critically, the filling will firm up even more as it cools down. If you slice your apples too thin, they break down faster, so stick to that half-inch slice!
Can I adjust the spice level in this apple pie filling recipe?
Absolutely! This recipe gives you a lovely, warm base for a spiced apple filling, but the beauty of homemade is customization. If you love ginger, throw in half a teaspoon of ground ginger along with the cinnamon and nutmeg. If you want it warmer, lean heavier on the allspice or even a tiny pinch of clove! Just remember, spices can be strong, so start small and taste as you go before you add that cornstarch slurry.
If I use different apples, how does that affect the flavor?
It changes everything, which is great if you experiment! Granny Smiths give you that signature tartness that punches through the sugar, which I think tastes more like a classic diner pie. If you use only sweet apples, say, just McIntosh, your filling will be much softer and sweeter overall. That’s why our recipe calls for a mix—it creates complexity. But if you’re feeling adventurous, try adding dried cranberries along with your apples for an extra tart burst!
How quickly can this stovetop apple pie filling really come together?
If you have your apples prepped, you can honestly have a finished, cooled filling ready in under 35 minutes total! If you’re in a huge rush and need something right now, this quick apple pie filling is ready to go. I find that having everything ready to dump—my pre-mixed spices, the sugars, everything—makes the stovetop time fly by. It’s definitely quicker than relying on a store-bought jar!
If you want to see a couple of other amazing baking routines, my recipes for sweet potato muffins and pies from The Food Charlatan here are great examples of simple, high-impact baking!
Estimated Nutritional Snapshot for Apple Pie Filling Recipe
I’ve got the numbers here for you, but please remember this is just an estimate! When you’re making something as glorious as this apple pie filling recipe in your own kitchen, the exact nutrition can shift slightly based on the size of your apples, or if you decide to sneak in an extra pinch of nutmeg (which I totally advocate for, by the way!).
These figures are based on a half-cup serving size of the finished filling, assuming you used the ingredients exactly as listed. It gives you a great general idea of what you’re putting into those delicious pies or crisps you’re whipping up!
For a half-cup serving:
- Calories: About 210
- Sugar: Roughly 35 grams (Mostly from those wonderful brown sugar sweet spots!)
- Fat: Only about 3 grams, thanks to that little bit of butter we stir in at the end.
- Carbohydrates: Around 46 grams
- Protein: Near zero, which is typical for a fruit-based dessert component.
It’s a treat, for sure, but one made with real ingredients! If you’re looking for similar cozy flavors in a slightly different format, you should definitely check out the tips for moist zucchini banana bread—it’s another great fall staple!
Share Your Homemade Apple Pie Filling Creations
Now that you’ve made this absolutely perfect, non-mushy batch of apple pie filling recipe on your stovetop, the real fun begins! I truly hope you got to sneak a spoonful while it was cooling because it smells incredible, doesn’t it?
I poured my heart into making this recipe reliable and simple, so if you loved how thick your filling turned out for your pie, tart, or crisp—please let me know! A quick rating helps other folks feel confident trying it out! I always love seeing the beautiful ways you use it. Are you serving it warm over ice cream? Did you use it to make an apple crumble?
Snap a picture and tag me! If you’re looking for another gorgeous pie recipe to tackle next, you have to try my strawberry rhubarb pie—it’s such a spring showstopper!
For some brilliant inspiration on how other bakers are using their fresh filling, check out this quick resource over at Cookox. Happy baking, friends!
PrintThe Best Easy Homemade Apple Pie Filling (Thick & Perfectly Spiced)

Make this easy homemade apple pie filling on the stovetop for a thick, sweet, and perfectly spiced result that beats store-bought every time. This recipe works great in pies, crisps, or as a topping.
- Prep Time: 15 min
- Cook Time: 20 min
- Total Time: 35 min
- Yield: About 6 cups 1x
- Category: Dessert Component
- Method: Stovetop Cooking
- Cuisine: American
- Diet: Vegetarian
Ingredients
- 6 medium apples (about 2.5 lbs, use a mix like Granny Smith and Honeycrisp)
- 3/4 cup packed brown sugar
- 1/4 cup granulated sugar
- 1/4 cup water
- 2 tablespoons lemon juice
- 2 teaspoons ground cinnamon
- 1/4 teaspoon ground nutmeg
- 1/8 teaspoon ground allspice
- 1/4 teaspoon salt
- 3 tablespoons cornstarch
- 2 tablespoons unsalted butter
Instructions
- Peel, core, and slice the apples into uniform 1/4-inch thick pieces. Place the slices in a large bowl and toss them with the lemon juice to prevent browning.
- In a large saucepan, combine the brown sugar, granulated sugar, water, cinnamon, nutmeg, allspice, and salt. Heat over medium heat, stirring until the sugar dissolves and the mixture just begins to simmer.
- Add the apple slices to the saucepan. Stir gently to coat the apples in the sugar mixture. Cook for 5 to 7 minutes, stirring occasionally, until the apples begin to soften slightly but still hold their shape. You want tender apples, not mushy apple pie filling.
- In a small bowl, whisk the cornstarch with 2 tablespoons of cold water until smooth. Pour this slurry into the simmering apple mixture.
- Continue to cook, stirring constantly, until the filling thickens significantly, about 1 to 2 minutes. It should coat the back of a spoon.
- Remove the pan from the heat. Stir in the 2 tablespoons of butter until it melts completely, adding richness to your sweet apple pie filling.
- Let the apple pie filling cool completely before using it in your pie crust or storing it. Cooling allows the filling to set to the proper thickness.
Notes
- For the best texture, use a mix of firm, tart apples (like Granny Smith) and sweeter apples (like Honeycrisp or Fuji). This helps prevent mushy apple pie filling.
- To freeze this freezer friendly apple pie filling, cool it completely, then store it in airtight, freezer-safe containers, leaving 1/2 inch headspace. It keeps well for up to 6 months.
- If you plan to can this apple pie filling recipe, follow standard water bath canning procedures for high-acid fruit fillings, processing quart jars for 20 minutes.
- This stovetop apple pie filling is also excellent served warm over pancakes, waffles, or ice cream.
Nutrition
- Serving Size: 1/2 cup
- Calories: 210
- Sugar: 35
- Sodium: 110
- Fat: 3
- Saturated Fat: 2
- Unsaturated Fat: 1
- Trans Fat: 0
- Carbohydrates: 46
- Fiber: 2
- Protein: 0
- Cholesterol: 8