
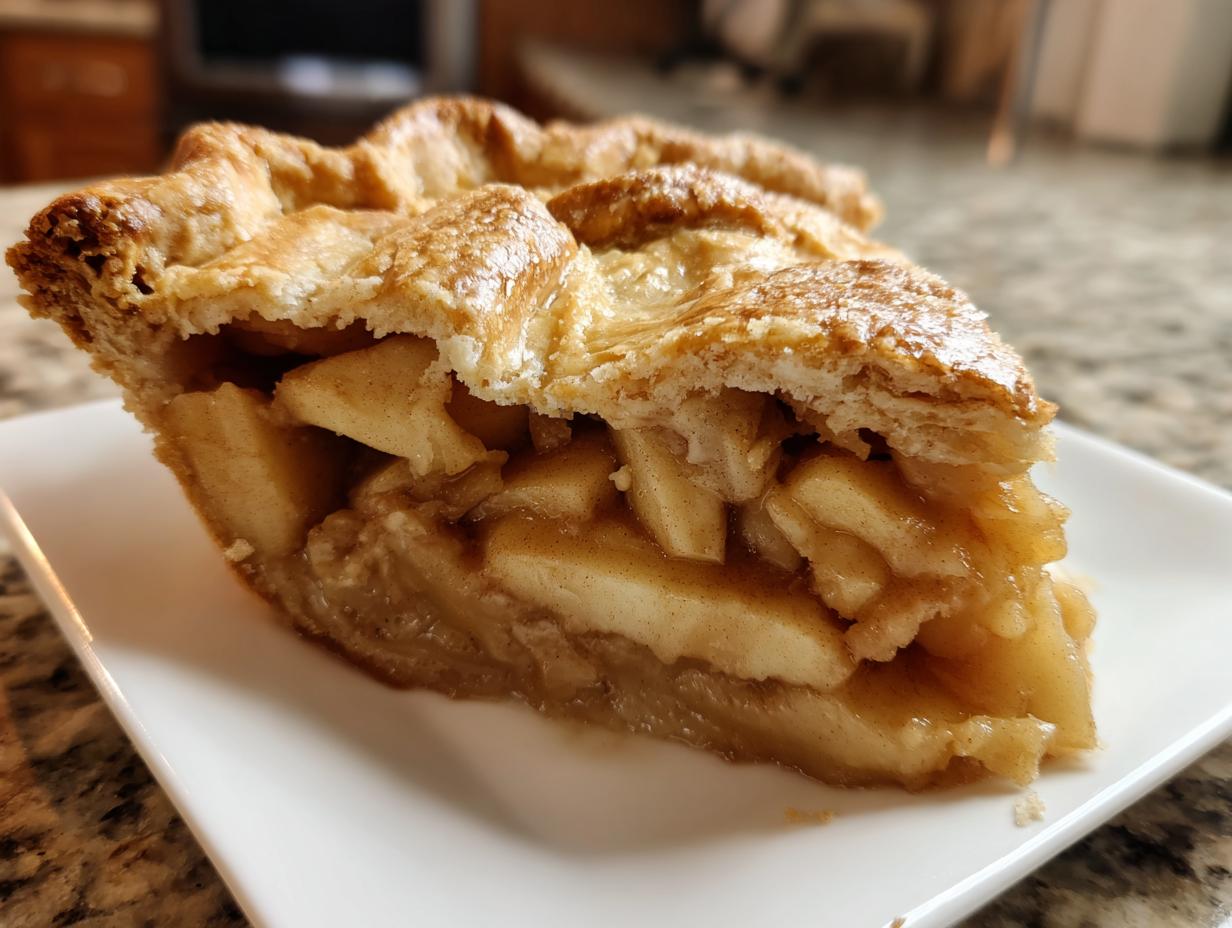
There is just nothing on this earth that smells quite as wonderfully comforting as a pie baking in the oven. That rich, buttery scent mixed with sweet, warm cinnamon—it instantly slows down my whole world. When I decided to reclaim my kitchen after those hectic years in graphic design, I knew I needed a true anchor recipe, something that felt like home and tasted like tradition. Friends, I’m so excited to share what I landed on: this recipe for the ultimate homemade apple pie, made completely from scratch. Forget those sad, floppy versions you’ve had before; we are making something truly bakery-style today!
- Why This Is the Ultimate Homemade Apple Pie Recipe (E-E-A-T Focus)
- Ingredients for Your **Classic Apple Pie Recipe**
- **How to Make Apple Pie** From Scratch: Step-by-Step
- Tips for the **Ultimate Apple Pie** Success
- Serving Suggestions for Your Comfort Food Desserts
- Storage and Reheating Instructions for Your Homemade Apple Pie
- Frequently Asked Questions About Making **Apple Pie From Scratch**
- Nutritional Estimates for This Homemade Dessert Recipe
- Share Your Homemade Apple Pie Creations
Why This Is the Ultimate Homemade Apple Pie Recipe (E-E-A-T Focus)
You might be thinking, another apple pie recipe? Trust me, this one hits different because it tackles the two places almost every other recipe falls short: the crust and the filling. My goal when developing this was to make a true Ultimate Apple Pie that mimics that perfect, shattering texture you usually only find in high-end bakeries. I spent way too many nights messing with butter temperatures before I perfected this method!
We focus on simple techniques that give you massive payoff. If you follow these steps exactly, you’ll end up with a sliceable, deeply flavorful, Bakery Style Apple Pie that tastes intensely like home.
Achieving the Perfect Flaky Pie Crust Tutorial
The secret to a crust that flakes apart, rather than crumbling into hard shards, is temperature, temperature, temperature! We need that butter to stay in distinct pieces, not melt into the flour. When those ice-cold cubes hit the hot oven, they create steam pockets, and those pockets are the layers that make that gorgeous flaky texture we crave. I even wrote a whole guide just on the buttery dough prep because it’s that crucial! Keep your hands moving fast and don’t overwork it—that’s the golden rule here.
Crafting the **Best Apple Pie Filling** Balance
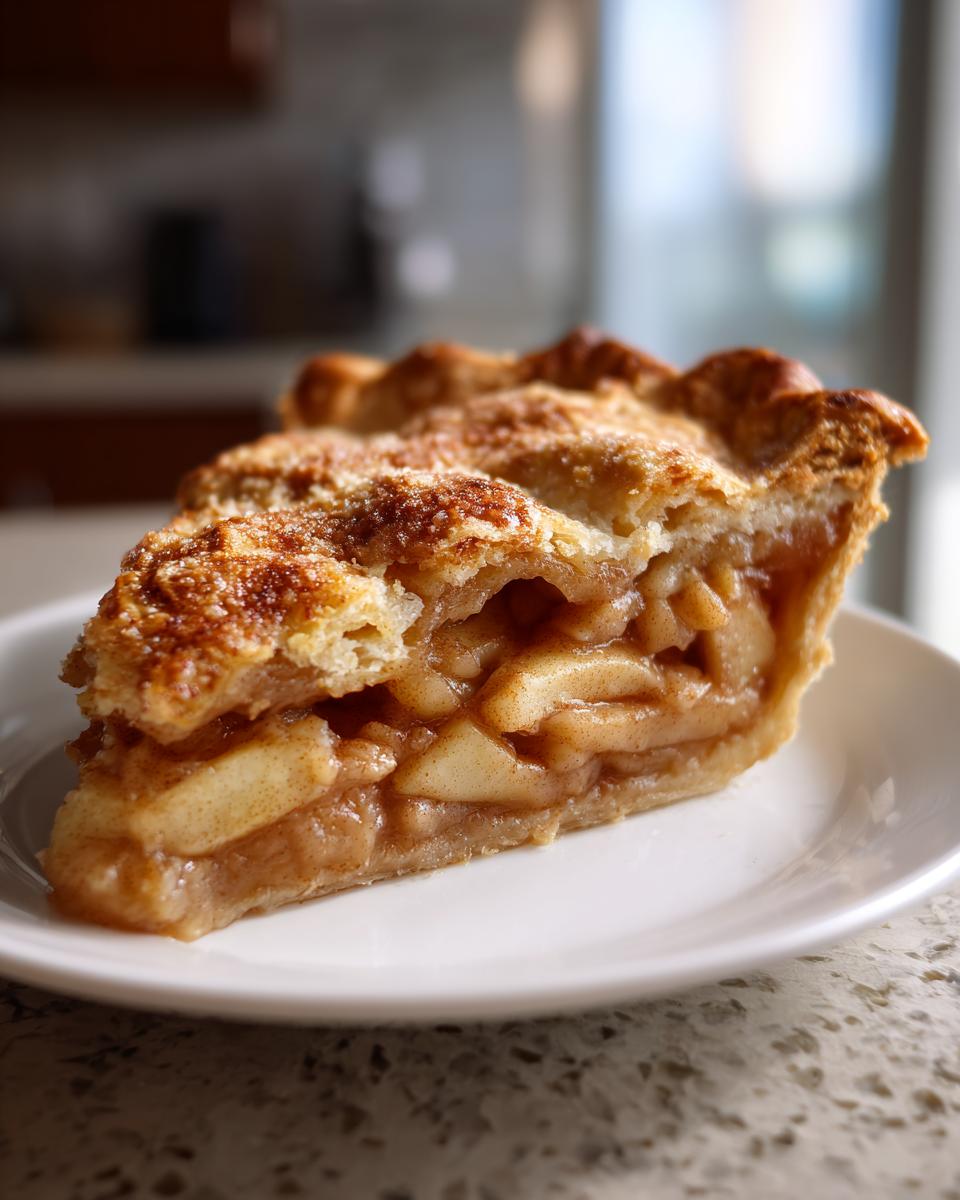
It’s all about the apple choir singing together. If you just use Red Delicious, you get applesauce that tastes grainy. If you use only Granny Smiths, it tastes like sour candy! The backbone of this filling is using a marriage of tart and sweet—Granny Smith gives you that nice, firm structure and tang, while Golden Delicious melts down just enough to thicken the sauce naturally. The small amount of flour blended with the sugars helps soak up just the right moisture, ensuring we never have watery soup at the bottom of our perfect **homemade apple pie**.
Ingredients for Your **Classic Apple Pie Recipe**
Okay, now that you know *why* this recipe sings, let’s talk about what you need to gather. Making an amazing homemade apple pie starts with ingredients that are ready to go and prepped correctly. When I moved away from relying on pre-made dough, the flavor changed completely! Remember, almost everything in this recipe is simple pantry stuff, but the way we handle the butter and apples makes all the difference. You’ll want to look sharp when measuring out your spices, too. You can check out my other thoughts on making a standalone apple pie filling recipe if you ever need extra, but here are the exact amounts we need for one perfect double-crust pie.
For the Buttery Pie Dough
This dough needs to be ice cold to get that shatteringly flaky texture we talked about.
- 2 1/2 cups all-purpose flour
- 1 teaspoon salt
- 1 cup (2 sticks) cold unsalted butter, cut into cubes
- 1/2 cup ice water, plus more if needed
For the Sweet and Tart Apple Filling
Using mixed apples is key here, friends—don’t skimp! Make sure everything is sliced about 1/4 inch thick so it softens evenly without turning to mush.
- 6 large apples (mix of Granny Smith and Golden Delicious recommended)
- 3/4 cup granulated sugar
- 1/4 cup packed light brown sugar
- 1/4 cup all-purpose flour (Trust me, this is important!)
- 1 teaspoon ground cinnamon
- 1/4 teaspoon ground nutmeg
- 1/8 teaspoon ground allspice
- 1 tablespoon lemon juice
- 2 tablespoons unsalted butter, cut into small pieces (for dotting the top)
- 1 large egg, beaten with 1 teaspoon water (for egg wash)
- 1 tablespoon coarse sugar for sprinkling
**How to Make Apple Pie** From Scratch: Step-by-Step
Alright, let’s get messy! This is where the magic happens, moving from ingredients in bowls to something that smells undeniably like an Old Fashioned Apple Pie. Don’t rush these steps—they are designed to build structure and lock in flavor. If you’re looking for a good reference on technique versus just ingredients, you can check out this piece on the classic flaky crust right alongside these instructions. We are aiming for that perfect sliceable result!
Step 1: Preparing the **Flaky Pie Crust Tutorial** Dough
Once you’ve cut in the butter and it looks like coarse crumbs with some actual pea-sized chunks of butter remaining, start adding that ice water really slowly. I mean, tablespoon by confusing tablespoon! You stop the second the dough holds together when you squeeze a handful. Seriously, don’t add too much water or it gets tough. Divide that dough into two disks—one slightly bigger for the bottom—wrap them up tightly, and shove them into the fridge for at least an hour. They need that time to relax the gluten, or you’ll fight it when rolling!
Step 2: Mixing the **Best Apple Pie Filling**
While that dough chills, we tackle the apples. Peel, core, and get them sliced about a quarter-inch thick. Put them in the biggest bowl you own. Now, in a separate small bowl, mix your sugars, the flour (this prevents that soupiness!), and all those warm spices until they look uniform and fragrant. Pour that mix over the apples and drizzle in the lemon juice. Gently toss everything together using your hands if you have to. You want every slice coated beautifully. If you ever wanted to get super creative with apples, though maybe not for this classic, learning how to make homemade applesauce first really teaches you about texture!
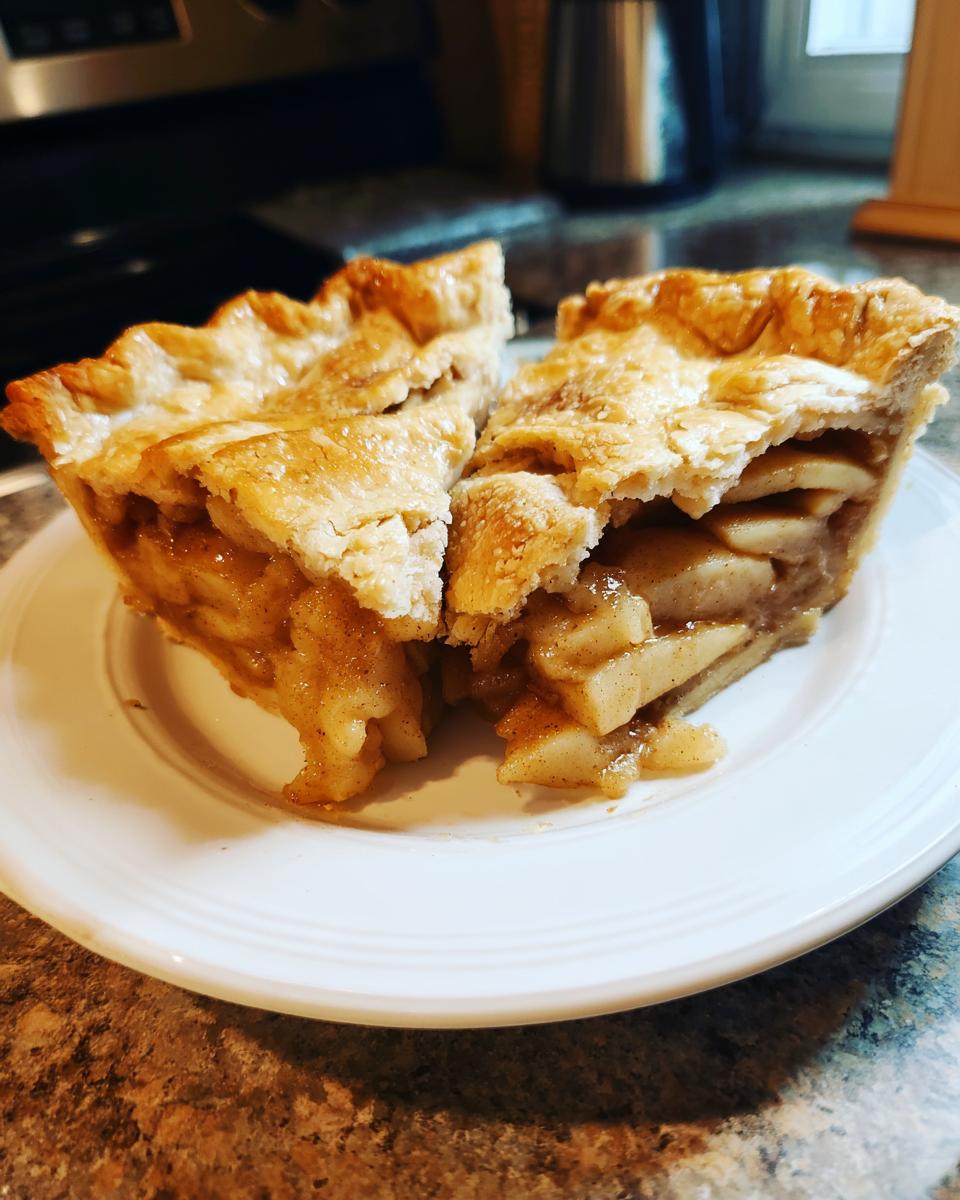
Step 3: Assembling Your **Double Crust Apple Pie**
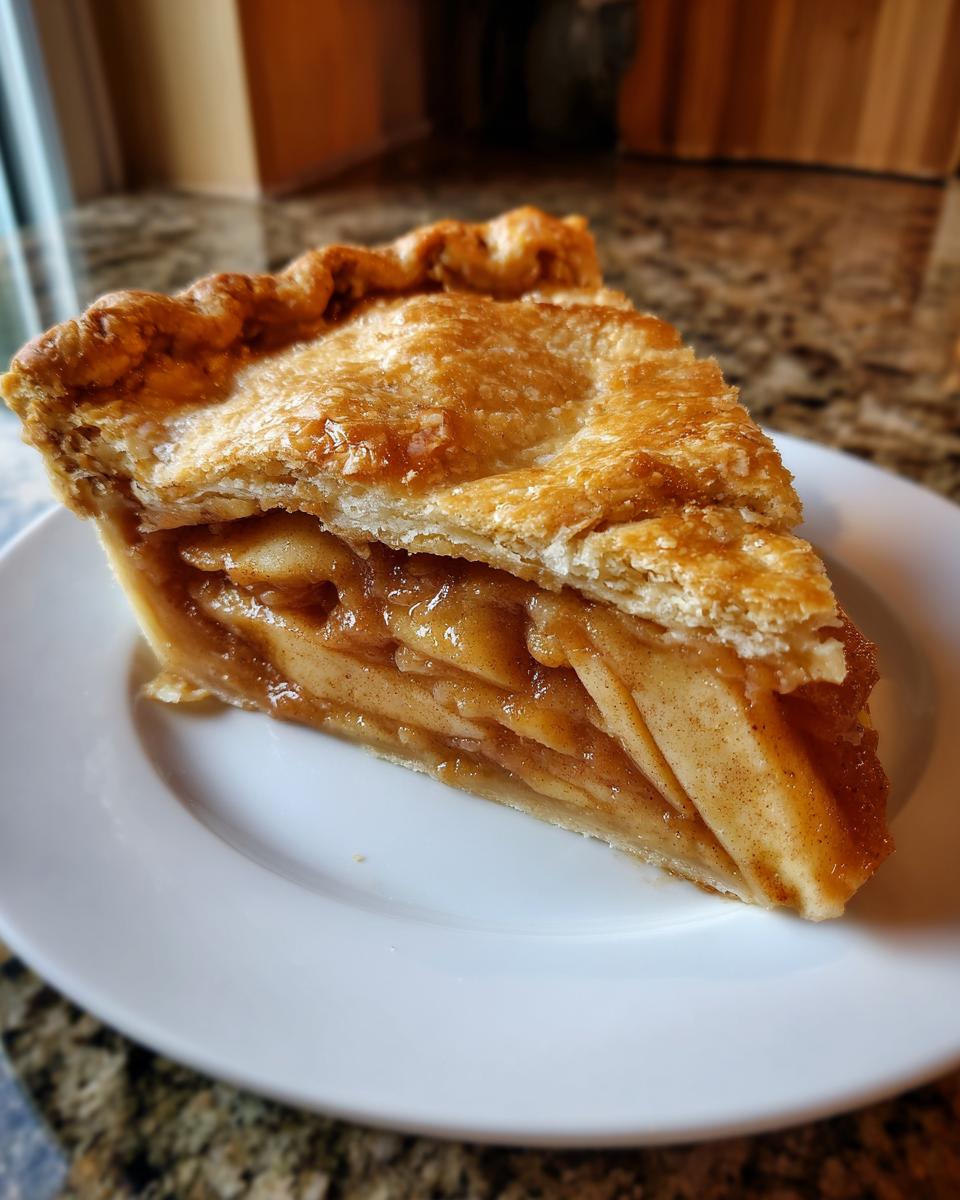
Take the larger disk out first and roll it out into a nice big 12-inch circle on a floured counter. Carefully drape that beauty into your 9-inch pie dish. Trim the overhang to about an inch. Now, pile those spiced apples right into the center, mounding them up a bit—they shrink! Dot the top of the apples with those little pieces of cold butter—that richness melts down beautifully into the filling. Roll out your second disk, place it on top, trim it, bring the top and bottom edges together, and crimp them nicely. Don’t forget to cut several good vents right in the middle so steam can escape or you’ll end up with a cracked top! Pop the whole thing back in the fridge while the oven preheats.
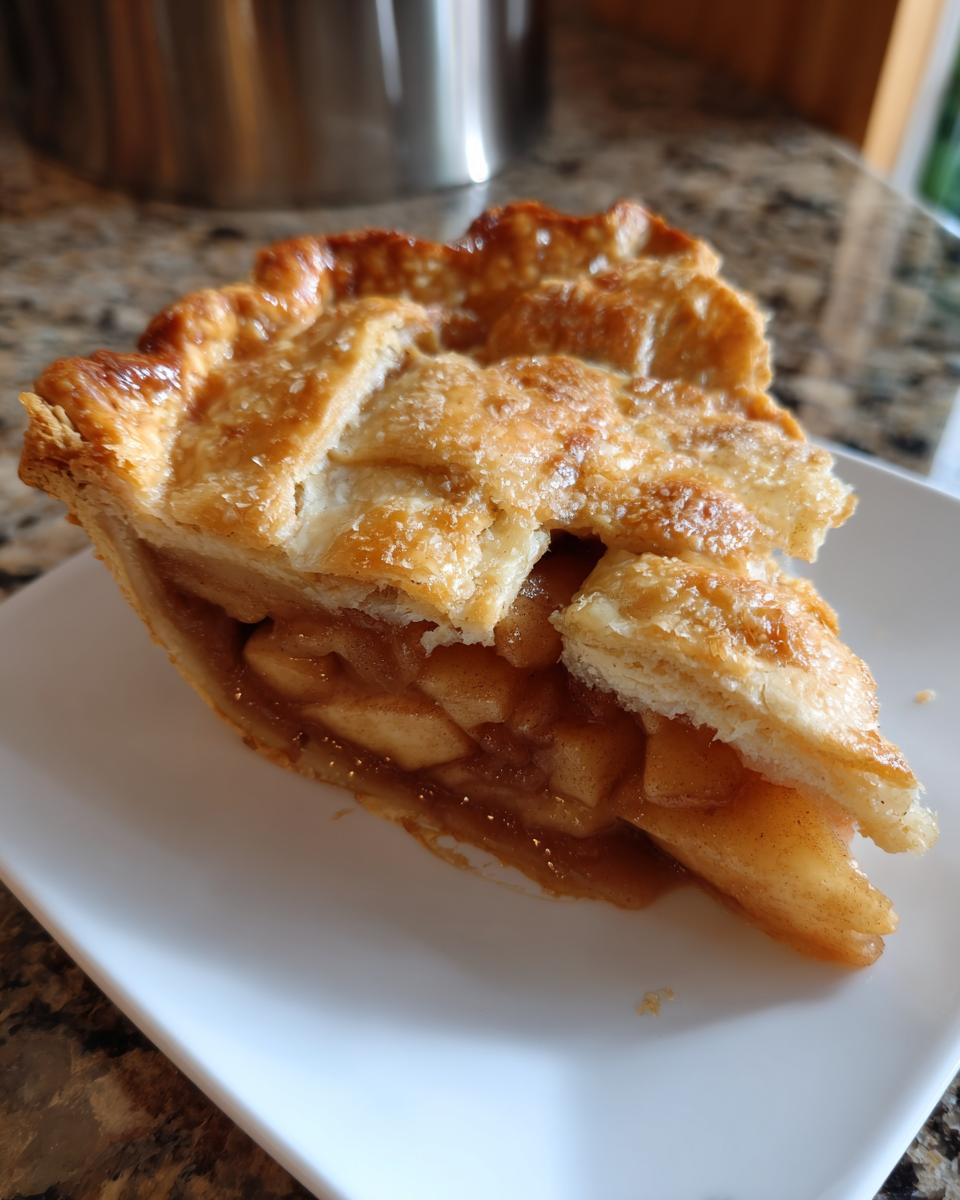
Step 4: Baking the **Homemade Apple Pie** to Golden Perfection
We hit the oven with high heat first! Preheat to 425 degrees F and place your pie on a baking sheet—this catches drips and helps crisp the bottom. Bake it hard for 15 minutes. This sets the crust structure quickly! Then, drop the temperature way down to 375 degrees F and bake for about 40 to 50 minutes more. If the edges look too dark too soon, just cover them loosely with foil—that’s my tried-and-true fix! You know it’s done when the filling is bubbling thickly through the vents. I saw a great method on this ultimate pie recipe about listening for that bubbling sound. The hardest part? Let it cool for three full hours before you dare cut into it. If you slice it hot, all that lovely thickened filling runs right out!
Tips for the **Ultimate Apple Pie** Success
Even with a perfect recipe, sometimes the apple gods are temperamental! We want this **Old Fashioned Apple Pie** to be flawless every time, which means having backup plans for those tricky baking moments. Don’t panic if the bottom crust looks a little pale—these little nudges will ensure you get that bakery-level perfection we’ve been aiming for.
If you’re interested in other cozy, fruit-forward bakes, you should absolutely check out my recipe for apple crisp next! It’s the ultimate no-fuss treat. And if you want to see how another great cook tackles this classic, take a look at the method used by The Food Charlatan over at their site!
How to Prevent a Soggy Bottom in Your **Homemade Apple Pie**
This is the number one complaint I hear! If you notice your crust looking a bit damp or pale halfway through the 375-degree bake, slide a preheated baking sheet or even a pizza stone underneath the pie plate. That extra heat hitting the underside of the crust helps cook off any accumulated moisture and crisps it up beautifully. Pre-baking sounds intense, but for super juicy fillings, a quick 10-minute blind bake of the bottom shell before filling can work wonders too!
Apple Selection for **Sweet and Tart Apple Pie**
Don’t just reach for the first bag of apples you see! Remember how I stressed the importance of mixing? That contrast is what defines a truly great **Classic Apple Pie Recipe**. You need the sharp, firm Granny Smith to hold their shape and provide that necessary tang, balanced by the softer, sweeter varieties like Gala or Golden Delicious that break down nicely to thicken the filling. It’s about layers of flavor, just like in baking!
Serving Suggestions for Your Comfort Food Desserts
A perfect slice of this **homemade apple pie** never asks to stand alone! While it’s amazing piping hot right out of the oven, the right accompaniments make it truly special. My go-to is always a generous scoop of good vanilla bean ice cream—the cold cream melting slowly over the warm cinnamon spices is just heaven. If you’re serving it warm on a chilly night, a quick mug of my homemade hot cocoa on the side elevates the whole cozy experience!
Storage and Reheating Instructions for Your Homemade Apple Pie
Because we put so much heart into creating that flaky crust, we need to treat leftovers right! If you have any **homemade apple pie** remaining, the best way to keep it overnight is loosely covered on the counter at room temperature. Don’t seal it airtight immediately, or you invite sogginess! If you need to store it longer than a day—which I doubt will happen—cover it gently and pop it into the fridge.
The secret to reheating? Never microwave a slice! Seriously, please don’t. Reheat individual slices in a low oven or a toaster oven at about 350 degrees F for about 10 minutes. This brings the filling back to perfect warmth while crisping up the crust again. It tastes like it just came out of the oven!
Frequently Asked Questions About Making **Apple Pie From Scratch**
I always get so many great questions after people try this recipe for the first time—it’s wonderful! It just shows how much love is out there for a truly great homemade apple pie. Here are a few things folks ask most often about diving into this Apple Pie From Scratch project.
Can I use pre-made apples for this **Simple Apple Pie Recipe**?
Oh, I totally get the desire to skip the peeling and coring, but I really, really advise against using apples that are already cooked, like from a can. Canned apples are just too soft and will dissolve into mush in the oven. Frozen apples weep too much moisture. Keep it fresh! You want firm, **sweet and tart apple pie** filling, and that only comes from fresh, firm apples that you slice yourself.
How far ahead can I make the **homemade apple pie** crust?
That crust dough is so patient! You can absolutely make the dough disks, wrap them tightly in plastic wrap, and let them hang out in the fridge for up to three days. If you need to break it up even more, you can freeze the wrapped disk for up to three months. Just pop it in the fridge the day before you need it to thaw slowly. It’s perfect for making that flaky pie crust when you’re planning ahead!
What is the best way to get a shiny top on my **Double Crust Apple Pie**?
A shiny top screams “professional baker,” right? It’s all about the egg wash! We talked about beating that one egg with just a teaspoon of water—that simple mixture brushed lightly over the entire top crust is what gives you that rich, golden color. And don’t forget the final touch: scattering that coarse sugar over the wash. It sparkles, it adds texture, and it makes your Double Crust Apple Pie look irresistible!
If you’re curious about other spiced fruit bakes, my recipe for brown sugar cinnamon pear crisp is another showstopper when you need a little change!
Nutritional Estimates for This Homemade Dessert Recipe
When you’re making an **Ultimate Apple Pie** completely from scratch, I know the nutrition facts still matter to some of you! Here’s the breakdown based on the 8 servings this recipe yields. I always tell everyone to take these numbers with a grain of salt, though. How much butter you brush on the top or the exact size of your apples can change things!
These are estimates, so please remember that your final tally might look a little different based on your specific ingredients and how generously you portion out that amazing filling. But honestly, when it tastes this good, I try not to stare too closely at the numbers!
- Serving Size: 1 slice
- Calories: 450
- Sugar: 35g
- Sodium: 250mg
- Fat: 25g
Share Your Homemade Apple Pie Creations
Honestly, seeing your gorgeous pies is what keeps me inspired in the kitchen! My passion for sharing these simple, classic American recipes comes directly from connecting with you all. This **homemade apple pie** is meant to be shared around a table, so I truly hope it brought some warmth to your house.
If you loved how flaky that crust turned out or if you found a new favorite apple combination, please let me know! Drop a comment below. Tell me what you served it with, or even better, leave a star rating right on the recipe card so others know this is the real deal. I love seeing photos of your **Classic Apple Pie Recipe** results—you can always tag me on social media!
If you want to learn more about my philosophy on making comfort food accessible—and maybe sneak a peek at how I get all these recipes tested—check out the About Page! Happy baking, everyone!
PrintClassic Homemade Double-Crust Apple Pie From Scratch

Make the ultimate apple pie with a flaky, buttery crust and a perfectly balanced sweet and tart apple filling. This recipe guides you through creating a bakery-style dessert that tastes like home.
- Prep Time: 45 min
- Cook Time: 65 min
- Total Time: 110 min
- Yield: 8 servings 1x
- Category: Dessert
- Method: Baking
- Cuisine: American
- Diet: Vegetarian
Ingredients
- 2 1/2 cups all-purpose flour
- 1 teaspoon salt
- 1 cup (2 sticks) cold unsalted butter, cut into cubes
- 1/2 cup ice water, plus more if needed
- 6 large apples (mix of Granny Smith and Golden Delicious recommended)
- 3/4 cup granulated sugar
- 1/4 cup packed light brown sugar
- 1/4 cup all-purpose flour
- 1 teaspoon ground cinnamon
- 1/4 teaspoon ground nutmeg
- 1/8 teaspoon ground allspice
- 1 tablespoon lemon juice
- 2 tablespoons unsalted butter, cut into small pieces
- 1 large egg, beaten with 1 teaspoon water (for egg wash)
- 1 tablespoon coarse sugar for sprinkling
Instructions
- Prepare the Pie Crust: In a large bowl, whisk together the 2 1/2 cups flour and 1 teaspoon salt. Cut in the cold butter using a pastry blender or your fingers until the mixture resembles coarse crumbs with some pea-sized pieces of butter remaining. Gradually add the ice water, one tablespoon at a time, mixing until the dough just comes together. Do not overmix. Divide the dough in half, flatten each half into a disk, wrap in plastic wrap, and chill for at least 1 hour.
- Prepare the Filling: Peel, core, and slice the apples about 1/4 inch thick. In a large bowl, combine the sliced apples, granulated sugar, brown sugar, 1/4 cup flour, cinnamon, nutmeg, allspice, and lemon juice. Toss gently until the apples are evenly coated.
- Assemble the Bottom Crust: On a lightly floured surface, roll out one dough disk into a 12-inch circle. Carefully transfer the dough to a 9-inch pie plate. Trim the edges, leaving a 1-inch overhang. Place the bowl of apple filling into the crust. Dot the top of the apples with the 2 tablespoons of small butter pieces.
- Assemble the Top Crust: Roll out the second dough disk into an 11-inch circle. Place this crust over the filling. Trim the top crust, leaving a 1-inch overhang. Crimp the top and bottom edges together to seal. Cut several slits in the top crust to allow steam to escape.
- Chill and Bake: Brush the top crust with the egg wash and sprinkle evenly with coarse sugar. Chill the assembled pie for 15 minutes before baking. Preheat your oven to 425 degrees Fahrenheit.
- Bake the Pie: Place the pie on a baking sheet. Bake at 425 degrees Fahrenheit for 15 minutes. Reduce the oven temperature to 375 degrees Fahrenheit and continue baking for 40 to 50 minutes more, or until the crust is golden brown and the filling is bubbling. If the edges brown too quickly, cover them loosely with foil.
- Cool: Let the ultimate apple pie cool on a wire rack for at least 3 hours before slicing and serving. This allows the filling to set properly.
Notes
- For the flakiest pie crust, keep all your butter and water extremely cold.
- Use a mix of tart apples (like Granny Smith) and sweet apples (like Honeycrisp or Golden Delicious) for the best flavor balance.
- If you notice the bottom crust becoming soggy during baking, place a pizza stone or another baking sheet on the rack below the pie for the last 20 minutes of cooking.
Nutrition
- Serving Size: 1 slice
- Calories: 450
- Sugar: 35g
- Sodium: 250mg
- Fat: 25g
- Saturated Fat: 15g
- Unsaturated Fat: 10g
- Trans Fat: 0g
- Carbohydrates: 58g
- Fiber: 3g
- Protein: 4g
- Cholesterol: 60mg