
You know those days, right? When the sweet craving hits you like a freight train, but the thought of the oven warming up the kitchen feels like too much effort? Trust me, I live that life often now that I’m juggling family and DelishCraze. That’s why I am just so excited to share this recipe with you. This is hands-down the ultimate no bake peanut butter pie you’ll ever make. It’s unbelievably rich, super indulgent, and delivers that decadent, creamy peanut butter dessert texture everyone loves, all with zero oven time. If you are looking for something fast and easy, almost as simple as my easy 3-ingredient fudge, you need this pie! When you’re reclaiming those moments in the kitchen, sometimes the simplest, quickest treats are the very best. This pie is pure edible joy in under twenty minutes of actual work!
- Why This No Bake Peanut Butter Pie Is Your New Favorite Creamy Peanut Butter Dessert
- Gathering Ingredients for the Simple Peanut Butter Pie
- Step-by-Step Instructions for the Easy Peanut Butter Pie
- Tips for the Best No Bake Pie Success
- Making Your No Bake Peanut Butter Pie a Make Ahead Dessert
- Serving Suggestions for This Indulgent Peanut Butter Treat
- Frequently Asked Questions About the No Bake Peanut Butter Pie
- Estimated Nutritional Snapshot for Your Simple Peanut Butter Pie
- Share Your No Bake Peanut Butter Pie Creations
Why This No Bake Peanut Butter Pie Is Your New Favorite Creamy Peanut Butter Dessert
Honestly, what’s not to love? This isn’t just another dessert; it’s a lifesaver when you need something seriously indulgent without the fuss. The whole point of a no bake peanut butter pie is speed and texture, right? This recipe nails both, giving you that unbelievably smooth, creamy peanut butter dessert mouthfeel that usually only comes from hours of work.
Here’s why I put this one on heavy rotation:
- It truly skips the oven. Zero heat involved!
- The filling is cloud-like—so fluffy, yet so rich.
- It uses ingredients I almost always have stocked up.
If you want a simple treat, this is it. You can whip this up before dinner and have a showstopper ready later. You can check out my other quick fixes, like these easy no-bake protein balls, if you need another fast option!
Prep Time vs. Chill Time for Your Quick Peanut Butter Pie Recipe
Forget spending an hour mixing and baking. The active work here is lightning fast—we’re talking about 15 minutes, tops! That’s the beauty of a quick peanut butter pie recipe. Now, you do need patience for the chilling, so always plan for at least 4 hours in the fridge. But I promise, those four hours are completely hands-off, letting that creamy filling firm up perfectly.
Gathering Ingredients for the Simple Peanut Butter Pie
When you’re making a spectacular treat without turning on the oven, the ingredients are everything! For this simple peanut butter pie, we stick to the essentials that guarantee that amazing texture. I always tell people, you can’t skimp here; use good ingredients and you’ll get that luscious, rich result.
Crust Component Details for Your No Bake Peanut Butter Pie
For the base, we need about one and a half cups of finely crushed graham crackers, which usually means crushing about 12 full sheets yourself—don’t worry, it’s easy! Mix those crumbs with 6 tablespoons of melted unsalted butter. The melted butter is what binds everything together so nicely; it locks in that buttery flavor where the oven usually does the heavy lifting. If you want to swap to the incredible easy chocolate dip flavor, just use 24 crushed Oreos instead of the graham crackers!
Achieving the Fluffy Peanut Butter Pie Filling
This is where the magic happens for that fluffy peanut butter pie filling. You absolutely must have an 8-ounce block of cream cheese, and I mean *softened*. If it’s hard, you’ll get lumps, and we don’t want that! Then you mix in your creamy peanut butter and about a cup and a half of powdered sugar for just the right sweetness. The secret weapon for that airy texture, though, is folding in a whole 8-ounce container of thawed whipped topping at the end. That’s what makes it so light!
Step-by-Step Instructions for the Easy Peanut Butter Pie
Okay, now that we have all our lovely components ready, let’s put this show on the road! Remember, for any truly fantastic no oven desserts situation, technique matters almost as much as ingredients. We’re moving fast here, but we need to be intentional. Don’t worry if you’re not a professional baker; this process is straightforward, and I’m here to walk you through every smooth, creamy step. I promise, the results of this easy peanut butter pie are worth every second of your attention right now!
Creating and Chilling the Peanut Butter Pie with Graham Cracker Crust
First up is that crust! In a medium bowl, mix those graham cracker crumbs with the sugar, then pour in the melted butter. Stir it until everything looks evenly moistened—like wet sand, you know? Press that mixture down firmly into your 9-inch pie plate. I mean firmly! This is what prevents crumbly disaster slices later. Once it’s packed down tight against the bottom and sides, pop it into the freezer. See? We’re already knocking out that “no oven” benefit! Sticking that baby in the freezer while we whip up the filling helps it solidify beautifully.
Mixing the Rich Peanut Butter Dessert Filling
Grab your big bowl! Start by beating that softened cream cheese until it’s totally silky smooth. No lumps allowed! Then, beat in your peanut butter until that’s incorporated. Next, we slowly add the powdered sugar—keep mixing until everything looks smooth again. This creates the base for our rich peanut butter dessert. Now for the big move: gently fold in that thawed whipped topping. I mean gently. Don’t use the electric mixer here! We are folding, not beating, because we want to keep all those lovely air bubbles trapped in there to make it fluffy. If you overmix, that fluffiness disappears in a flash!
Setting and Serving Your No Bake Peanut Butter Pie
Once everything is just combined and you have that gorgeous, even filling, spoon it right into your chilled crust. Use a spatula to smooth out the top. Now, this is non-negotiable: we need time for this no bake peanut butter pie to become sliceable! Cover it loosely and let it chill for a minimum of 4 hours. Seriously, don’t cut it early, or you’ll have peanut butter soup!
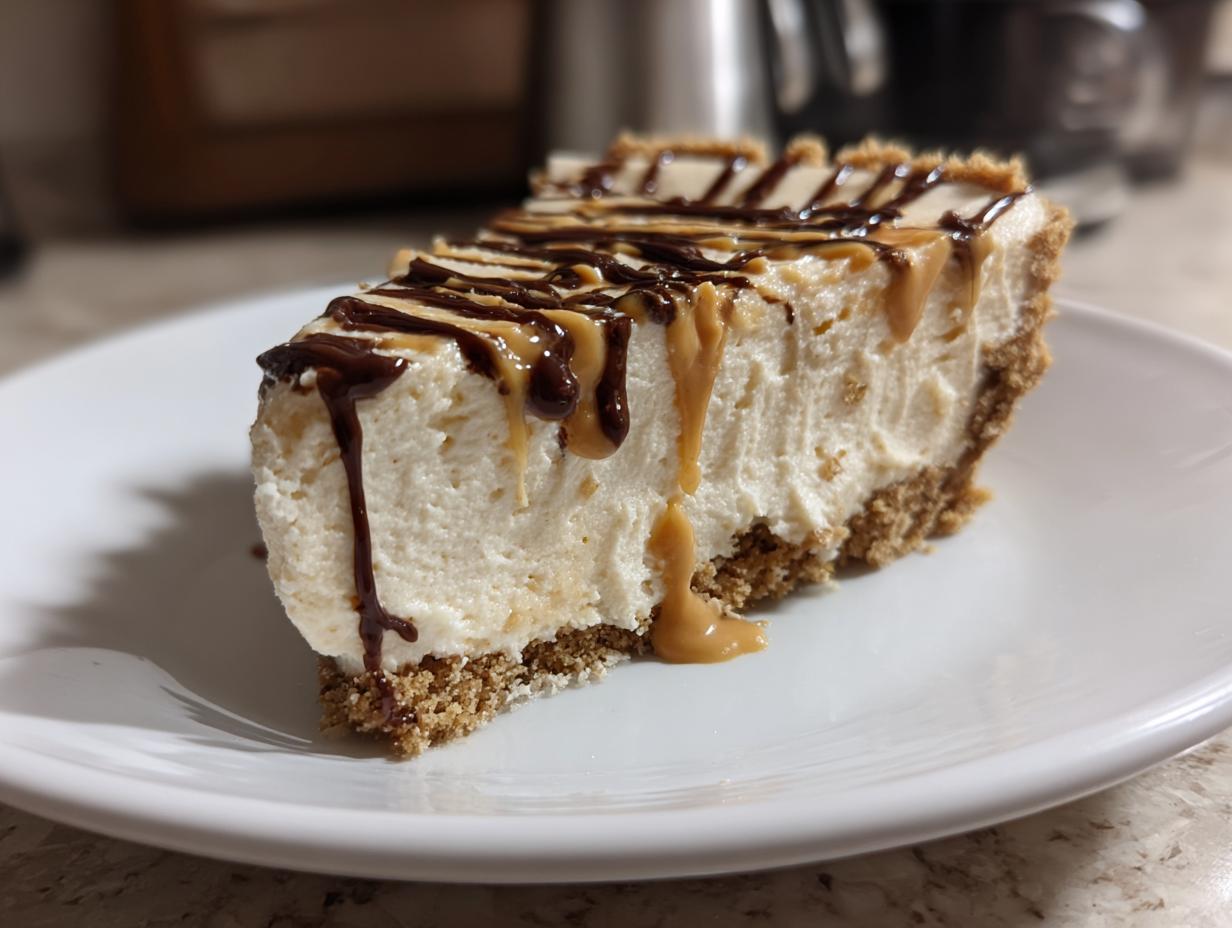
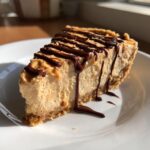
When it’s time to serve, you can take inspiration from my easy Twix cookies and add a drizzle of chocolate syrup or maybe some chopped peanut butter cups on top. Slice it cold, and enjoy the applause. You did that without turning on the heat!
Tips for the Best No Bake Pie Success
When you’re aiming for the absolute best no bake pie—the kind that makes people ask for the recipe immediately—it comes down to a couple of tiny things that make a huge difference. I learned these tricks the hard way, usually by scooping out lumpy filling and wondering where I went wrong! Mostly, it comes down to temperature control and mixing technique. Since there’s no baking to magically fix texture issues, we’ve got to be precise in the beginning.
If you follow these pointers, you’ll nail that perfectly smooth, rich filling every single time. It’s about treating those dairy ingredients right, just like I always stress when I talk about getting the right texture in my soft chewy snickerdoodle recipe!
Crust Variations: Graham Cracker vs. Oreo Crust Peanut Butter Pie
While I love the classic sweet flavor of the graham cracker crust, sometimes you just need that deep, chocolatey counterpoint to intense peanut butter. If you want to pivot to an Oreo crust peanut butter pie, it’s super easy, but you need to swap ingredients correctly. Instead of using the crushed graham crackers and the extra quarter cup of sugar, just use about 24 whole Oreo cookies—yes, use the whole thing, crumbs and the creamy filling inside! Crush them up finely, mix them with about 5 or 6 tablespoons of melted butter instead of the 6 in the original recipe, and press away. The chocolate from the Oreos already has enough fat and sugar, so you usually need a touch less added butter to hold it together. It presses beautifully and tastes absolutely decadent!
Making Your No Bake Peanut Butter Pie a Make Ahead Dessert
This is why I adore this pie! It’s the perfect make ahead dessert because it actually tastes better after it has time to chill and let those flavors really mingle together. Since there are no eggs involved in the filling, you are completely safe storing this pie covered in the fridge for up to three days. Yep, three whole days of glorious no bake peanut butter pie waiting for you!
I actually find it’s too soft to slice nicely if you try to rush it, so making it the day before a party is my favorite strategy. If you wanted to freeze it, you totally can, but pull it out a good day before you want to eat it because it turns rock hard due to the cream cheese and whipped topping. You can find my tips for other simple make ahead egg muffin recipes if you need simple freezer meals, too!
Serving Suggestions for This Indulgent Peanut Butter Treat
Now that you’ve created this magnificent, rich, indulgent peanut butter treat, the only question is what should accompany it? Because this pie is so wonderfully sweet and creamy, you want something on the side to either balance out that richness or double down on the decadence!
For me, the absolute best pairing has to be a strong, slightly bitter cup of coffee. The dark roast really cuts through the sweet peanut butter and the slight tang from the cream cheese we used in the filling. It’s just the perfect post-dinner combination.

If you’re serving this on a hot day—which is when no bake desserts truly shine—you need a little freshness to balance things out. Think about topping individual slices with a small handful of fresh raspberries or sliced strawberries. The acidity of the berries is just divine against the smooth peanut butter. It’s like a built-in flavor balancing act!
If you want to lean into the ultimate decadent experience, which I totally support sometimes, a drizzle of warm chocolate ganache is amazing. Or, you could pair a slice with a light, fizzy drink. Something bright, maybe like a cranberry spritzer or even just a tart apple cider mule if you’re feeling festive! However you serve it, make sure you have a sharp knife ready, because once this thing is chilled properly, it cuts beautifully!
Frequently Asked Questions About the No Bake Peanut Butter Pie
I get so many questions whenever I post this pie online! It’s just proof that everyone needs a ridiculously easy, no-fuss dessert in their back pocket. I’ve gathered the ones I hear the most right here to help you avoid any silly mistakes and ensure you get that perfect, sliceable result every single time, whether you’re making my classic or trying a twist.
Can I make a No Bake Chocolate Peanut Butter Pie version?
Oh, absolutely! Who wouldn’t want to double down on the flavor? If you want a full-on no bake chocolate peanut butter pie, you have a couple of routes. My favorite way is to add two tablespoons of unsweetened cocoa powder right in with the peanut butter and powdered sugar step (Step 3 in the instructions). Make sure you mix it really well to avoid streaks. That gives you a gorgeous light chocolate swirl throughout the existing filling. Alternatively, if you swap out the graham cracker crust for an Oreo crust, you’ve already got a fantastic chocolate base!
What if my creamy peanut butter dessert filling is too soft?
This is almost always one of two issues: either your cream cheese wasn’t quite soft enough when you started, leading to poor structure, or you mixed the whipped topping in too aggressively. Remember, when we fold in that Cool Whip, we are trying to keep the air in it! If you check on your pie after 2 hours of chilling and it still looks like soup, don’t panic. Just gently cover it back up and pop it back in the fridge for another 2 hours. Sometimes, especially if your kitchen is warm, it just needs that extra nudge to firm up. If it’s really too soft to serve, you can try freezing it for about 30 minutes, but generally, longer chilling solves the issue for this creamy peanut butter dessert.
For more general tips on making sure everything comes out perfectly—even in recipes that don’t involve the stove, like my creamy horseradish sauce—technique is king! Don’t hesitate to leave a comment below if you have another sneaky question!
Estimated Nutritional Snapshot for Your Simple Peanut Butter Pie
Now, I always say that when we are making an indulgent peanut butter treat like this, we aren’t necessarily focusing on counting exact macros, but it’s good to have a general idea, right? Based on the ingredients listed for this particular simple peanut butter pie, here is an estimate per slice. Remember, these are guidelines, especially since peanut butter brands can vary quite a bit!
For a single slice, you are looking at roughly 450 calories, 30 grams of sugar, and 28 grams of fat. It packs about 10 grams of protein too! It’s certainly a rich treat, which is why it’s perfect for parties or those times you just need something truly satisfying. If you want another great peanut butter indulgence that uses whole foods like bananas, check out my creamy banana smoothie made with peanut butter!
Share Your No Bake Peanut Butter Pie Creations
Well, that’s it! You’ve made the absolute easiest, creamiest, no-oven-required treat, and I’m just beaming for you! I truly hope this no bake peanut butter pie became a huge hit at your house. Since this recipe is so simple, it’s the perfect one to try out and feel really proud of the result.
Now that your pie is set and delicious, I would just love to know what you thought! Did you stick with the graham cracker crust, or did you go for the dark and decadent Oreo crust? Did you drizzle it with chocolate or maybe add those tiny peanut butter cups on top? Don’t keep your successes a secret!
Please, please leave me a rating right below this paragraph. Stars are fantastic, but I want to hear the stories in the comments section! Tell me how quickly you whipped it up, or what occasion you served it for. And if you snap a picture—I’m always on the lookout for them on Instagram! Tag me so I can share your gorgeous handiwork. Food is all about sharing, and I’ve given you my secret to this easy goodness, so now it’s your turn!
If you have any super specific questions that I didn’t cover, or if you just want to say hi, you can always reach out through my contact page. Happy eating, and I can’t wait to see your amazing, no-bake pies!
PrintThe Ultimate Easy No-Bake Peanut Butter Pie
Create a rich, creamy, and indulgent no-bake peanut butter pie using simple ingredients. This recipe features a smooth filling in a buttery crust, perfect for a quick dessert when you want to skip the oven.
- Prep Time: 15 min
- Cook Time: 0 min
- Total Time: 4 hours 15 min
- Yield: 8 servings 1x
- Category: Dessert
- Method: No Bake
- Cuisine: American
- Diet: Vegetarian
Ingredients
- 1 1/2 cups crushed graham crackers (about 12 full sheets)
- 1/4 cup granulated sugar
- 6 tablespoons unsalted butter, melted
- 1 (8 ounce) package cream cheese, softened
- 1 cup creamy peanut butter
- 1 1/2 cups powdered sugar
- 1 teaspoon vanilla extract
- 1 (8 ounce) container frozen whipped topping, thawed
- Optional topping: Chocolate syrup or mini peanut butter cups
Instructions
- Prepare the crust: Combine the crushed graham crackers and 1/4 cup granulated sugar in a medium bowl. Pour in the melted butter and mix until the crumbs are evenly moistened. Press the mixture firmly into the bottom and up the sides of a 9-inch pie plate. Place the crust in the freezer while you prepare the filling.
- Make the filling base: In a large bowl, beat the softened cream cheese with an electric mixer until smooth. Add the peanut butter and beat until fully combined and creamy.
- Add sweetness: Gradually beat in the 1 1/2 cups powdered sugar until the mixture is smooth. Mix in the vanilla extract.
- Fold in topping: Gently fold in the thawed whipped topping until no streaks remain. Do not overmix; you want the filling to stay light and fluffy.
- Assemble the pie: Spoon the peanut butter filling evenly into the chilled graham cracker crust. Smooth the top with a spatula.
- Chill: Cover the pie loosely with plastic wrap and refrigerate for at least 4 hours, or until the filling is firm.
- Serve: Before serving, top with chocolate syrup or chopped peanut butter cups, if desired. Slice and serve cold.
Notes
- For an Oreo crust variation, substitute 24 crushed Oreo cookies (filling included) for the graham crackers and sugar.
- You can use crunchy peanut butter if you prefer texture in your filling.
- This pie tastes best when fully chilled, making it an excellent make-ahead dessert for gatherings.
Nutrition
- Serving Size: 1 slice
- Calories: 450
- Sugar: 30g
- Sodium: 250mg
- Fat: 28g
- Saturated Fat: 10g
- Unsaturated Fat: 18g
- Trans Fat: 0g
- Carbohydrates: 45g
- Fiber: 2g
- Protein: 10g
- Cholesterol: 35mg